Hiak'ar, Hoardseeker: Difference between revisions
From Destinypedia, the Destiny wiki
(Grammatical changes) |
No edit summary |
||
| (4 intermediate revisions by 2 users not shown) | |||
| Line 11: | Line 11: | ||
|class= [[Lightbearer Knight]] | |class= [[Lightbearer Knight]] | ||
|mission= [[Pirate Hideouts|Pirate Hideout]]: [[Pirate Hideout: The Lucent Brood|The Lucent Brood]] | |mission= [[Pirate Hideouts|Pirate Hideout]]: [[Pirate Hideout: The Lucent Brood|The Lucent Brood]] | ||
| | |weapon= {{icon|Arc}} [[Boomer]] <br> {{icon|Void}} [[Suppressor Grenade]] | ||
| | |ability= Towering Barricade <br> {{icon|Void}} [[Sentinel Shield]]s <br> Resurrection <br> Summon Hive <br> High Durability <br> Rapid Movement <br> Immunity Shield <br> {{icon|Kinetic}} Hive Melee | ||
|ability= Towering Barricade <br> [[Sentinel Shield]]s <br> Resurrection <br> Summon Hive <br> High Durability <br> Rapid Movement <br> Immunity Shield <br> Hive Melee | |||
}} | }} | ||
'''Hiak'ar, Hoardseeker''' was a [[Hive]] [[Lightbearer Knight]] who commanded a portion of the [[Lucent Brood]]'s forces in their search for the relic of [[Nezarec]]. They led an assault on the asteroid [[16246 Cantor]], where [[ | '''Hiak'ar, Hoardseeker''' was a [[Hive]] [[Lightbearer Knight]] who commanded a portion of the [[Lucent Brood]]'s forces in their search for the relic of [[Nezarec, Final God of Pain|Nezarec]]. They led an assault on the asteroid [[16246 Cantor]], where [[Eido]] was retrieving the last artifact from [[Eramis, Kell of Darkness|Eramis]]. The Knight appeared in the [[Pirate Hideout: The Lucent Brood]] activity as the final boss.<ref>'''Bungie (2022/8/23)''', ''[[Destiny 2]]: [[Season of Plunder]] - [[Pirate Hideouts|Pirate Hideout]]: [[Pirate Hideout: The Lucent Brood|The Lucent Brood]]''</ref> | ||
==Gameplay== | ==Gameplay== | ||
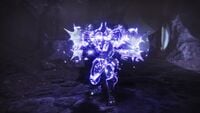
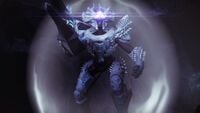
Hiak'ar serves as the final boss of the Pirate Hideout: The Lucent Brood activity, and is encountered inside the asteroid 16246 Cantor in the [[Themis Cluster]]. After you have entered the lair and cleared out the waves of Hive forces, you must proceed to the next room: a cave area. Upon arriving, the boss will spawn, bolstered by several other Lucent Hive enemies. Hiak'ar utilizes a [[Boomer]] in combat, which can fire large, long-ranged [[Arc]] blasts in quick succession. As a Lightbearer Knight, they are also capable of deploying Towering Barricades to fire at the player from behind cover, and throwing Suppressor Grenades to nullify their target's abilities. When activating their [[Sentinel]] [[Super]], Hiak'ar will become engulfed in [[Void]] energy and gain two [[Sentinel Shield|Shields]] on their arms, which they can throw at long distances or use to bash the player away. Once a third of the boss's health has been depleted, they will summon an immunity shield and retreat to the far end of the cave, summoning a horde of [[Thrall]] and [[Cursed Thrall]] to cover them. Hiak'ar will lose their protection after they have made it to their destination, leaving them vulnerable once again. They will repeat this when they have lost two-thirds of their health, but will also call upon [[Ogre]]s for extra support. After this, however, the Knight will be completely defenseless and can be finished off with relative ease. The boss will respawn if you do not destroy their [[Ghost]] in time though, so it is important to do so as quickly as possible. Once the Hoardseeker has been neutralised, head to the door at the far end of the cave to finish the mission. | Hiak'ar serves as the final boss of the Pirate Hideout: The Lucent Brood activity, and is encountered inside the asteroid 16246 Cantor in the [[Themis Cluster]]. After you have entered the lair and cleared out the waves of Hive forces, you must proceed to the next room: a cave area. Upon arriving, the boss will spawn, bolstered by several other Lucent Hive enemies. Hiak'ar utilizes a [[Boomer]] in combat, which can fire large, long-ranged [[Arc]] blasts in quick succession. As a Lightbearer Knight, they are also capable of deploying Towering Barricades to fire at the player from behind cover, and throwing Suppressor Grenades to nullify their target's abilities. When activating their [[Sentinel]] [[Super]], Hiak'ar will become engulfed in [[Void]] energy and gain two [[Sentinel Shield|Shields]] on their arms, which they can throw at long distances or use to bash the player away. | ||
Once a third of the boss's health has been depleted, they will summon an immunity shield and retreat to the far end of the cave, summoning a horde of [[Thrall]] and [[Cursed Thrall]] to cover them. Hiak'ar will lose their protection after they have made it to their destination, leaving them vulnerable once again. They will repeat this when they have lost two-thirds of their health, but will also call upon [[Ogre]]s for extra support. After this, however, the Knight will be completely defenseless and can be finished off with relative ease. The boss will respawn if you do not destroy their [[Ghost]] in time though, so it is important to do so as quickly as possible. Once the Hoardseeker has been neutralised, head to the door at the far end of the cave to finish the mission. | |||
==Gallery== | ==Gallery== | ||
| Line 34: | Line 33: | ||
</gallery> | </gallery> | ||
== | ==Appearance== | ||
*''[[Destiny 2]]'' | *''[[Destiny 2]]'': ''[[Season of Plunder]]'' {{1st}} | ||
==References== | ==References== | ||
Latest revision as of 09:34, August 6, 2023
| Hiak'ar, Hoardseeker | |
|---|---|
| |
| Biographical information | |
|
Species: |
|
|
Faction: |
|
|
Rank: |
|
|
Class: |
|
| Combat information | |
|
Mission: |
|
|
Weapon(s): |
|
|
Abilities: |
Towering Barricade |
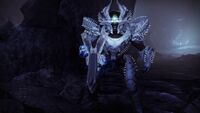
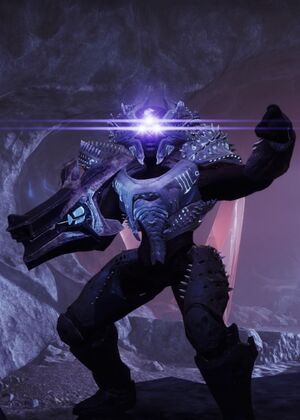
Hiak'ar, Hoardseeker was a Hive Lightbearer Knight who commanded a portion of the Lucent Brood's forces in their search for the relic of Nezarec. They led an assault on the asteroid 16246 Cantor, where Eido was retrieving the last artifact from Eramis. The Knight appeared in the Pirate Hideout: The Lucent Brood activity as the final boss.[1]
Gameplay[edit]
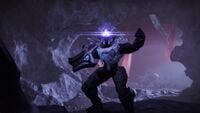
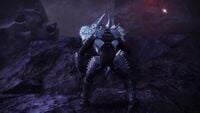
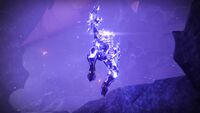
Hiak'ar serves as the final boss of the Pirate Hideout: The Lucent Brood activity, and is encountered inside the asteroid 16246 Cantor in the Themis Cluster. After you have entered the lair and cleared out the waves of Hive forces, you must proceed to the next room: a cave area. Upon arriving, the boss will spawn, bolstered by several other Lucent Hive enemies. Hiak'ar utilizes a Boomer in combat, which can fire large, long-ranged Arc blasts in quick succession. As a Lightbearer Knight, they are also capable of deploying Towering Barricades to fire at the player from behind cover, and throwing Suppressor Grenades to nullify their target's abilities. When activating their Sentinel Super, Hiak'ar will become engulfed in Void energy and gain two Shields on their arms, which they can throw at long distances or use to bash the player away.
Once a third of the boss's health has been depleted, they will summon an immunity shield and retreat to the far end of the cave, summoning a horde of Thrall and Cursed Thrall to cover them. Hiak'ar will lose their protection after they have made it to their destination, leaving them vulnerable once again. They will repeat this when they have lost two-thirds of their health, but will also call upon Ogres for extra support. After this, however, the Knight will be completely defenseless and can be finished off with relative ease. The boss will respawn if you do not destroy their Ghost in time though, so it is important to do so as quickly as possible. Once the Hoardseeker has been neutralised, head to the door at the far end of the cave to finish the mission.
Gallery[edit]
Appearance[edit]
- Destiny 2: Season of Plunder (First appearance)
References[edit]
- ^ Bungie (2022/8/23), Destiny 2: Season of Plunder - Pirate Hideout: The Lucent Brood
