Imperial Deserter: Difference between revisions
From Destinypedia, the Destiny wiki
Mrcroker 69 (talk | contribs) m (→Gameplay) |
(added symbols) |
||
| (16 intermediate revisions by 4 users not shown) | |||
| Line 5: | Line 5: | ||
|lineBG=silver | |lineBG=silver | ||
|name= Imperial Deserter | |name= Imperial Deserter | ||
|image= [[File:Deserter0.jpg|300px]] | |image=[[File:Deserter0.jpg|300px]] | ||
|species= [[Cabal]] | |species= [[Cabal]] | ||
|faction= [[Imperial Cabal]] | |faction= [[Imperial Cabal]] {{c|formerly}} <br> [[Cabal Deserters]] | ||
|rank= [[Ultra]] | |rank= [[Ultra]] | ||
|class= [[Centurion]] | |class= [[Centurion]] | ||
|mission= [[The Communion]] | |mission= [[The Communion]] | ||
| | |weapon= {{icon|Solar}} [[Projection Rifle]] | ||
| | |ability= Summon Cabal <br> High Durability <br> Rapid Movement <br> Immunity Shield <br> Limited Flight <br> {{icon|Kinetic}} Quake <br> {{icon|Solar}} Burn | ||
|ability= Summon Cabal <br> High Durability <br> Rapid Movement <br> Immunity Shield <br> Limited Flight <br> Quake <br> | |||
}} | }} | ||
The '''Imperial Deserter''' is a powerful [[Cabal]] [[Centurion]] who abandoned the [[Imperial Cabal|Empire]]. They accompanied [[Valus Dralgur, the Exiled]] to the [[Pyramid | The '''Imperial Deserter''' is a powerful [[Cabal]] [[Centurion]] who abandoned the [[Imperial Cabal|Empire]]. They accompanied [[Valus Dralgur, the Exiled]], to the [[The Europan Pyramid|Pyramid]] on [[Europa]] in the hopes of pillaging artifacts of the [[Darkness]].<ref>'''Bungie (2022/2/22)''', ''[[Destiny 2]]: [[The Witch Queen]] - [[Mission]]: [[The Communion]]''</ref> | ||
==Gameplay== | ==Gameplay== | ||
The Imperial Deserter is encountered midway through | The Imperial Deserter is encountered midway through [[The Communion]] [[Mission]] as a boss. After killing all of the Cabal in the area, the Pyramid will begin to shift, creating floating platforms and miniature walls to be used as cover. Following this, the Boss will arrive via [[Harvester]], accompanied by two [[Incendior]]s. For the beginning of the fight, the Deserter will remain on the bridge on which they landed when they entered. Like many Centurions, they make use of [[Projection Rifle]], firing explosive munitions at the player from long distances. They also have a powerful stomp attack that leaves behind large, burning pools of fire behind, which they will perform if you get to close, knocking you back and causing significant [[Solar]] damage. | ||
The Centurion will call for more troops as they continue to take damage, and will summon an immunity shield after their health is decreased by a third. After this, they will come down from the bridge and begin to move about the arena more freely. In order to disable their defenses, the player must deactivate to a Cabal jammer device located on the right side of the room. This will have to be done a second time when the boss loses another third of their health and summons another shield, but after that, the Deserter can finally be finished off. | |||
==Gallery== | ==Gallery== | ||
<gallery> | <gallery perrow=3> | ||
Deserter1.jpg | Deserter1.jpg | ||
Deserter2.jpg | Deserter2.jpg | ||
| Line 32: | Line 32: | ||
Deserter6.jpg | Deserter6.jpg | ||
</gallery> | </gallery> | ||
==List of appearance== | ==List of appearance== | ||
| Line 41: | Line 38: | ||
==References== | ==References== | ||
<references/> | |||
{{ | {{Bosses|D2}} | ||
[[Category:Characters]] | [[Category:Characters]] | ||
[[Category:Enemies]] | [[Category:Enemies]] | ||
[[Category:Cabal]] | [[Category:Cabal]] | ||
Latest revision as of 10:11, July 26, 2023
| Imperial Deserter | |
|---|---|
| |
| Biographical information | |
|
Species: |
|
|
Faction: |
Imperial Cabal (formerly) |
|
Rank: |
|
|
Class: |
|
| Combat information | |
|
Mission: |
|
|
Weapon(s): |
|
|
Abilities: |
Summon Cabal |
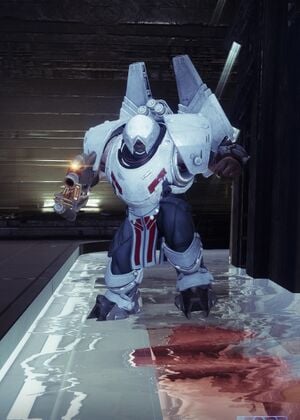
The Imperial Deserter is a powerful Cabal Centurion who abandoned the Empire. They accompanied Valus Dralgur, the Exiled, to the Pyramid on Europa in the hopes of pillaging artifacts of the Darkness.[1]
Gameplay[edit]
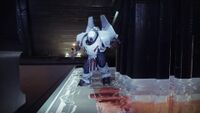
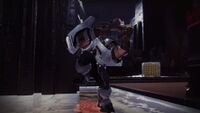
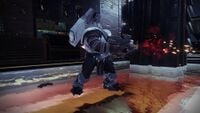
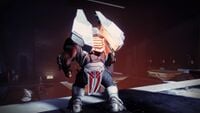
The Imperial Deserter is encountered midway through The Communion Mission as a boss. After killing all of the Cabal in the area, the Pyramid will begin to shift, creating floating platforms and miniature walls to be used as cover. Following this, the Boss will arrive via Harvester, accompanied by two Incendiors. For the beginning of the fight, the Deserter will remain on the bridge on which they landed when they entered. Like many Centurions, they make use of Projection Rifle, firing explosive munitions at the player from long distances. They also have a powerful stomp attack that leaves behind large, burning pools of fire behind, which they will perform if you get to close, knocking you back and causing significant Solar damage.
The Centurion will call for more troops as they continue to take damage, and will summon an immunity shield after their health is decreased by a third. After this, they will come down from the bridge and begin to move about the arena more freely. In order to disable their defenses, the player must deactivate to a Cabal jammer device located on the right side of the room. This will have to be done a second time when the boss loses another third of their health and summons another shield, but after that, the Deserter can finally be finished off.
Gallery[edit]
List of appearance[edit]
- Destiny 2
- The Witch Queen (First appearance)
References[edit]
- ^ Bungie (2022/2/22), Destiny 2: The Witch Queen - Mission: The Communion
