Forum:King's Fall (Fractures)
From Destinypedia, the Destiny wiki
| Forums: Index → Fan Fiction → King's Fall (Fractures) |
|
Prev: |
Crota's End (Raid) |
|
Next: |
Pretender to the Throne (Story) |
| King's Fall | |
|---|---|
| |
|
Game: |
D&Destiny: Fractures |
|
Campaign: |
|
|
Player(s): |
6 |
|
Recommended Power Level: |
19 |
|
Location: |
Dreadnaught, System Edge |
|
Enemy faction(s): |
|
|
Hostile race(s): |
|
|
Objective(s): |
Overthrow Oryx, the Taken King at the height of his power, and end the Taken War. |
| “ | Long live the King. | ” |
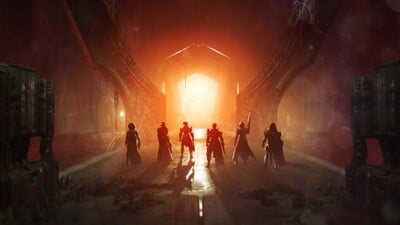
King's Fall is the raid of The Taken King Arc.
After previously forcing Oryx to retreat into the Ascendant Realm, Guardians must permanently topple the God-King of the Hive for good within the furthest depths of the Dreadnaught, defeat the strongest champions of his court and bring the Taken War to a climax.
Unique enemies[edit]
- Adept (Elite Acolyte)
- Light-Eater Ogre
- Vessel of Oryx (Elite Knight)
- Light-Eater Knight (Elite Knight)
- Shade of Oryx
- Blightguard (Major Taken Knight)
Bosses[edit]
Walkthrough[edit]
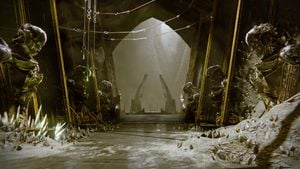
Hall of Souls[edit]
This step is easily completed with a full fireteam of six.
- Separate the team into three groups of two.
- Two people pick up the two Relics (which appear as Tomb Husks) and wait as the rest of the fireteam destroys the center gate. Take out all enemies and locate the statue with another Relic. Both people must interact to slam their Relics into the statue at roughly the same time. Too much time between deposits will cause the previous statue to fall silent.
- This is where the three groups of two split comes in handy. Two people go left, two people go right and two people stay and take out all enemies in the center. As you travel either left or right you will encounter a Relic. For both sides one person must be a gunner and the other one a Relic holder. The gunner's duty is to guide the Relic holder back to the statues, distracting enemies and destroying shield gates on the way by taking out the blights at their center.
- After both relic holders locate the statue and activate the second Relics more Relics will appear, this time further away than last time. The whole team must repeat Step 3 until both Relics are placed into all six statues, thus being six rounds.
- After the team successfully activates all statues, a portal will open in the Court of Oryx and enemies will spawn. Kill them all and proceed into the gate. Once past, a chest containing mostly moldering shards will appear (varies between different Raids). The chest cannot be opened until the whole fireteam has passed through the portal.
- You will now leave Hall of Souls and enter the next location, Basilica.
Basilica[edit]
After leaving the Hall of Souls, you will enter a room with several Acolytes and Adept Acolytes. You will need to split up into two teams of three again, per side. Pickup the Brand of the Unraveler and the Brand of the Weaver
The people who were not dealing with Acolytes and Adepts must get on their respective Annihilator Totems. Once every Acolyte and Adept is dead in the middle, To transfer the Brand from the player holding it, a player must pick up a Brand Claimer buff, spawned by defeating a Hive Wizard and then a Blightguard Taken Knight, on the balconies to the sides of the doorway to the Warpriest. Once picked up, they will have a 30 second timer to return to the person holding a Brand to be able to interact with them to "steal" it and take it upon themselves. The person holding the Brand will lose half of their obtained Deathsinger's Power and be exposed to the poison if their timer for holding it runs out, so you need to transfer it before it expires. If nobody is within to accept the Brand, it will pass to nobody and respawn at its initial location after a short time, likely killing anyone under the Totem and eventually causing a wipe.
Deathsinger's Power must be taken to the middle plate where they will slowly drain, illuminating glyphs on the main door. It is imperative that all stacks of Deathsinger's Power be deposited before returning to your side, as a player cannot accept the Brand while holding any stacks of Deathsinger's Power. This process repeats itself (except the initial Acolyte and Adept part) estimated ten times on each side until the Warpriest deems you worthy, as it takes 100 power total to gain an audience with the Warpriest. While under the influence of a Brand, any enemy killed will provide stacks of Deathsinger's Power. Minors provide 1, Elites provide 2. Depositing Deathsinger's Power on the central plate in front of the door, works by just standing on the plate. Be aware that you can't pick up Brand Claimer if you have any stacks of Deathsinger's Power, so make sure to get rid of them all before you try to do so. You'll be told "Brand Denied" if you hold any Deathsinger's Power when trying to pick up Brand Claimer.
In essence, the trio of players assigned onto a side should be rotating between standing under the totem and killing to gain power, killing the Hive Wizard and Taken Knight so they can get Brand Claimer to relieve the person who is currently with Brand, and returning to deposit Deathsinger's Power in the center. An Unstoppable Ogre will spawn from the pool in front of the power deposit plate at about 30 total power and 80 total power, so make sure you have something Anti-Unstoppable equipped to handle these. Another tip for the person currently Branded is that if their timer is running low, they can get off the plate beneath the Annihilator Totem and run towards the person with Brand Claimer. You have more than enough time before the forced wipe occurs for the person who has Brand Claimer to take the Brand and make it back to the plate to pacify the Totem.
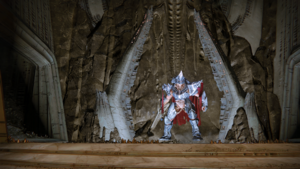
Warpriest[edit]
To begin with, assign your teams per plate, two to each. Three people should take it upon themselves to be people who will always stand on the plates for the glyph reading sequence, which leaves three players left to pick up the other role of the fight, which is Brand Claimer. Two players will need to take this role, as extension of the Brand timer is no longer a feature through simply killing an enemy. Instead, you will need to kill a Blightguard during the damage phase to get a Brand Claimer buff to drop. Once picked up, the person holding it can interact with the Branded person to claim their Brand, thus extending the fight timer. This can be done twice before the Warpriest summons their Oculus, of which you still need to hide from.
During the waves Blistered Wizards will spawn alongside the waves of enemies, and their death signals the arrival of Revenant Knights with Cleavers. These Knights will have the ability to fire a damaging wave of Arc energy with their sword swings, much like a Wave Frame Grenade Launcher. Once the Warpriest reaches half health, the Hive will be exchanged with Taken, with Servile Minotaurs and Servile Knights taking the place of Wizards, and Ravenous Taken Knights with Boomers taking the place of Revenant Knights, though they will appear right on a plate.
Once the Knights are dead, a message will appear stating the glyph reading sequence has begun. The person who has middle plate duty should stand on theirs and check the left and right monolith for a glowing white back, visible from their position. If they can see this, then it will be the job of that side to stand on their plate when they need to. If there is no glowing white back on either, it will be the middle plate first. Once identification has been completed, middle will step off their plate until the Hive symbology on it disappears. Then, whoever is first will step on their plate and look for the same white glow on the other monoliths and call that out. That side will then get on their plate, and whoever is left out of the trio of plate steppers will need to get on their plate. This will then provide the Brand of the Initiate to the last plate stepper. Be aware that if a monolith has been destroyed in a previous glyph reading sequence, the white glow indicator is replaced with a pillar of flame indicator instead.
This Brand of the Initiate comes with a large glowing red aura, and anyone inside can damage the Warpriest. Players ought to gather up to begin damaging the Warpriest, and the two players assigned as Claimers before will need to decide who will claim first. They should seek out the first Blightguard spawn (either up on the balcony on left, in middle between the right and middle monolith, or up on the right side platform), kill it and pick up the Brand Claimer buff from it, and return to the group. The Branded player should count down from 10 when their buff reaches this, so the Claimer can take it just as the timer runs out, so as to maximise the time available to deal damage. Failure to claim the Brand will cause the Branded player to be stunned (the brand will also disappear) and the Warpriest will immediately summon the Oculus in an attempt to kill any players not hiding. If you successfully claim the Brand twice, the person holding it last won't die when it expires, but the Warpriest will move on to summoning the Oculus to wipe the arena. Choose a monolith to hide behind as a team, survive, and move on to repeat the same steps to enter the next damage phase.
As the Warpriest is prone to running around on his balcony during the entire fight, damage opportunities may be lost if trying to use a plate as a gathering spot for committing damage. Instead, it is recommended to use the space between the right and middle monoliths as a place to plant Wells and do damage, as you will be able to comfortably view the Warpriest no matter what side of the balcony he runs to. It also provides close access to both the right and middle monoliths for hiding from the Oculus. The only problem is accessing the left monolith, which players must climb to. If this is your last monolith, it is advisable to end your damage phase early to provide enough time to reach it to avoid a wipe.
After four damage rounds have passed and you have not yet killed the Warpriest, your whole fireteam will die due to there being no Monoliths to hide behind from the Searing Torrent, which kills everyone. After Enraging, Searing Torrent's effect of killing you is persistent even after the Oculus goes away.
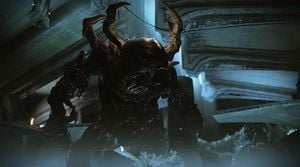
Golgoroth's Cellar[edit]
- After defeating The Warpriest you will go through the portal and end up in Golgoroth's Cellar and will have to traverse a maze to get to the boss. Once #your fireteam reaches the exit a door will open and you will be able to fight Golgoroth. Start the fight by shooting the orb hanging from the ceiling and Golgoroth will spawn. Then kill all enemies that spawn from the back and sides of the room to trigger Golgoroth to open his back and begin the damage phase. Once all enemies spawning from the back and sides of the room have been eliminated, capture Golgoroth's gaze by damaging their back enough while positioned appropriately to reveal the soft innards of their stomach to your fireteam. While Golgoroth's gaze is being captured, the fireteam should be shooting down the first Pool of Reclaimed Light orb from the ceiling. They take a lot of damage before they fall, so everyone in the damage team should be helping out. Timing both the gaze capture and the dropping of the pool is advisable, to maximise your time to hurt Golgoroth. Only one orb will appear at a time, with the next one appearing shortly after the destruction of one. The pattern of spawning is left, right, left, right, left, right, moving towards the Tablet of Ruin. Once the Gaze timer gets low, another gaze-holder should be standing diagonally opposite the gaze holder, ready to pop the back and obtain the gaze. They should then run to position themselves behind the current Pool of Reclaimed Light, so the fireteam can shoot the stomach of Golgoroth. The previous gaze holder can now move into position so they can view the back of Golgoroth, ready to take the gaze when the current holder gets low on time. Repeat movement between shooting down the pools, gaze swapping and generally doing damage until you exhaust all 6 available orbs, at which time Golgoroth will grow tired and the fight will repeat the first section of killing everything that spawns. If you lose the gaze, any of the orbs left unused on the ceiling will add one glyph to the Tablet of Ruin. Filling up all 6 will cause a wipe. Another mechanic to watch out for is Unstable Light. A person standing in the Pool of Reclaimed Light will randomly obtain the Unstable Light debuff. Once this timer expires, they will explode, harming anything nearby in a severe fashion. Instead of blowing up your fireteam in the Pool, run towards Golgoroth as the timer runs out, and detonate near them. This will deal a huge amount of damage to the boss, more than making up for the lost damage of people swapping the gaze.
- As the fight continues, the Hive will be gradually replaced with Taken. Beware of the Taken Phalanxes that appear in the lower level, as they will try to push players out of their damage dealing positions.
- Repeat the process until Golgoroth dies and you will receive your loot. when you're ready, proceed into the cave behind the Tablet of Ruin (Soulsiphon Plinth) into the Crossing. If a orb is not used before gaze is lost it will charge the Tablet of Ruin and if six orbs are not used, or Golgoroth Enrages, the Tablet will complete and it is a wipe because you will be Drained of Light by the Soulsiphon Plinth.
The Crossing[edit]
After defeating Golgoroth, the fireteam reaches a fractured expanse known as The Crossing, a threshold ritual space guarding access to the Daughters’ sanctum. To proceed, Guardians must open a portal by proving their mastery of Sword Logic. The arena is split into two sides, each anchored by a plate. Hive forces assault the right side, while Taken forces assault the left. Enemies will continuously spawn and advance toward the plates, and all progress toward opening the portal is made by killing them. Each plate accumulates power through kills made while Guardians are present. Minors grant 1 power, Elites grant 2, Majors grant 3, and Champions grant 4. Both plates contribute to a shared total, and the goal is to reach 100 total power. As the ritual progresses, enemy resistance escalates. When total portal power reaches 25% and 75%, an Overload Taken Hobgoblin spawns in the center of the arena. When total power reaches 50%, an Unstoppable Taken Phalanx spawns on each plate simultaneously, forcing the fireteam to split attention while maintaining plate control. Once 100 total power is reached, the portal begins to open—but the ritual is not yet complete. A barrier seals the portal, and two Deathsinger’s Handmaidens emerge, one on each side of the arena. Their presence empowers the ritual and prevents progress. With the Handmaidens active, a Deathsinger reveals itself and begins preparing a lethal Deathsong. The fireteam must quickly slay both Handmaidens to drop the barrier, then eliminate the Deathsinger before the song completes. Failure to do so results in a wipe. Once the Deathsinger is defeated, any remaining enemies must be cleared. With the arena secured, the barrier fully dissipates and the portal stabilizes. The fireteam may then pass through, leaving the Crossing behind and advancing toward the Daughters of Oryx.
Threshold[edit]
After leaving the Crossing, you will enter Threshold the final boss arena. To face Oryx, you must defeat his daughters. When someone steps on a plate or gets too close to the daughters, the fight starts. As soon as the fight starts, one of the daughters will immediately begin singing their deathsong, which lasts about two minutes. You’ll need to complete the mechanics below in about a minute and a half if you want to deal damage, and within the two minutes if you just want to survive. If the daughter finishes her song before you’re able to steal one of their immunity bubbles, she will wipe the team. With the fight started, work with your team to kill any Knights on the plates. When they are dead, the player who owns the plate that should now be dimly glowing should jump up on top of it. This will cause one random player on the team (excluding the person currently on their plate) to become Torn Between Dimensions. While Torn Between Dimensions, just like in the first game the Guardian will not be able to shoot or attack and will instead need to collect a special item to progress the fight. The Torn player must make their way along a path made of platforms only they can see and interact with, these platforms are made physical by two guardians on separate plates. As soon as one plate is stepped on, a toland like orb will appear above the plate that you need to have another player stand on. Both plate players must stay on till the torn player reaches the orb and claims the piece of the blightguard; this will be announced by the message: a piece of the Blightguard has been found, this means its safe to hop off plates and progress the mechanics. You will do this twice before on the third time the torn player gets to pick up the Brand Claimer buff seen in previous encounters thus far. With this buff the torn player should preferably steal the brand of the one shooting at everyone as unlike in D1 where one was "asleep" and one was singing, that is not the case, the sleeper is instead very active. After you’ve stolen the Daughter’s Brand, its damage time. This is point where dump everything into the sister who you just stole the brand from, however be warned as it was the case in D1 it remains in D2, if you kill one daughter you must kill the other in the next damage phase otherwise you wipe. When you finish the mechanics, you have the remaining time on the deathsong to deal damage, before mechanics repeat.As soon as the fight starts, one of the daughters will immediately begin singing their deathsong, which lasts about two minutes. You’ll need to complete the mechanics below in about a minute and a half if you want to deal damage, and within the two minutes if you just want to survive. If the daughter finishes her song before you’re able to steal one of their immunity bubbles, she will wipe the team. With the fight started, work with your team to kill any Knights on the plates. When they are dead, the player who owns the plate that should now be dimly glowing should jump up on top of it. This will cause one random player on the team (excluding the person currently on their plate) to become Torn Between Dimensions. While Torn Between Dimensions, just like in the first game the Guardian will not be able to shoot or attack and will instead need to collect a special item to progress the fight. The Torn player must make their way along a path made of platforms only they can see and interact with, these platforms are made physical by two guardians on separate plates. As soon as one plate is stepped, a toland like orb will appear above the plate that you need to have another player stand on. Both plate players must stay on till the torn player reaches the orb and claims the piece of the blightguard; this will be announced by the message: a piece of the Blightguard has been found, this means its safe to hop off plates and progress the mechanics. You will do this twice before on the third time the torn player gets to pick up the Brand Claimer buff seen in previous encounters thus far. With this buff the torn player should preferably steal the brand of the one shooting at everyone as unlike in D1 where one was "asleep" and one was singing, that is not the case, the sleeper is instead very active. After you’ve stolen the Daughter’s Brand, its damage time. This is point where dump everything into the sister who you just stole the brand from, however be warned, if you kill one daughter you must kill the other in the next damage phase otherwise you wipe. When you finish the mechanics, you have the remaining time on the deathsong to deal damage, before mechanics repeat. These repeat till the Daughters are dead.
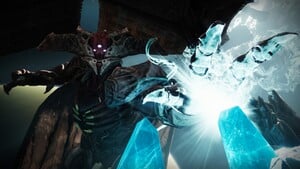
Confronting Oryx[edit]
- Before spawning Oryx there will be a black orb at the end of the room. Approaching it begins the fight so take this time to talk strategy and gear up accordingly.
- When you approach the orb, Oryx appears much larger than before. The team must eliminate all knights, then follow Oryx when he moves. When Oryx reaches the spot, he has chosen, he will slam his fist onto the plate. When he does this, the team must do the plate and brand pieces mechanic from the Daughters to get the Brand Claimer. Halfway through the third platforms set, a Tombship will arrive dropping off the Vessel of Oryx and a small contingent of Acolytes. The Brand-Claimer must steal the Aura of Immortality from him then kill as when he loses his aura he becomes like the Light-Eater Knights, in that he will eat the orb dropped by Ligh-Eater Ogres.
- While you stand on the platforms, Light-Eater Ogres spawn with Light-Eater Knights in a clockwise order. The three people and the plate people while on their plates will need to kill the Ogres. They are problematic, and you need to kill them to spawn orbs of corrupted Light to stun Oryx. It is also crucial to kill the Light-Eater Knights after dealing with the Orges, because they will steal the orbs that were dropped.
- Shortly after the Vessel loses its aura/it dies, or if you take too long. Oryx will slam his fist on the plate again signaling damage phase is about to start. Oryx will call upon the Darkness shoot his chest when it glows white or he will wipe everyone if not enough damage is done. To stun him, the players that are assigned to the plates need to stand in the aura of the corrupted Light. Pay attention to the Updates in the lower left corner for the X has detonated a corrupted Light. Get back to the person with Aura of Immortality. This player should not move from rough center during the detonation sequences since the detonation will wipe the area outside of the Aura and stun Oryx, allowing more time for damage. Failure to detonate could result in a wipe, as you will not likely have enough time to stagger Oryx. Unload into Oryx who will fall and reappear at the starting position.
- Oryx's Rotation Pattern is:
- Front Right or Front Left for First Phase
- Back Left or Back Right for Second Phase
- Front Left or Front Right for Third Phase
- Front Left or Front Right again for Fourth Phase
- Back Left or Back Right for Fifth Phase
- When he restarts, start running around your platform if you have one, and stay away from your friends since Oryx will start mortaring the area with dark-matter bombs. This cycle repeats until he's at 50% health. The first half of platforms and Ogres are the same, but instead of a mortar, he will summon a massive Blight. One by one, Oryx will suck Guardians into the Blight. Once inside, hammer the Shade of Oryx and be careful: health will not replenish in the Blight. The players still outside should kill the Taken Knights and Thralls that spawn since they will get into the Blight (Thralls) or mortar into the Blight (Knights). Eventually all six players will get sucked in if the Shade is still up. If you don't kill him fast enough, you will wipe. Shouldn't really be a problem at that point overall. If the players do not defeat Oryx within these five phases he will Enrage, causing a wipe.
- When he moves to the front for his final stand, the current holder of the Aura will keep it, and two more Light Eater Ogres will spawn, dropping another Corrupted Light each. These Lights should be detonated one at a time to maximize the amount of time players have to damage Oryx. Wound him enough, and the Taken King will capitulate as his dead corpse floats off into the void of space.
Messages[edit]
- A statue hums with dark energy
- A Relic appears
- The Portal is open
- The Annihilator Totems awaken
- The Warpriest deems you worthy
- Glyph sequence started
- The Warpriest calls upon the Oculus
- The Tablet of Ruin is complete
- Golgoroth focuses his rage on PlayerName
- Golgoroth shifts his Gaze to PlayerName
- Failed to capture Golgoroth's Gaze
- Golgoroth grows tired
- A Sigil ignites with power
- The Sigils are alite and the Portal is open
- The platforms fade from existence
- Oryx calls upon the Darkness
Rewards[edit]
Weapons[edit]
- Touch of Malice - Exotic
 Scout Rifle - Obtained from completion of the Old Hunger quest.
 - 1 Random Adept Weapon per encounter from the options available in that encounter pool.
- Anguish of Drystan - Legendary
 Auto Rifle
 - Doom of Chelchis - Legendary (
 ) Scout Rifle
 - Defiance of Yasmin - Legendary (
 ) Sniper Rifle
 - Midha's Reckoning - Legendary (
 ) Fusion Rifle
 - Qullim's Terminus - Legendary (
 ) Machine Gun
 - Zaouli's Bane - Legendary (
 ) Hand Cannon
| ||||||||||||||||||||||||||||||||||||||||||||
