Court of Oryx
From Destinypedia, the Destiny wiki
| Court of Oryx | |
|---|---|
| |
|
Game: |
|
|
Campaign: |
|
|
Recommended Light level: |
190 (Tier 1) |
|
Location: |
|
|
Enemies: |
|
|
Objective(s): |
Prove your might against the members of the Taken King's court. |
- "The Court of Oryx. The most powerful of his army. He would hold the Court in reserve. Allow the mass of the Hive to tear down a world. Then, he would open the gates and unleash the Court upon a weary and battle-scarred race. Fear is a powerful weapon, and one the King uses all too well. "
- — Toland's Journal[1]
The Court of Oryx is a group of Oryx, the Taken King's most powerful champions, ancient warriors used to strike fear and wreak havoc on already ravaged worlds during the Hive's many conquests. It is also the name of an activity introduced in The Taken King where Guardians can summon members of the Court and battle them to earn powerful rewards.
History[edit]
- "I shall establish a court, and whoever comes into this court may challenge me. My court will be the High War. It will be a killing ground and a school of the sword logic we have learned from our gods."
- — Auryx, King of the Hive[2]
Oryx established the High War 20,000 years after the fall of Fundament when the Hive encountered alien life for the first time beyond their homeworld.[2] Members of the Court fought during the Golden Amputation, and the Court itself was briefly usurped by Savathûn and Xivu Arath during their attempted coup afterward.[3][4] The Court was the first to hear of Oryx's plan to move his throne world into a Dreadnaught.[5] It later pulled down the Gift Mast, signifying the end of the Harmony civilization.[6]
After the departure of his sisters, Oryx realized that he had come to depend too strongly on his Court, and other large sources of tribute, for survival.[7] He accepted that if the High War was destroyed, his own death would shortly follow, and reasoned that this was proper: if the Court fell, it meant they had been weak, and if the Court was weak, then he had been a bad king and unworthy to rule them.[8]
The Court consisted of Oryx's champions, but also his family: niece Balwûr, granddaughter Hashladûn,[9] and children Ir Anûk,[7] Ir Halak[7] and at one point Crota.
Complement[edit]
- Warpriest
- Golgoroth
- Ir Halak, Deathsinger
- Ir Anûk, Deathsinger
- Krughor
- Lokaar
- The Däl sisters
- Vorlog
- Balwûr
- Thalnok, Fanatic of Crota
- Bracus Horu'usk
- Kagoor
- Cra'adug
- Mengoor
- Hashladûn
Gameplay (D1)[edit]
The Court of Oryx is a Guardian-initiated activity that can be triggered as a public event in the Hall of Souls on the Dreadnaught that summons an assortment of powerful Hive and Taken enemies. These events must be initiated by offering either a Reciprocal Rune, a Stolen Rune, or an Antiquated Rune.
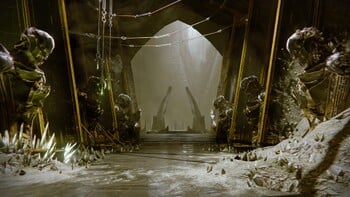
The Court of Oryx can be found at the central dais of the Hall of Souls, where a rupture portal to Oryx, the Taken King's ascendant realm stands; this is the same portal that must be opened at the beginning of the King's Fall Raid.
Players cannot enter the court proper, as the floor is covered in flames. To enter and initiate the event, one of the players must offer a rune to one of the different statues. The rarity of the runes determines the difficulty of the encounter. The summoner then must stay within the Court of Oryx, or else the boss will despawn after fifteen seconds.
After the boss has been defeated, a chest appears in the middle of the room. The player who sacrificed the runes will get the highest reward, but all players who participated, including those who joined outside the initiating player's fireteam, will receive a reward.[10] The last person to place a rune will be prevented from placing another for forty seconds, allowing another person to place a rune and initiate the event.
Within the Court, there is a chest directly beneath the main platform from which bosses spawn. It can only be opened with a Key of Gnashing Teeth.
Important Note: While the Court allows for a maximum of nine players to compete in the Court, the game's matchmaking system is such that one solo player in a single instance takes up three spaces. This means that a player should bring with them a full fireteam if they want to maximize the number of people who can participate.
Tier 1[edit]
Tier 1 encounters are initiated by using a Reciprocal Rune. A random boss will spawn at 190 Light. Defeating this boss will reward the summoner with Reciprocal Runes, a chance for an Uncharged Stolen Rune, and rare Artifacts, alongside regular loot. The different encounters that can spawn are as follows:
| Boss | Image | Mechanics |
|---|---|---|
| Alzok Däl, Gornuk Däl, and Zyrok Däl |
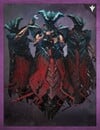 |
A trio of Hive Wizards that revive after 30 seconds upon being killed, as long as one of them is alive. Kill all three before they revive to complete the event. |
| Bracus Horu'usk | 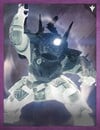 |
A Taken Centurion with an impenetrable shield. Defeat the Taken enemies Horu'usk summons to temporarily deactive their shield. Kill Horu'usk to complete the encounter. |
| Cra'adug and Mengoor | 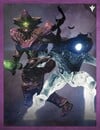 |
A Taken Knight with a Boomer and a Hive Knight with a Cleaver. They have an impenetrable shield that links the two. Coax them near to each other to deactive their sheilds temporarily, then focus fire on one of the Knights. The shield of the remaining Knight will permanently deactivate once they are the last one alive. Kill the final Knight to complete the encounter. |
| Krughor | 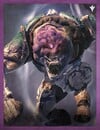 |
A Hive Ogre with an impenetrable shield. The shield can be temporarily deactivated by Cursed Thrall explosions. Coax Krughor near some Cursed Thralls, then kill the Cursed Thralls to deactivate his shield. Kill Krughor to complete the encounter. |
| Vorlog | 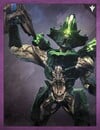 |
A Hive Knight with a significantly stronger-than-usual shield. The shield will rotate between Arc, Solar, and Void (in that order) at set intervals, which will immediately and wholly replenish it even if it's been depleted. Kill Vorlog to complete the encounter. |
| Lokaar | 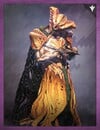 |
A Hive Wizard that will constantly teleport around the arena. Kill Lokaar to complete the encounter. |
Tier 2[edit]
Tier 2 encounters are activated with a Stolen Rune, which must be charged by completing three Tier 1 encounters. It will spawn two Tier 1 encounters at once, at 240 Light (the specific encounters that spawn are semi-random, as not all encounters can pair with each other). Completion of a Tier 2 encounter will reward the same items as Tier 1, with the additional chance for an Uncharged Antiquated Rune.
Tier 3[edit]
Tier 3 encounters are activated with an Antiquated Rune, which must be charged by completing three Tier 2 encounters. It will spawn a unique boss that rotates weekly, at 300 Light. Completing a Tier 3 encounter will reward the same items as Tier 2, along with at least one Legendary Artifact; these artifacts cannot drop any higher than at 320 Light. The Tier 3 bosses are as follows:
| Boss | Image | Mechanics |
|---|---|---|
| Balwûr | 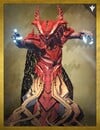 |
A Hive Wizard that will cover almost the entire arena in poison. Guardians afflicted by the poison cannot damage Balwûr. Killing Acolytes of Balwûr will temporarily create pools of Light that burn away the poison, allowing the Guardians to damage Balwûr. There is a permanent pool of Light underneath the elevated platform to allow the Guardians to stay in the arena without the risk of dying to the poison, though Balwûr is obscured by the arena while under the platform and thus cannot be damaged from it. Killing Balwûr completes the encounter. |
| Kagoor | 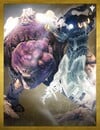 |
A Taken Wizard accompanied by the Servile Ogre. Kagoor is immune to attacks as long as the Servile Ogre is alive. The Ogre must be killed for Kagoor to be defeated. Taking too long to kill Kagoor will result in her reviving the Servile Ogre, which will make her immune to damage again. The damage Guardians do to the Servile Ogre (and any lesser Ogres that spawn in the arena) can be boosted by defeating unique Acolyte's Eyes called Maleficent Eyes. Kill Kagoor to complete the encounter. |
| Thalnok, Fanatic of Crota | 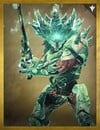 |
A Hive Knight resembling Crota, Son of Oryx, and accompanied by Hagrist, Blade's Edge. Thalnok is almost identical to Crota, able to kill Guardians with a single swing of his sword, and able to fire Darkness Blasts across the arena. He can also only be damaged by a Hive Cleaver, which is acquired by killing Hagrist. Killing Thalnok completes the encounter. |
List of appearances[edit]
- Destiny: The Taken King (First appearance)
- Destiny 2: Shadowkeep (Mentioned only)
- Season of Plunder (Non-canon appearance)
- Season of the Deep (Mentioned only)
- Season of the Witch (Mentioned only)
- Episode: Heresy (Mentioned only)
References[edit]
- ^ Bungie (2015/9/15), Destiny: The Taken King - Item Description: Talk to Eris
- ^ a b Bungie (2015/9/15), Destiny: The Taken King - Grimoire:Enemies/Books of Sorrow, XXII: The High War
- ^ Bungie (2015/9/15), Destiny: The Taken King - Grimoire:Enemies/Books of Sorrow, XXX: a golden amputation
- ^ Bungie (2015/9/15), Destiny: The Taken King - Grimoire:Enemies/Books of Sorrow, XXXVI: Eater of Hope
- ^ Bungie (2015/9/15), Destiny: The Taken King - Grimoire:Enemies/Books of Sorrow, XLI: Dreadnaught
- ^ Bungie (2015/9/15), Destiny: The Taken King - Grimoire:Enemies/Books of Sorrow, XLVI: The Gift Mast
- ^ a b c Bungie (2015/9/15), Destiny: The Taken King - Grimoire:Activities/The Taken King, Court of Oryx
- ^ Bungie (2015/9/15), Destiny: The Taken King - Grimoire:Enemies/Books of Sorrow, L: Wormfood
- ^ Bungie (2019/10/1), Weblore:Shadowkeep - Hope
- ^ Reddit: The new Edge article for The Taken King confirms we'll be seeing more Y1 exotics come forward in the future