The Desert Perpetual
From Destinypedia, the Destiny wiki
 This article is a stub. You can help Destinypedia by expanding it. Reason: Epic Raid information
|
Prev: |
|
|
Next: |
TBA |
| The Desert Perpetual | |
|---|---|

| |
|
Game: |
|
|
Player(s): |
1-6 |
|
Recommended Power Level: |
100 |
|
Location: |
|
|
Enemy faction(s): |
|
|
Hostile race(s): |
|
|
Objective(s): |
Stop the Conductor's Vex from subsuming a section of Unknown Space into the Vex Network. |
| “ | Step across the threshold of the infinite. | ” |
The Desert Perpetual is a Raid in Destiny 2, released in the The Edge of Fate expansion on July 19th, 2025. The Epic Raid was also released September 27, 2025 with the Ash & Iron update.
Deep within the heart of Kepler's singularity, Vex of the Nessian Schism have occupied a part of the Nine's Unknown Space. Guardians must assemble a team to drive them out before they digitize its dimensional Dark matter into the Vex Network.
Objectives[edit]
- This section is a stub. You can help Destinypedia by expanding it.
Unique enemies[edit]
- Abandoned Guard
- Abandoned Watcher
- Cavern's Watcher
- Graveyard Guard
- Graveyard Watcher
- Particle Lens
- Time's Burden
- Time's Magistrate
- Time's Restraint
- Wave Lens
Bosses[edit]
Walkthrough[edit]
Being the second non-linear Raid behind the semi-nonlinear Leviathan Raid, the Desert Perpetual allows full freedom for the fireteam to pick which ever boss they want. After clearing out the center area in the Nursery, the Guardians can ascend the main purple spire and select one of the three areas to face off against first. The more pristine spire to the left leads to Epoptes, Lord of Quanta, the sunken spire behind the pillar leads to Agraios, Inherent and the more damaged spire to the right leads to Iatros, Inward-Turned, with the final one facing forward towards the arena itself granting the fireteam the ability to confront Koregos once all three other bosses have been eliminated. For the sake of introducing new mechanics more fluidly, however, the walkthrough will be structured as such:
Epoptes, Lord of Quanta[edit]
The Guardians should immediately note that Epoptes isn't alone, and is supported by two additional, almost identical Hydras named Particle Lens and Wave Lens. The team should split into two teams of three, one on both left and right side with both splitting down further still into Hydra eyes Guardian, inside eyes Guardian and add clear. Upon approach, the Lenses will temporarily vanish and Epoptes should move into position directly above the central pit and engage its Guardian attackers, while also bringing forth its Goblin and Minotaur minions. The guardians should immediately set out to destroy the waves of minions and draw out special Major Cyclopses named Time's Magistrates. One will spawn on each side and should be swiftly dispatched to unlock plates on both sides. When both are stepped on at the same time by one guardian each, both players will receive a 30 second debuff below their health-bar, with left side receiving Constant Temporality and right side receiving Cyclical Temporality. When the debuff expires, the Guardians with this debuff will be killed. To address this and get to the mechanics proper, the Guardians with these debuffs should head to their rooms on their respective sides to deal with their corresponding Hydra.
Both Guardians should note that their target Hydra is protected by a larger half shield identical to that of Destiny 1 Hydras, this time also sporting seven eyes in the center, with a larger one circled by six smaller ones, as well as a bright light projected by this shield. Upon entering the cone of light projected by the shield, the debuffed Guardians should note that their debuff timer has frozen and, additionally, one of six eyes on a pillar on their side is lit up. These players' job is to utilize their debuffs to destroy the Hydra's eyes and, thus, destroy the Lens' Hydras themselves by destroying the eyes called out by their fellow debuffed compatriot. For example, when the Constant Temporality player stands in the light of their Hydra's shield and sees that the lit eye is bottom middle and Cyclical Temporality player stands in their light and sees that the lit eye on their pillar is top right, both players call out, and Constant player destroys top right eye on their hydra's shield and Cyclical player destroys bottom middle. Destroying the wrong eye on either Hydra regenerates all of them and also stalls time, so both player should take their time and remain accurate all the while staying in the light of their Hydra's shield. It is highly recommended to deal with only three, as any more eyes will immediately move on to the wipe mechanic. During which, these players should note that their Lens Hydra has stopped attacking and is now in an animation beneath a triangle cornered by three spherical objects (more on this in a bit).
Meanwhile, inside eyes Guardian is providing add clear for the Hydra eyes Guardians from Elite Harpy units until the debuffed player has dealt with their three eyes, where they should immediately move on to middle to prepare for the next step. After enough time, the Time's Magistrates should respawn and, upon elimination, should once again reactivate plates, providing them their respective buffs. Sometime around this point, Epoptes itself will begin to charge up its wipe mechanic. The inside players now must deal with the two sets of three eyes on their side. Epoptes will be surrounded by two of those larger shields, each providing a light only visible to a certain player that also freezes their debuff counter and allows them to see their respective eyes, which lies on a pillar in the center of the arena. These players should also call out their eyes to one another, so that the other destroys their called eyes that are set into the pillar. For example Constant Temporality player inside sees that their three eyes are left and right while Cyclical Temporality player notes theirs is top and left. Thus, Constant player should destroy Cyclical's top and left, while Cyclical destroys Constant's left and right. Meanwhile, Hydra Eyes players should also be listening in to those call outs, and must deal with the eyes above their lens Hydras that was called out by their teammate, not their fellow's teammate, FROM THE PERSPECTIVE FROM THE ENTRANCE FROM THE ROOM. Using the prior example, when Hydra Constant player hears that the inside Constant player called out left and right, they shoot the top eye above their Lens, while Hydra Cyclical destroys the right eye FROM THE PERSPECTIVE FROM FRONT OF THE ROOM after their inside player calls out left and top. If the wrong eye is destroyed on either side, Epoptes immediately invokes a wipe. If done correctly, however, all temporality players are cleansed of their debuffs and the wipe mechanic is stalled. Here, both Hydra players should refresh their buffs at their plate and inside players should return to provide add clear as the rest of the eyes are dealt with.
Once all six eyes have been dealt with on the Hydra players, they can finally shoot the central eye and finally destroy their Hydra. Upon the destruction of even one, Epoptes will, once again, begin another wipe mechanic. This time, however, Hydra players can finally break the boss Hydra's shields once the central eye of their respective shield is shot enough, finally moving into a damage phase where after a short period should entirely remove Epoptes' immunity. Players are free to finally deal with Epoptes, all the while dealing with the boss' Aeon Maul barrages and vast Harpy backup, which can prove to be overwhelming, so at least a few Warlocks should provide healing support with rifts, Healing Grenades or, more ideally, Wells of Radiance. During damage phase, however, Epoptes will regain its two shields and randomly apply the Cyclical and Constant Temporality debuff to two players. After a short period of time after reactivating these shields, Epoptes will become immune as long as those two randomly selected players are not within the light of their shields, so those players should maneuver into their position as fast as possible to maximize damage for their team. While the remaining four try to damage Epoptes even with the immune shields active, the two debuffed players should maneuver into the light of their respective shields and await the spawning of the central eye's orbiting six eyes. These players should swiftly attempt to shoot all six eyes before finally focusing fire on the center one to dismantle Epoptes' shields and extend the damage phase further; if the eyes are not destroyed in a timely manner, Epoptes will shorten the damage phase and immediately move on to the next step. All six players will eventually be chosen to address Epoptes' eyes and after three of these eye sub-phases, Epoptes will regain immunity and restart the mechanics of the encounter. All three of these sub-phases should be successfully completed ideally so that all players can get the most of their damage before, once again, dealing with Epoptes' defenses. The players repeat the mechanics until the Hydra is successfully destroyed.
Challenge[edit]
The required challenge for Epoptes with the Encounter Challenges feat enabled requires that players cannot destroy a Lens' eye more than once sequentially. Thus, using the prior example, two players must receive their buff on each side after the elimination of the Time's Magistrates and must swiftly maneuver into their rooms and into the light of their Lens. During which they are free to call out the eyes they see on their pillar for the other side to destroy. However, this time, after one Guardian destroys an eye on the shield and another is called, the other guardian joining them must destroy the newly called out eye, which then requires the next eye to be destroyed by the first shooter. This process remains in effect even during the Broken by Quanta wipe mechanic, which can be dealt with the adjoining player once the third eye on their Lens' shield has been destroyed and the process begins. After averting Epoptes' wipe, both players on each side may reapply their buffs and continue the process, requiring the second player to pick up where they left off. This does not apply during damage phase, as Epoptes will randomly choose two players for both of its shields.
Note: the central eye on the Lens' shield can only be destroyed by the player that destroyed the last eye, so the second player must finish off the Lens itself without worry of failing the challenge.
Agraios, Inherent[edit]
Behind a pillar and between five different rings will lie a dormant Agraios, looking upwards in prayer or wait for its Guardian assailants. The Guardians should note the five ring devices and number them 1 through 5 clockwise from their spawning position, as it will be essential for the encounter later. The fireteam should be split into two teams of three, with one team concerned with standing on the three plates also within the circle and the other concerned with add clear and later Chronon dunking. Upon approach, Agraios will teleport to one of four different Vex platforms across the arena, with the others occupied by an identical version of the Hobgoblin boss, instead with the titles "Made Constant", "Made Absolute" and "Made Cyclical" (more on that later). Every Guardian should be concerned with eliminating the different waves of Goblins and a later spawn of an Ultra Hydra and its Imp Swarm backup. Upon the elimination of the boss Hydra, 5 special Minotaur units, called Time's Burdens, will show up in different corners of the arena that will drop a special item, called Cobalt Chronons, upon elimination. The Guardians that destroy the Time's Burden Minotaurs should pick up their Chronons and run through one of the five rings in the center of the arena to charge them; each Guardian should take their Cobalt Chronons to a different ring to begin the next step lest they futilely lose one of their Chronons to an already charged ring, so each Guardian should take a predesignated ring or call out which ring they are going to. It should be noted that, after a short period of time, untouched Chronons will despawn and once all Chronons are gone, another Ultra Hydra must be destroyed to spawn another wave of Time's Burden Minotaurs to gain more Cobalt Chronons. It should also be noted that Chronons do not have an expiration counter, so Guardians can hold onto them indefinitely. Once all rings are charged, three Coryphaeus Wyverns will spawn around the arena and the three plates in the middle will activate.
After enough time elapses, Agraios will become impatient, marking the arrival of the next step towards a damage phase. Ideally, the rings should be charged by this point and the plate team should pick up their buffs from their designated plates. Each plate gives a certain buff to the players stepping on them, bestowing both Cyclical Temporality, Constant Temporality and, additionally, Absolute Temporality to their target players. This time, however, the players with this buff should note that the debuff lasts far longer than it did in the encounter prior. After more time still, one of the Agraios proxies will begin scanning the arena, targeting visible players and marking them with Variable Elimination which will instant kill any Guardian exposed after enough time elapses. It should be noted that even if sightline is broken at 0 seconds will still kill the Guardian. However, seeking cover will not only prevent the Agraios copy from "sniping" its target, but also entirely reset the debuff back to 10 seconds, regardless of where the debuff timer was at the moment of breaking sight. Players shouldn't try to remain in cover forever as now, Agraios will draw near to its wipe mechanic as long as it is not dealt with.
The plate players should try to zoom in on the Agraios proxy and should note the title it bears, either "Made Constant", "Made Absolute" or "Made Cyclical". Upon identifying the copy, the player with the corresponding buff should head for the platform underneath the Agraios proxy and interact with the Vex receptacal beneath, all the while occasionally breaking line of sight. For example, once the players have identified the "sniping" Agraios proxy as "Made Cyclical", the player with Cyclical Temporality should hoof it to the device beneath their copy's platform and interact with it. Upon doing so, that player should now receive a buff in their other buff box called Alignment Charge and should note the five boxes beneath it. Meanwhile, the other plate players should look to the rings and see three of them flashing red and two of them glowing a constant blue. These other plate players should call out the blue rings to the non-plate players, as those rings need to be charged by the non-debuffed players for the designated plate Guardian to fill up their Alignment Charge buff. For example, while the Cyclical Temporality player deals with their Agraios copy, the other two look to the rings and Absolute Temporality player sees 1 and 5 glowing blue while Constant Temporality player sees 2 and 3 glowing blue. Those players should call it out and/or type it into the fireteam chat for the non-plate players. Upon doing so, the non-plate players must eliminate the Time's Burden Minotaurs or additionally the Ultra Hydra beforehand, gather their Chronons and run them through the designated rings. Once all rings are safely charged (and also done correctly), the Alignment Charge player should see all rings glowing blue rather than flashing red and can safely run through them, slowly but surely building up the charge they need for their buff. Everyone else, however, should try and remain out of the Agraios copy's sightline.
Once the Alignment Charge player maxes out their buff, they should now notice that their grenade has been replaced by a gray, Vex-gate-like icon instead. Upon detonating it, that player should now be surrounded by a benign Detainment bubble that, not only protects everyone drawn in, including themselves, from the Variable Elimination attack, but also ricochets the round back at the Agraios copy. It should be noted that a premature detonation will cause the player to temporarily lose the attack itself and thus lose the only way to begin damage phase proper, so they should make no effort to waste it. To make this defense mechanic count, the Alignment Charge plate player should synchronize with one of the other players to defend against the Variable Elimination attack, with one Guardian remaining out into the open at a certain point, slowly counting down the wipe mechanic when, upon four or sometime but not too much later, should be defended from the copy's attack. For example, once the Alignment Charge player has gained all or even their fourth charge, one player should step out into the open to draw the copy's aggro while counting down and, upon four, the Alignment Charge player activates their detainment bubble to ricochet the attack back and finally begin damage phase. To avoid any unfortunate accidents with another targeted player getting others killed at the last second, only one player should draw the copy's attention. Once the copy is destroyed, Agraios itself should teleport to the center of the arena to face the Guardians personally and be exposed to all means of attack. Much like the encounter prior, players again must extend their damage phase through repetition of the mechanics, with the Alignment Charge player running the ring gauntlet once more upon seeing their buff reappear sometime during the damage phase, especially before Agraios teleports away, as the boss will move back into starting the mechanics all over again if not addressed. Thus, during damage phase, Alignment Charge player should note when their buff returns and should immediately re-run through the rings again to regain their Detainment defense ability while the rest try to milk as much damage as they can, even after it teleports away and begins sniping at them. Upon the ability being restored, one player should, again, goad Agraios to shoot at them and count down, with Alignment Charge player defending them at around 4 seconds. The damage phase, ideally, should last after three deflections, including the initial one that kills the copy and Agraios should once again retreat to restart mechanics until it is defeated.
Challenge[edit]
To complete the Encounter Challenges feat for Agraios, no player picks up a Cobalt Chronon until all players have done so. Meaning that most of the fireteam should do their best to pitch in and aid in the activation of the Alignment Charge rings in the arena and even stabilizing them for damage prep. Thus, the fireteam shouldn't rely on a small group to complete this challenge alone, even if during damage prep half the team cannot. Nevertheless, this challenge is relatively easy to accomplish compared to the other challenges for the other bosses.
Iatros, Inward-Turned[edit]
Capping off new mechanics, the players should now notice a hoop-like device with a spherical receptacle beneath it in front of Iatros itself. The team should now be split into three groups, the solitary climber, the three builders, each dealing with their own spire, and the two add-clear/hourglass fillers. Upon approach, Iatros will confront the fireteam and a squad of six Time's Burden Minotaurs should also join the fray. Much like before, they will drop Chronons except, this time, dropping different colored ones, either Red Cinnabar Chronons or White Antimony Chronons. For the time being, the color matters not, as the hoop will accept all the identical Chronons. Each Guardian should destroy a Time's Burden Minotaur, pick up their dropped Chronons and jump through the hoop to deposit their item. Once all six Chronons are dumped, the "Hourglass" will be filled and a diamond Oracle beneath it can be shot. Upon its destruction, the prep phase will officially begin, and players should move into place.
Working with another, the Climber and Builders must work together to activate all three cubes on either the upper-most (spawn), middle (boss spawn) or bottom-most areas. Upon activation of the "hourglass", all players will be afflicted by the Diastole buff when, upon the fourth cube activated, will cause all players on the ground to be launched into the air. The mechanics here must be done as quickly as possible for reasons to be explained later. For now, builders must be by their pillars, each marked with three easily destructible cubes and the climber must seek out an active plate on one of the three areas to receive the Absolute Temporality debuff. When the climber is ready, all builders must shoot the bottommost cube on their pillar the instant the Diastole buff beneath the healthbar hits the fourth cube in the sequence, no sooner, no later, lest the hourglass drains faster. If done correctly, the climber can now begin ascending freshly created platforms to reach a cube they can interact with. However, they will be harried by Imp Swarms which they should deal with at the earliest convenience as any damage will reset any progress with their cube if they interact with it. Upon full activation of the cube, a note should appear in the lesser buff section, indicating the middle cube can be shot next. Again, successfully timing the destruction of the cube with the activation of the Diastole ability will cause the next pair of platforms to spawn. The climber, however, should be quick with this and/or time their jump with the Diastole activation as the bottom platforms will disappear upon the creation of new platforms. This is to be repeated until the top most one is activated after another Diastole destruction at the top cube and the activation of the Climber's third interactable cube, finally beginning damage phase.
Meanwhile, the remaining two's role is no less important, as they are essential to not only quelling the number of adds in the area and keeping the boss' aggro, but also the stalling of the wipe mechanic. Once the diamond from earlier is destroyed, the hoop-mounted hourglass will slowly drain and, when fully empty, will begin a 12 second wipe mechanic called Neomutation. On top of it all, the other two players must hunt down a pair of randomly spawning Time's Burden Minotaurs who can appear anywhere in the arena, gather their Chronons and dunk them to top off the hourglass. Even during damage phase, if the team wasn't fast enough, the hourglass may drain enough to the point of activating Neomutation during damage phase, which can be forestalled by the add-clear team if they still have a Chronon on hand.
Once the climber's third cube is interacted with, damage phase will begin. Upon its activation, everyone should converge where the climber is above or currently at, as that is where Iatros will appear, now weakened and exposed to damage. Iatros can pump out an incredible amount of damage with it's ![]() Warp Lance and can launch players back with its'
Warp Lance and can launch players back with its' ![]() Ground Slam but, ultimately, lacks any true means to sabotage its' assailants assault unlike its fellow peers with the exception of a still draining Hourglass, which can deplete before the end of damage phase. Nevertheless, after enough time, Iatros will regain immunity, replace the old Hourglass with a dormant, empty one and restart the mechanics. The Guardians repeat accordingly until Iatros is finally defeated.
Ground Slam but, ultimately, lacks any true means to sabotage its' assailants assault unlike its fellow peers with the exception of a still draining Hourglass, which can deplete before the end of damage phase. Nevertheless, after enough time, Iatros will regain immunity, replace the old Hourglass with a dormant, empty one and restart the mechanics. The Guardians repeat accordingly until Iatros is finally defeated.
Challenge[edit]
The mandatory challenge for Iatros with the Encounter Challenges feat enabled, requires three Climbers instead of relying on one, with each interacting with a different cube. Again, using the prior example, the add clear/hourglass fillers will be joining the climber as they ascend the scattered platforms, with one interfacing with a cube at one level and the other interacting with another. Once their jobs are complete, the two new climbers should return to their prior tasks and try to fill up the Hourglass to the best of their ability.
Koregos, the Worldline[edit]
Once all bosses are destroyed, the fireteam may now direct the monolith in the Nursery forward to finally stir and confront Koregos, the Worldline. Once one player interacts with the cube in the middle, Koregos will lift from the ground in the middle of the arena, activating its arm-cannons, teleport to one of the corners of the arena and begin a 6 minute wipe timer called Digitization. The team should now split into two groups this time: stunners, who must receive the Constant Temporality debuff, and mechanics team who is composed of at least one of each Temporality debuff. Upon teleporting into position, a wave of Goblins, Minotaurs and Coryphaeus Hydras will spawn and Koregos will spool up and unleash an ![]() Arc beam upon the Guardians. This beam can easily annihilate a Guardian, so everyone should deal with Koregos' minions while out of the mega-harpy's sightline. Once the Coryphaeus Hydras are destroyed, the Guardians may stand upon their plates and pick up their respective buffs, with Constant and Stunner players gaining their debuff from the left-most plate looking from spawn monolith, Absolute player gaining theirs from middle and Cyclical player(s) gaining theirs from right. Before explanation, a seasoned team can have two Cyclical players for a "double-dunk" strategy, elsewise, only one player should receive Cyclical Temporality, with the remaining other players picking up Constant Temporality to deal with Koregos' arms.
Arc beam upon the Guardians. This beam can easily annihilate a Guardian, so everyone should deal with Koregos' minions while out of the mega-harpy's sightline. Once the Coryphaeus Hydras are destroyed, the Guardians may stand upon their plates and pick up their respective buffs, with Constant and Stunner players gaining their debuff from the left-most plate looking from spawn monolith, Absolute player gaining theirs from middle and Cyclical player(s) gaining theirs from right. Before explanation, a seasoned team can have two Cyclical players for a "double-dunk" strategy, elsewise, only one player should receive Cyclical Temporality, with the remaining other players picking up Constant Temporality to deal with Koregos' arms.
As previously mentioned, stunners team has the job of stunning Koregos by destroying its four arms that charge up its devastating Arc beam. Not only does it prevent Koregos' fearsome beam attack from causing problems for the mainline mechanic players, it also refreshes the debuff time for every Constant player, including the one not mainly tasked with stunning. In the mean time, attack Constants also have the essential job of clearing the vast waves of Goblins and Minotaurs. Meanwhile, the three/four other players, one with Constant Temporality, one with Absolute Temporality, and one/two with Cyclical Temporality, must initially stop the Digitization wipe mechanic and bring the team to a damage phase.
Upon receiving their buffs, the fireteam should notice a bunch of "sea-mine" shaped devices circling the arena and another hoop-mounted Hourglass hovering over a bottomless pit in the center of the arena. These "mines" are essential to draw closer to a damage phase. After Constant players temporarily disarm Koregos, players should notice a tetrad of pools atop of a couple of short pillars when, upon debuffed players entering, will provide them with the Temporal Oculus buff, allowing them all to see specific things for said mines and the hoop-mounted Hourglass. In terms of order of operations, the player with the Absolute Temporality debuff can see the type of Chronons needed in the center hoop, either red Cinnebar Chronons, white Antimony Chronons, or blue Cobalt Chronons and can destroy the mines circling around the arena, with their debuff counter reset when destroying a true mine (Absolute players should not destroy Mines randomly, as a wrong mine destroyed will set the Hourglass back a Chronon). Meanwhile, the player with Constant Temporality can see which Chronons the mines around the arena are currently holding. Finally, the player(s) with the Cyclical Temporality debuff can see which ones are covered in a white, digital aura, marking them as true mines and can dunk their Chronons in middle, which resets their debuff counter. Upon filling the hourglass with six Chronons, the fireteam can finally move onto a damage phase.
For a long drawn example, upon receiving the Temporal Oculus buff, the Absolute player looks to the hoop and sees it wreathed in a red dust, thus calling out red to the mechanics team. Next, the Constant player looks around with the buff for any mines also wreathed in red dust and points it out more concisely with fire from a distinct weapon (particularly a Trace Rifle) for the Cyclical player(s), asking if it is a real mine. Then, the Cyclical player(s) see that it is covered in a digital aura, marking it as a real mine; if it is false, then the Constant player can safely point to the the other mines that are wreathed in that dust and determine them real, as only one of the three needed mines are fake while the other two are real. Then, the Absolute player destroys the true mine(s), refreshing their buff timer and dropping Chronons upon the site of the mine's destruction. Finally, the Cyclical player(s) receive their Chronon(s) and run through the hoop to fill up the hourglass; if it is a double dunk strategy, both players MUST do it at the same time or around it, as the Hourglass will change its needed Chronons shortly after the first, and a wrong Chronon will kill the player instantly. The mechanics team repeats this process, all the while gaining Temporal Oculus buffs from different pillars, until the hourglass is maxed and a diamond beneath it can be destroyed.
Once the diamond beneath the filled hourglass is destroyed, Koregos will temporarily vanish, and the fireteam can converge around the upper central part of the arena. Koregos will once appear, now facing upwards and forming itself as its own sort of platform and creating other smaller platforms that allow the fireteam to traverse up to it. However, damage phase is yet to be reached, and Koregos is preparing for another wipe mechanic. Now, the stunner team (and one of the Cyclical players if doubling up), upon reaching Koregos, must deal with Imp Swarms while the mechanics team must now deal with a new puzzle: a pair of cubes for the Constant and Cyclical players and a trio of cubes for the Absolute player all arranged around all four of Koregos' arms. To finally reach damage phase and prevent a wipe, the Absolute player must interact with the cube that both the Constant and Cyclical players see for each arm. One strategy is for Constant and Cyclical players to call out their cubes from the perspective of Koregos. For example, Constant player looks from Koregos' perspective and calls out middle and left, while Cyclical, from Koregos perspective, calls out right and left, thus telling Absolute player to interact with the left-most cube from Koregos' perspective. Another, less communicative, strategy has the Constant and Cyclical players standing in the place the cube is absent from their perspective, thus showing the true cube to the Absolute player. Using the prior example, the Constant player, after seeing middle and left cubes, stands in the place the right cube would be, while Cyclical player sees right and left and stands in middle, showing the Absolute player that the left cube is not absent to both players. This process repeats for all four arms where, after successfully seeking all common cubes, destroys Koregos' heads' shell and exposes it to damage.
Here the team can now fire into Koregos' exposed head, earning precision hits from the three sets of three eyes looking around the now-platform shaped boss. However, Koregos is far from defenseless, as it now has created a diamond above its exposed head that fires off two beams of ![]() Arc energy that follow a certain path and can change at random intervals. These beams can easily melt Guardians upon direct hit and leave behind a damaging trail that can prove fatal if no healing is present. Thus, during damage phase, players should be mindful of where these beams are. To note, these beams can be hitting two of three places: close to Koregos' head, furthest from Koregos' head, or in the spot in between. Thus, players should note where these beams are being fired and situate themselves in the place the beams are not firing. It should be noted, however, that the beams can change their paths, so players should also be mindful of when the beams change places and maneuver accordingly. Finally, however, Koregos can also shorten damage phase via the introduction of a local hourglass and the appearance of three different Chronons types around Koregos. Thus, one player among the group should be designated to attempt to prolong the damage phase. This player should notice the dusty aura around the ring indicating the Chronon needed to be deposited into it, seek that Chronon around Koregos and deposit it into the hoop, thus extending the damage phase. After three of these damage extension checks, successful or not, Koregos will regain its armor, angle its fins downward to shake off its boarders and teleport once more to deal with its attackers, thus restarting mechanics accordingly.
Arc energy that follow a certain path and can change at random intervals. These beams can easily melt Guardians upon direct hit and leave behind a damaging trail that can prove fatal if no healing is present. Thus, during damage phase, players should be mindful of where these beams are. To note, these beams can be hitting two of three places: close to Koregos' head, furthest from Koregos' head, or in the spot in between. Thus, players should note where these beams are being fired and situate themselves in the place the beams are not firing. It should be noted, however, that the beams can change their paths, so players should also be mindful of when the beams change places and maneuver accordingly. Finally, however, Koregos can also shorten damage phase via the introduction of a local hourglass and the appearance of three different Chronons types around Koregos. Thus, one player among the group should be designated to attempt to prolong the damage phase. This player should notice the dusty aura around the ring indicating the Chronon needed to be deposited into it, seek that Chronon around Koregos and deposit it into the hoop, thus extending the damage phase. After three of these damage extension checks, successful or not, Koregos will regain its armor, angle its fins downward to shake off its boarders and teleport once more to deal with its attackers, thus restarting mechanics accordingly.
Once final stand is reached, Koregos will gain temporary immunity and spin its head around erratically before finally dropping its immunity and beginning a short wipe mechanic. Players must now race against a very short clock to finally defeat Koregos before they are annihilated; they should thus save their hard hitting and ammo-consuming weapons and damage supers for this phase. Players that rely on precision damage should notice, however, that the frantic nature of Koregos' head spins can now situate the eyes vertically or diagonally, and will spin them frequently, so they should either make their shots quickly or wait for their opening when they temporarily stop spinning. Additionally, the laser beams now also move in a far more erratic pattern, now carving a destructive trail far more unpredictably, which can eventually lead to the beam coming for the team at an unexpected angle and thus requiring more advanced movement compared to a standard beam attack. Irregardless, after narrowly blowing apart Koregos' head, the team should now notice a debuff at the top of their screen called Decoherence Imminent!. Every Guardian must dismount Koregos and seek high ground on one of the pillars or get far enough away from the exploding boss where the warning disappears before Koregos finally explodes and violently crashes into the ground, killing anyone nearby, which can cause a very unfortunate wipe for the unsuspecting. Nevertheless, with the Worldline defeated, and the team surviving its death throes, the Guardians can reap the rewards of finally completing the Desert Perpetual raid and seek more focused loot from the Conductor statue at one end of the arena.
Challenge[edit]
The challenge for Koregos now requires that each player dunks a Chronon into the Hourglass. Arguably the trickiest challenge to nail down, the process now requires the Guardian fireteam to instead be split into three teams of two players, allowing all three teams cycle through buffs so that, eventually, all will take up the Cyclical Temporality role and fill up the Hourglass with their respective Chronons. While simple so far, Guardians may soon find that swapping debuffs at the energy plates does not refresh the timer at all, instead carrying over the remaining time from the Temporality prior, thus sometimes leading to deaths as the newly debuffed players simply do not have enough time to refresh their debuff. So, the Guardian fireteam should be as swift and efficient as they can for this encounter so every player should play each role and fill the hourglass with their own Chronons, cycling through buffs however they can.
For example, upon the destruction of the Hydras, all players play their role as quick as they can, and, as Koregos is firing its beam, or even as it begins to fire, Constant team point out the mines wreathed with the same dust as the hourglass Absolute players called out and make sure the Cyclical players see it. After confirming or denying whether or not they are true, they receive their dropped Chronons after Absolute players destroy them, refreshing their buff, during which the Constant players set to work disabling Koregos to refresh theirs BEFORE Cyclical players deposit their Chronons into the Hourglass (as depositing any Chronon will cause Koregos to stop firing immediately, thus creating a situation in which Constant players may not have enough time with their next roles). After the deposit is made, the three teams then immediately run to swap roles at new plates, cycling to the fireteams' desire.
After completing the raid for the first time, players have the option to complete Koregos's fight first the next time they do the raid.
Feats[edit]
Before entering the Raid itself, the fireteam leader can modify the experience in orbit and apply Feats to the raid, with each improving the tiers of the loot itself and each feat required to be completed for the Atemporal badge and title, all the while slightly tweaking the Raid experience to make it more challenging to the raid team. The feats are as follows and impact it accordingly:
- Phase Race - The fireteam must dispatch each boss within 2 phases instead of the ordinary 3, lest the game immediately invoke a wipe.
- Token Limit - The fireteam as a whole is limited to a total of 3 revives instead of each member having a revive token.
- Cutthroat Combat - The enemies are on the same level as contest mode, with the bosses also sharing increased health.
- Encounter Challenges - The fireteam must complete the challenges for each boss, lest any mistake lead to a wipe.
- Battalions - New enemies and Banes now show up during each boss, particularly the following:
- Epoptes - Cyclopses can now spawn, along with Rage Bane Minotaurs in the central arena and Major ranked and Mine-Bane Harpys can show up with the Lenses.
- Agraios - Ultra Hydras are all Hypernova Banes and the Coryphaeus Wyverns are Slow Banes
- Iatros - Major Hypernova Bane Hobgoblins will spawn around the towers and Slow Bane Imp Swarms will guard the Hourglass
- Koregos - Meteor Bane Minotaurs will join the ranks of Vex reinforcements and Slow Bane Wyverns will now show up once a Chronon is dunked
Rewards[edit]
Weapons[edit]
- Whirling Ovation – Exotic
 /
/ Rocket Launcher
 - Opaque Hourglass – Legendary
 Combat Bow
 - Intercalary – Legendary
 Auto Rifle
 - Antedate – Legendary Submachine Gun
- Finite Maybe – Legendary Fusion Rifle
- Lance Ephemeral – Legendary Sniper Rifle
- The When and Where – Legendary Rocket Launcher
- Cusp Sempiternal – Legendary
 Auto Rifle (Epic Raid)
 - Starscape Null – Legendary Shotgun (Epic Raid)
- The Ever-Present – Legendary Heavy Grenade Launcher (Epic Raid)
Armor sets[edit]
- Collective Psyche Suit – Titan/Hunter/Warlock Armor sets
- Wayward Psyche Suit – Titan/Hunter/Warlock Armor sets (Epic Raid)
Miscellaneous Equipment[edit]
- Skimmed Surface ― Exotic Sparrow
- Soloist Shell – Exotic Ghost shell
- Emblems:
- Shaders:
- Envoy's Togs - Complete the "Map and Territory" quest.
- Mediant Flourish - Complete all encounters in "The Desert Perpetual" raid without any member of your fireteam dying or returning to orbit.
- The Immanent Lore book
Transcript[edit]
Standard[edit]
The Nursery, Spawning[edit]
Mission begins
The Guardians interact with a beacon on the path leading to the central platform from spawn
- Chioma Esi: Dr. Chioma Esi, team .50 of 227, calling from somewhere in the VexNet. In my escape from the Conductor's lab, I seem to have lost my bearings. I'm searching for stable coordinates... and for my partner, the Maya Sundaresh of the .87 team. That's a new receiver picking up my signal. Where are you, Maya? Where am I?
The Guardians clear the Vex from the central platform and select their boss from the command spire.
Epoptes, Lord of Quanta[edit]
The Guardians interact with a beacon in the transition area between the Nursery and Fallow Pavilion
- Chioma Esi: To my new listener: Fluctuations in dark matter are destabilizing your local space. Be wary.
- Maya Sundaresh: .87 Maya here. Chioma, what did she do to you?
- Chioma Esi: Maya! Is that you? The real you?
- Maya Sundaresh: I am not the Conductor! How can I prove it?
- Chioma Esi: [exhales] I don't know.
The Guardians confront Epoptes, Lord of Quanta and shatter the lenses protecting it and destroy it. The Guardians interact with a beacon found after the defeat of Epoptes by the exit.
- Maya Sundaresh: Quantum entanglement. They're studying how disturbing dark matter in one place can affect matter distant in both space and time.
- Chioma Esi: With precise enough control over their dark matter, the Vex wouldn't need to enter a timeline to affect it.
Agraios, Inherent[edit]
The Guardians interact with a beacon in the transition area between the Nursery and Velocity's Tomb
- Maya Sundaresh: If you're fighting the servants of my other self, then I wish you well. The Conductor was a monster to the hundreds of our selves within the network. A phantom snatching Chiomas away in the dark. What a relief to finally have a target to aim at. Even if it's me.
The Guardians face off against Agraios, Inherent, dodging it and it's copies and sabotage its test, drawing it out and finally breaking it apart. The Guardians interact with a beacon found after the destruction of Agraios.
- Chioma Esi: The death of your Nine has left the Vex with a surplus of dark matter. It shouldn't accumulate like this naturally. They're studying how that dark matter interacts with materials superposed in space and time, across phase and dimension.
Iatros, Inward-Turned[edit]
The Guardians interact with a beacon in the transition area between the Nursery and the Chambers
- Chioma Esi: The Vex are focused on cold dark matter. Their work is pulling at the bonds of real space where it's tied to your location... a corner of Unknown Space.
- Maya Sundaresh: The Conductor must be taken down. And don't tell me off for self-destructive impulses, Chioma.
- Chioma Esi: Have I ever?
- Maya Sundaresh: Once... yes. Memorably.
The fireteam engage Iatros, Inward-Turned, utilizing its defenses against it and weakening its Radiolaria, leaving it finally exposed enough to be taken down. The Guardians interact with a beacon found after the neutralization of Iatros, found by the exit.
- Maya Sundaresh: That Vex was running experiments on its own chassis–looking to neutralize the effects of the dark matter contaminating it.
- Chioma Esi: Dark matter is inimical to the Vex. That's an advantage of ours we can't see taken away.
Koregos, the Worldline[edit]
The Guardians direct the pillar's energies forward and interact with a Vex cube in the center of the arena
- Chioma Esi: The Vex intend to digitize this place. Pull it whole into the VexNet. Why?
- Maya Sundaresh: The Conductor wants control. I know my other self.
- Chioma Esi: [chuckles] And I know you. You couldn't be her. Trust me, there's only one Maya I've had to shout at for self-destructive impulses.
or, if the Guardian fireteam chooses to face Koregos immediately on subsequent runs of the Desert Perpetual
- Chioma Esi: Facing the Vex directly without investigating their methods first is a rash move... or a bold one. For your sake, listener, I hope it's the latter.
- Maya Sundaresh: And for all our sakes, I hope you make them pay.
Koregos answers the Guardians challenge, rising from the ground and activating its weapons before teleporting into firing position. The Guardians prevent its digitization efforts, blast open its armor and quickly destroy its rampant head before it can retaliate. Escaping the burning wreckage of a crashing Koregos, the fireteam can finally reap the rewards of saving the realm from digitization. The mission completes, and the team interacts with a beacon that appears next to the chest.
- Chioma Esi: Real space is stabilizing again. It's done, Guardian. The Vex here were sifting for the locations of other sapient gravitic anomalies –in your terms, the other members of the Nine.
- Maya Sundaresh: This one was commanded to trade the places of today's Earth with the Earth of my time. It failed and was punished. The Conductor will not accept a second failure.
Mission End
Epic[edit]
The Nursery, Spawning[edit]
Mission begins
The Guardians interact with a beacon on the path leading to the central platform from spawn
- Chioma Esi: After her recent failure, the Conductor's fled into the VexNet. It's time to chart a path to the end of this. Their experiments are running again under new parameters. We need your help, Guardian. Your experience will make you more effective here. But be warned that the Vex have experience here now as well.
The Guardians clear the Vex from the central platform and select their boss from the command spire.
Epoptes, Lord of Quanta[edit]
The Guardians interact with a beacon in the transition area between the Nursery and Fallow Pavilion
- Chioma Esi: The Vex are varying their experiments. Repeating them under different conditions, just like with their simulations.
- Maya Sundaresh: They're looking for a specific result.
- Chioma Esi: Not a result. A win condition for the universe itself.
The Guardians confront Epoptes, Lord of Quanta and shatter the lenses protecting it and destroy it. The Guardians interact with a beacon found after the defeat of Epoptes by the exit.
- Maya Sundaresh: We know that measuring the quantum state of a particle changes that state. To speculate, with enough data, the Vex could systematize that measurement. Predict what changes their observation make.
- Chioma Esi: Look at a particle here. Change something thousands of kilometers — or years — away, in any direction. Another tool at their disposal.
Agraios, Inherent[edit]
The Guardians interact with a beacon in the transition area between the Nursery and Velocity's Tomb
- Chioma Esi: We’re reading data from these anchors you planted for us, Guardian. Signals are going everywhere.
- Maya Sundaresh: The Vex are aiming them at distant parts of the VexNet. Gathering information on simulations run by other Collectives.
The Guardians face off against Agraios, Inherent, dodging it and it's copies and sabotage its test, drawing it out and finally breaking it apart. The Guardians interact with a beacon found after the destruction of Agraios.
- Chioma Esi: Dark matter interacts only weakly with baryonic matter in our home dimension. What about other dimensions — phases, timelines? The Vex are asking these questions. And I fear the answers they will find.
Iatros, Inward-Turned[edit]
The Guardians interact with a beacon in the transition area between the Nursery and the Chambers.
- Maya Sundaresh: This dimension, this Unknown Space, is not one friendly to the Vex. They are running constant tests on how to keep to their foothold.
- Chioma Esi: They don't want just any dark matter… only that existing within III's dead body.
The fireteam engage Iatros, Inward-Turned, utilizing its defenses against it and weakening its Radiolaria, leaving it finally exposed enough to be taken down. The Guardians interact with a beacon found after the neutralization of Iatros, found by the exit.
- Maya Sundaresh: The Vex have given up trying to shut down dark matter's effects on their radiolaria. They're forcing it through new processes to mutate it. To their own ends.
Koregos, Fractured in Time[edit]
The Guardians approach the Kernel.
- Chioma Esi: Careful as you go. The Vex are working deeply here.
- Maya Sundaresh: Now we know what the Conductor wanted with one of the Nine. The question is, what do the Vex want with its corpse?
or, if the Guardian fireteam chooses to face Koregos immediately on subsequent runs of the Desert Perpetual
- Maya Sundaresh: As yet, there's no way to know what goal the Vex have aimed these new experiments at.
- Chioma Esi: All we can do is try to shut them down.
The fireteam defeats Koregos.
- Chioma Esi: The floodgates are open. The Conductor proved to the Vex that the Nine can be used. They're studying III's corpse from the inside, learning how it fits into their win condition.
- Maya Sundaresh: You stopped them for now, but this is not the end.
Mission End
Trivia[edit]
- The Desert Perpetual is the first Raid or Dungeon to replace an entire encounter with a new one, that being the removal of the original Koregos, the Worldline encounter and replacing it with its Fractured in Time encounter.
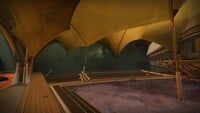
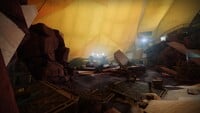
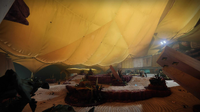
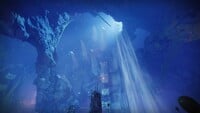
Gallery[edit]

The hub area of Desert Perpetual

A traversal section

The border area between the traversal and encounter area
Epoptes, Lord of Quanta's Area, facing the outside
Epoptes, Lord of Quanta, Particle Lens, and Wave Lens
The area afterward.

Agraios, Inherent's Area

Iatros, Inward-Turned's Area

The hourglass pre-encounter


Iatros, Inward-Turned before the encounter starts

Koregos, the Worldline rising out of the ground