Last Wish
From Destinypedia, the Destiny wiki
|
Prev: |
|
|
Next: |
|
| Last Wish | |
|---|---|

| |
|
Game: |
|
|
Player(s): |
1-6 |
|
Recommended Power Level: |
550 |
|
Location: |
|
|
Hostile race(s): |
|
|
Objective(s): |
Slay the Taken Ahamkara within the center of the city, claim her heart, and cleanse it of its corruption. |
| “ | The opportunity of a lifetime. | ” |
Last Wish is a Raid in the Forsaken expansion, which released on September 14th, 2018; roughly two weeks after the launch of the expansion.
Uncovering the culprit behind Uldren Sov’s corruption and the Scorn, Queen Mara Sov and Petra Venj calls upon the Guardians to face Riven of a Thousand Voices: the last living Ahamkara and the Awoken’s greatest kept secret. Having been Taken since the Taken War, the Guardians must reach her within her prison at the heart of the city, kill the corrupted wish dragon and extract her heart.
Objectives[edit]
- Enter the Dreaming City
- Access the Dreaming City and begin your pursuit of Riven, the last known Ahamkara.
- Defeat Kalli
- Defeat the corrupted Kalli to free her from Taken influence.
- Find Riven
- Head higher into the Dreaming City and pursue Riven.
- Defeat Shuro Chi
- Defeat the corrupted Shuro Chi to free her from Taken influence.
- Find Riven
- Head higher into the Dreaming City and pursue Riven.
- Defeat Morgeth, the Spirekeeper
- Defeat Morgeth.
- Find Riven
- Head higher into the Dreaming City and pursue Riven.
- Unlock the Way Forward
- Find a way to open the door barring your path.
- Find Riven
- Head higher into the Dreaming City and pursue Riven.
- Slay Riven
- Destroy Riven, the last known Ahamkara.
- Take the Stone to the Techeun
- Escape the spire and get the Heart Stone to the Techeun.
Unique enemies[edit]
Bosses[edit]
- Kalli, the Corrupted
- Shuro Chi, the Corrupted
- Morgeth, the Spirekeeper
- Riven of a Thousand Voices (Final Boss)
Walkthrough[edit]
Kalli, The Corrupted[edit]

Guardians will enter a large empty chamber whose layout is similar to that of the Blind Well. Near the center pit, three groups of two icons will appear to give six in total: Heads (two-headed snake), Smile (a snake in a smiley face pattern), Eight (an eight sign), and Infinite (the infinity symbol). One icon will not be shown.
There will be a matching plate for each of the icons. Two of each of the matching plates must be captured. For example, if Heads, Eights, and Smiles are being shown, 2x Heads, 2x Eights, 2x Smiles must be captured. Each plate will have their symbol above or near the side of the plate.
Each plate is divided into three sections. Two Taken Blight bombs will be above two of the sections. Stand on top of the empty section of the plate and defend as Taken Thrall attempt to overwhelm the team. If a plate is held long enough, a Ravenous Taken Knight will spawn. Killing the Taken Knight is required to "complete" a symbol.
Also be cautious, as Kalli will warp to a random plate and attack with blasts that will knock the player into the air, then "scream" at the player to knock them back. Simply shooting at Kalli will make her teleport away. Shortly after each plate has been captured, damage phase begins, and Kalli will enter the room's center area and attack with bolts and an ability similar to a Psion's Psionic Blast. Weapons that do not rely on precision damage are recommended, due to Kalli having a small head, unless your fireteam is using Divinity.
After a short while, she will cast her weapon which will wipe the team. Before the spell is complete, each Guardian must run into one of the open doors on the side of the pit below Kalli, which are tied to the Ravenous Taken Knights. Ensure that you kill the Knights to guarantee that a door will be open, or you will be wiped. If your team does not deplete her health, you must repeat cleansing plates to make Kalli vulnerable again.
Challenge Mode[edit]
You must cleanse all nine plates, including the plates of which symbols do not match with any of the six shown in the center. Doing so will spawn a Taken Ogre per wrong plate (three total).
Shuro Chi, the Corrupted[edit]

When you first get to the door of the arena, it will be closed. To open it, the whole team must stand at the door. To the right of the door (before you enter), there is a big rock that you can jump on to get into the arena before the fight starts, allowing you to get a better understanding of what you need to do by seeing the area without pressure. Ranged roaming Supers such as Daybreak and Hammer of Sol are useful here due to the large amount of enemies, and for damaging the boss, the same rules apply as Kalli. Shuro Chi has a small head so preferring to rely on weapons such as swords is recommended.
Now that you have your loadout setup, it is time to begin the fight. When you first enter the room, Shuro Chi will be directly in front of you, and will begin a song. You have around four minutes to complete each floor, before the song kills you. Each time you complete a floor, the timer resets. She will teleport a few times to the left, before resting in a specific area. While she does this, tons of enemies will spawn. You can not take down her shield until all of them are dead, so they are priority one. Among these enemies, there is one Elite captain called the Eye of Riven. This ad will be seen for most of the raid, and every time it will drop Taken Essence upon being killed. You will want to leave this on the ground until Shuro Chi's shield is down, as you will build up stacks of a debuff that, much like greed from Spire of Stars, will kill you after a certain amount of stacks. This debuff will stay for a certain amount of time, so you will need 2 designated players to carry this eye, alternating for each of the 6 phases. After killing all the enemies, three crystals will spawn on three plates. While you stand on the plates, you will take damage. You need to have three people pick these crystals up and shoot them at the person hold a crystal to the right (or left, you just all need to shoot in the same direction), making a sort of triangle. This will break her shield allowing you to do damage. You want to do the crystal part fast, as her song's tempo will quicken until you break her shield. Now, if you look down at her health bar, it will have six different bars of health. After breaking her shield, she will begin the obliterate attack that Kalli used. You need to destroy one bar of health to stop her from obliterating you. This is where you pick up Taken Essence that the Eye of Riven dropped. When you pick it up, you will see that you have your Super charged immediately. Using this near Shuro Chi will cancel the obliteration sequence, and she will start it again. You need to use your super right next to her as late as possible, allowing you to give your team as much time as possible to shred the bar of health. After you use your super, the artifact will disappear, and you join your team with DPS. Or you eliminate a sixth of her health before she obliterates you, without using the artifact. After you get down a bar of health, her shield will go back up, and she will teleport to the next area (still on the same floor). Advance forward, killing all enemies, and proceed to break Shuro Chi's shield with the crystals again. The other person who is supposed to pick up the artifact will use it to cancel the wipe, and she will teleport again.
Now, Shuro Chi will teleport to the next floor of the area. To reach her, you need to complete images projected on the walls of the next room you enter. You will see three circles on the walls. Each of these will show part of a symbol, starting with the one on the left. In the middle of this area, you will see nine plates. These plates, like the last ones you stood on to break Shuro Chi's shield, will deal damage. You need to stand on the plates corresponding to the empty parts of the image to complete it. There will be 4 people doing this, and the other two will be taking care of the enemies in the room, prioritizing the phalanxes. This is because after you stand on the plate, standing on it again will be rejected, so if a Phalanx knocks you off or you need to get off because you're taking too much damage, you cannot get back on and must swap plate with another fireteam member. After completing all three images, you can move upwards using the platforms that come down, and rinse-and-repeat for another two floors. Keep in mind that the song does not reset until after you complete the images, not after the second phase of damage on the floor, and starts immediately after.
Challenge Mode[edit]
Players must not take damage from Shuro Chi's ranged blast attack.
Morgeth, the Spirekeeper[edit]

Morgeth is the 3rd encounter of the raid, requiring a few mechanics to be completed in order to enter the damage phase of the boss. The mechanics consist of Taken Strength, the Eye of Riven and Umbral Enervation, which will all be explained. In order to start this encounter, someone must pick up the first Taken Strength that floats in front of the slumbering Morgeth.
There will be 10 Taken Strength before the damage phase, 1 to start the encounter, 4 in the 1st wave, 4 in the 2nd wave and 1 that will spawn where the first one was. After a player picks up the 1st Taken Strength, Taken enemies will spawn. It is recommended that your team is split into 2 teams of 3, on the left and on the right. Once the enemies are cleared, the 1st wave of Taken Strength will spawn, 2 on the left and 2 on the right, pick them up as soon as possible. Also, players can only carry 2 Taken Strength's at a time, as picking up a third will kill them. When someone dies with Taken Strength, the Taken Strength will eventually spawn in time.
As you progress within this encounter, Morgeth is slowly charging up its wipe mechanic in increments of 10%, each increment charging faster. Players must collect Taken Strength as soon as possible and restrict deaths as much as possible.
Within that 1st wave, there will be 2 Eyes of Riven and two Ravenous Taken Vandals spawning randomly either on left or right side. Within that wave, Morgeth will activate a debuff call Umbral Enervation. This debuff applies randomly on a player with Taken Strength. Once that debuff is applied to a player, that player will not be able to move and has 20 seconds until death. In order to free that player, someone must kill an Eye of Riven, pick up the Taken Essence it drops, and use the Grenade Button when stood next to the trapped Guardian to free them. However, there's a cost. The player freeing the trapped Guardian will absorb the trapped Guardian's Taken Strength. If the player that's freeing the trapped Guardian gains a total of 3 or more Taken Strength, they will die. It is recommended that a player with 0 Taken Strength frees the trapped Guardian. After the player frees the trapped Guardian and absorbs their Taken Strength, that player will not be able to pick up another Taken Essence for a long period of time.
The 2nd wave is exactly the same as the 1st wave. 4 Taken Strength, Eyes of Riven and another Umbral Enervation debuff. Once all Taken Strength collectibles have been gathered, the last Taken Strength will spawn in front of Morgeth and once collected, Morgeth will become vulnerable. Morgeth's critical spot is any pulsating spot that glows and during the damage phase, Morgeth will increase the speed at which it charges up its wipe mechanic. Morgeth will also spawn many Axion Darts that will track down Guardians. When Morgeth is close to 100%, a Guardian can grab an Eye of Riven (One should be left on the 2nd wave) and use the Super Ability to hit Morgeth, resetting its wipe mechanic, restarting the fight back to collecting Taken Strength. If players repeat this process, the only difference is that there will be a total of 12 Taken Strength.
For high level players, Morgeth can be easily one phased with many different weapons. A recommended spot for performing damage to Morgeth is on the set of steps directly behind the Ogre. A Well of Radiance will help players survive Axion Darts, and being so close to the large pustules on Morgeth's back makes critical hits easy to land.
Challenge Mode[edit]
The four Taken Ogres in front of Morgeth must be left alive throughout the entire fight.
The Vault[edit]

The Vault is the 4th encounter that consist of no boss, but rather a few mechanics that players must solve to reach the final encounter. The Vault includes the following mechanisms that players must know: Symbols, Penumbra, Antumbra and Eyes of Riven, later to be explained. The Vault has three plates, corresponding to the three areas that an Eye of Riven will spawn: Stairs (Spawn), Tree and Rocks. To sort the team, divide into groups of 2 per area, with one Guardian designated as a Runner, the other receiving the job of managing enemy spawns. All three phases of this encounter have a time limit of three minutes, known as the Vault Security Mechanism, that will reset to maximum upon successful phase completion.
To start this encounter, three people must stand on the three plates around the vault (the large mechanism) in the center of the room. The Vault will portray three symbols for each person standing on a plate, and all three players have a different combination of symbols. There is one large symbol in the center and two smaller symbols left and right of it. For each plate, there is a symbol on the left or right which may be found in the center of another person's set of symbols. The main objective is for each player to deduct which of the two symbols is owned by another player. One of the plate players, commonly stairs, must call out what their middle symbol is and one of the other player must respond if they have that same symbol. If a person has a symbol called out, it will be either left or right of their centre symbol. If a person identifies a symbol on their left, it means their plate requires Penumbra, while the symbol being on the right means their plate requires Antumbra. These designations, Penumbra and Antumbra, indicate where a Runner must go once they pick up an Eye of Riven's dropped Taken Essence. Once the player responded that their side is Penumbra/Antumbra, that same player will also call out what's their middle symbol and another player will respond if they have it on either Penumbra or Antumbra. Do this until all plates know what their side needs.
It is possible to shorten the communication of the vault by only obtaining the Penumbra or Antumbra designation of only two plates as there will always be one plate which requires Antumbra or Penumbra. The final plate may be discovered by process of elimination. For example, if Stairs and Rocks are both Penumbra, it can be concluded that Trees requires Antumbra. It is still wise to identify all three plates, as a mistake may be identified if it is the case that a mistake is made when reading out just two.
The ideal way to take note of what is needed for each plate is by typing them out in game chat (i.e "Trees Antumbra" or "T A" for a faster, more efficient call out). On console, this may be more difficult due to lack of quick input devices. Ideally, when somebody obtains the Eye of Riven Taken Essence, they identify whether they have Penumbra or Antumbra by checking their buff list, and the person who needs it asks for their respective plate to be cleansed.
After successfully calling out the plates, one of the rooms, either Stairs, Trees or Rocks will be open and the other rooms will be closed off. It is essential to stay inside the middle room, as people trapped in a closed room will have to run back to the center through a series of tunnels connecting the three rooms. A few enemies will spawn in the open room and then an Eye of Riven will spawn that must be defeated. Once defeated, a player must pick up the Taken Essence and the room that they are in will be closed off and another room will be open. Players must call out which side is open for the runner so that he/she can exit the room via the appropriate tunnel. When the Runner picks up the Taken Essence, either Penumbra or Antumbra will appear in the buff list for them. The Runner must use the Grenade Button at the correct plate that was called out at the beginning of the encounter. During this time, a Might of Riven, a Major Taken Knight with a Cleaver, will spawn randomly inside one of the rooms and must be defeated before it reaches a plate. If this Knight ever reaches a plate and slams its sword into it, it will quickly wipe all players if not stopped. It is crucial for at least one Guardian to monitor each room for a Might of Riven, as it is common to wipe due to a Knight stealthily sneaking onto a plate. Once the Runner has successfully cleansed the correct plate, that Runner can no longer pick up Taken Essence until they are revived, the timer runs out or a new phase is initiated. The room that the Runner exited from will contain the next spawn of an Eye of Riven and that rooms Runner must pick it up. It may also be noted that whichever clockwise direction the rooms are open will repeat. For example, if Stairs is open first and Rocks become open after killing the Eye of Riven, the next room to be open after the Eye of Riven at Rocks is killed will be Trees and subsequently Stairs.
It is possible to speed up the Vault encounter greatly by using Tractor Cannon to propulse the Eye of Riven closer to the Vault mechanism. As the rooms do not close immediately after killing an Eye of Riven, it is possible to move the Eye of Riven close to the edge of the main room, in some cases pushing him well into the room, meaning the Runner does not have to travel through the tunnels to reach the appropriate plate to cleanse. The Tractor Cannon "method" may also prove useful when a mistake occurs, such as slamming an incorrect plate, as the Eye of Riven will continue to spawn until all the plates are cleansed or the timer runs out. It is possible to obtain four Taken Essences in one cycle by using the Tractor Cannon method. Keep in mind that the Tractor Cannon will not push Mights of Riven, and will only apply a debuff.
Essentially, players must cleanse the correct plate three times to complete a phase, and there are three phases. When the Runner picks up the Taken Essence, a Might of Riven will spawn as explained before, and when the 2nd Runner picks up the Taken Essence, two Mights of Riven will spawn, and when the 3rd Runner picks it up, there will be three. The time limit will restart back to three minutes once three cleanses have been performed successfully.
Challenge Mode[edit]
The Mights of Riven must not be allowed to leave their spawn rooms. If they cross the barriers, the challenge fails.
Riven of a Thousand Voices[edit]

As soon as everyone steps on a plate, they will begin floating down and come face to face with Riven herself. Once everyone lands, they must split into two groups of three and run into one of the two rooms, marked by either a crystal or a tree. The door will lock after a certain amount of time, so the fireteam must head into their rooms quickly. Everyone should begin killing enemies, beginning with the Hobgoblins. At this point, one of two things will happen: either Riven appears in the room from the black wall, or she does not and an Eye of Riven appears instead.
If Riven shows up in the room, she will use one of two attacks. If the tentacles on the sides of her head extend, someone must lure her into attacking by getting within melee range of the tentacle, and jump as soon as that tentacle hits the ground. The group should then hit it until she staggers. If her tentacles do not extend, she will breathe fire. Once she finishes spewing fire, her mouth will glow and will be vulnerable to damage which will cause a stagger. Either way, once she is staggered, two of her ten eyes will glow and the fireteam must inform the other team which of them to shoot.
If the Eye of Riven spawns in the room, players must kill it. It will drop a Taken Essence which will then be used to cleanse a symbol that will be visible through a lens a Guardian will look through. To find this lens, a Guardian can head to the back of the room, jumping up on a platform to look a sheet of glass looking towards the arena. The Guardian who picks up the Taken Essence will see a column consisting of a single symbol, which they should let the lens user know. The lens user should direct the Taken Essence holder to the spot where this symbol exists. Once the Essence holder is over that symbol, they must hit the grenade button to cleanse it.
Riven and the Eye will switch sides when she is staggered. She will appear in the other room, regardless of whether the symbol was cleansed or not, so both groups must coordinate their staggers and cleanses. When Riven switches over to the other side, the group with her has a small window to damage her and shoot the eyes the other team called out. If the incorrect eyes are shot, the fireteam will wipe, and anything with splash damage will hit other eyes. Once both groups are finished in the rooms, they will head to the back of the room and take a lift up. Riven or the Eye, whichever the opposite of what either group started with, will appear in the second room. Both groups must repeat their processes and take a lift up to the starting room.
Once both groups are in the starting room, Goblins and Ogres will spawn. Both must be taken down quickly, as the Goblins will shield the Ogres, and the latter will knock players back. Riven herself will also appear in the room, and the group must stagger her three times for a total of six eyes. As usual, take note of these eyes in any way you see fit. There will be another small opportunity for damage, and while Riven is being damaged, players must shoot her six eyes. After all six eyes are shot, Riven will retreat and the fireteam will be affected by the Creeping Darkness debuff. When it reaches ten stacks, they will die. Everyone must run to the starting plates and start the real damage phase.
The fireteam will float down as they did at the start, but this time you will have an opportunity to deal significant damage. On Riven's body, there are black sores that must be shot at, which will deal a lot of damage once burst, but will spawn Axion Darts as well. Players must alternate between shooting the darts and her sores, and move around as they're floating down to get clearer shots at her sores and not get blocked off by parts of her body. If the team has not dealt enough damage, they must repeat the process.
If the team has dealt enough damage to reach the final stand segment of Riven's health bar, they will get teleported into the Ascendant Plane and must race to the top of the area before they are killed by the environmental damage being dealt. Along the way, Phalanxes will spawn. The team must eliminate these Phalanxes and watch their health while running. Utilising various healing methods will proceeding will keep the group alive, such as Healing Grenades and other Solar abilities, though it is fairly possible to reach the end goal without healing at all. At the end will be a Taken Strength orb, and only one player has to pick it up for the entire team to be teleported back to the starting room.
Riven will appear once more and will attempt to wipe the team. Everyone must shoot her glowing mouth and kill her. When this is done, everyone must climb into Riven's mouth, down her throat and shoot the blight inside her body. The fireteam must do this quickly, because everyone's health will continue to deplete over time. Once the blight is destroyed, Riven will be slain, but the raid isn't over yet.
As this fight is considered the most complex and communication-heavy fight in the history of Destiny as a franchise, players commonly rely on "cheese" methods to skip most mechanics involved. The weapons used to perform this strategy will vary depending on the current meta. When the fireteam floats down past Riven to the two rooms, the fireteam will instead all head to one room, preferably the blue crystal room. Upon entering, they will watch the wall were Riven appears to see if a black shadow will cross. If it does, Riven will not come to this room first and the team stays there. If it doesn't, the team will leave the room and hug the purple crystal wall, causing the "Joining Allies" countdown to appear, teleporting Guardians back to the initial room where the rally flag is placeable. If teleporting back, the fireteam has to race backwards through the encounter to get to the other room before Riven appears. Instead of shooting the correct eyes (because your team skipped that part), the fireteam should gather on the upper left side of the room, where Riven's limb will rest upon her arrival. Once Riven comes through, plant a Well of Radiance and begin hammering the limb with whatever meta weapon of choice you have. The fireteam must outpace Riven's wipe mechanic to reach the final stand health segment, skipping almost the entire fight. Once at this stage, the fight continues as normal. Weapons such as Swords have historically been useful for performing this, but remember to take ranged Special weapons for dealing damage to Riven after completing the Ascendant Plane platforming section.
Challenge Mode[edit]
Each player cannot shoot the same eye more than once.
The Heart of Riven[edit]
At the beginning of the encounter, the Heart of Riven will choose a player to hold it. This player will have the Fate's Chosen buff. As soon as the Fate's Chosen player picks up the heart, everyone must run out of Riven's mouth. That player must keep an eye on the timer on the lower left and count it down from fifteen seconds. As soon as that timer runs out, anyone too close to the player holding the Heart will get sucked inside along with the Heart holder. At the same time, the Heart also emits an aura that protects everyone else from the Creeping Darkness debuff, so everyone must stay close until the last few seconds. If a player dies, they will be sucked into the Heart regardless. Stopping just before the 2nd set of pink "teeth" will ensure the Heart doesn't roll out of the mouth and get stuck in an awkward spot.
Once a player gets sucked in, the Heart will choose another player. By the time a new player is chosen, the remaining fireteam outside of the Heart should be outside of Riven's body and into a room full of enemies. Roaming Super abilities and high RPM heavy weapons such as Machine Guns will be useful here. The fireteam must make their way back through the raid towards the room before the Vault.
Upon leaving Riven's mouth, head towards the back of the room and take the doorway to the left. Once through this, continue on and take the doorway on the right. You should arrive within a room of broken platforms and a large Taken Blight consuming the floor beneath. Cross this by following the broken platforms on the left side of the room, or brave it by crossing directly across the Blight using healing abilities to keep the carrier alive. Once across, take the right hand door, then take a left afterwards. At the Vault, you must head into whichever area is open — either the Trees or the Rocks area, and take the longest route of tunnels towards Stairs. Beware the Phalanxes in the tunnels, as they can hinder your progression with their shield blast, or outright splat you off a wall if they get lucky.
While this is all happening, the first Heart holder that got sucked inside must grab all of the Taken Strength inside as well as survive against the Taken spawning within, including Mights of Riven. The last Taken Strength orb should be left alone as long as possible (until 3-5 seconds left on the timer), as picking this up will slow down the Heart's beating and reset the Fate's Chosen timer, but this will only work once per carrier. As the run continues, more players will be teleported in, and more enemies will spawn. Just like Morgeth, players can only carry two Taken Strength at a time, requiring others to collect them so Fate's Chosen can reset. The number of Taken Strength in the Heart is relative to how many players are in the Heart. To keep it simple, the player who grabs the last Taken Strength should be the first Guardian who gets pulled in initially. They can claim a Strength of their own, leaving the rest of the fireteam to focus on finding the others.
Once at Stairs in the Vault, jump down the hole where the levitation elevator took you to the Vault, and proceed up the long sets of stairs in front of the landing spot. Taking the Heart toward the centre of this small room will deposit it, completing the Last Wish raid. Loot chests will spawn outside beneath the assortment of Awoken statues, and Guardians can open any they like, corresponding to how many keys they carry. Keys are granted through successive kills of Riven.
Wall of Wishes[edit]
The Wall of Wishes can be found right before the Kalli encounter. It consists of 21 buttons, which when shot, will change to a different symbol. There are fifteen wishes that can be activated for the raid:
- Wish 1 - Grants an Ethereal Key that can be used at the end of the raid. This Ethereal Key is once per account.
- Wish 2 - Causes a chest to spawn between the Morgeth and Vault encounters, which can be unlocked with a Glittering Key.
- Wish 3 - Unlocks an emblem.
- Wish 4 - This will immediately wipe the fireteam and teleport them to the Shuro Chi encounter.
- Wish 5 - This will immediately wipe the fireteam and teleport them to the Morgeth encounter.
- Wish 6 - This will immediately wipe the fireteam and teleport them to the Vault encounter.
- Wish 7 - This will immediately wipe the fireteam and teleport them to the Riven encounter.
- Wish 8 - Hope for the Future will play.
- Wish 9 - Failsafe will speak throughout the raid instead of the Siren of Riven.
- Wish 10 - The Drifter will speak throughout the raid instead of the Siren of Riven.
- Wish 11 - This will activate Grunt Birthday Party, which causes precision kills on enemies to explode into confetti, along with children cheering and a slide whistle in the background, not unlike the skull from the Halo series.
- Wish 12 - All fireteam members will have a random effect around their heads, which varies between a neon crown, a flower garland, or a Traveler. The effect on a given player's head will change between their deaths.
- Wish 13 - This will activate Petra's Run. If a fireteam member dies, the entire team will be sent to orbit.
- Wish 14 - Several Corrupted Eggs will spawn throughout the raid. These eggs can only be destroyed if the player has Wish-Ender equipped.
- Wish 15 - Impossible to be activated, but used in Season of the Wish, opens a portal for one person (Crow) to enter The Pale Heart of The Traveler.
Transcript[edit]
Loading screen
- Petra Venj: For generations, the Dreaming City housed one of the Awoken's most closely guarded secrets. She is known as Riven — Riven of a Thousand Voices. The last known Ahamkara. She has been Taken. And her death is your calling.
Mission begins, the team enters the opened doors leading to the Blind Well from the Divalian Mists.
- Siren of Riven: You are finally here. Brother slayer. Spawn killer. All that strength and you're still nothing but a retainer to the Awoken Queen. You could be so much more... all you need do is wish it. Come. I would quite like to meet you.
A statue turns, allowing the fireteam to progress into the Tower of Opened Eyes. They approach an open arena with a corrupted Kalli at its center.
- Siren of Riven: Have you come to free the Witches? They will resist. Darkness is their shape now.
The Guardians engage Kalli.
- Kalli conceives an ontological weapon
Kalli begins her Obliteration attack.
- Kalli prepares to wield her weapon
The Guardians free Kalli from her Taken corruption.
- Kalli: You have my thanks, Guardians, but my sister remains enthralled. Without Shuro Chi, we cannot defeat Riven. Find her, save her. And know this: Riven WILL try to seduce you. When she speaks... Do. Not. Listen.
The Guardians progress onward
- Siren of Riven: I can give you anything. What is it you want? Weapons? Glory? Peace? Or is it simpler than that?
The Guardians advance to the First Spire, traversing the structure of the bridge to make it to the other side. After rallying, the team approaches the door, encountering Shuro Chi and an onslaught of Taken.
- Siren of Riven: Oh ho ho. You are so tiny. Yet you continue to make enemies of so many gods and monsters. You want battle. I'll give you war!
Shuro Chi begins to enact her Song.
- Awoken Lenses materialize
Shuro Chi's Song begins to speed up.
- Shuro's tempo quickens
The Guardians use the Taken prism weapons to break Shuro Chi's shield; returning her Song to its original tempo.
- Shuro's tempo resumes
Damaged, Shuro Chi retreats up the spire. The Guardians configure the puzzle to ascend after her.
- Command accepted
The Guardians pursue and free Shuro Chi.
- Shuro Chi: You saved my sister... Thank you. Ahamkara feed on desire. Your desires could feed a nation of such beasts. They would grow till they shadowed the sun. Kill it. Rip out its heart. Bring it to us. We will purify it. Only then will Riven be contained.
The fireteam progresses to the Keep of Voices.
- Siren of Riven: You sully the sacred architecture of a culture you cannot understand. All so you can say you won today. Could that be what you're driving toward? Do you have the audacity to wish for my death? Perhaps you and I could work together.
The fireteam advances through the winding chambers and vistas and come across a broken bridge and a portal leading to the Ascendant Plane
- Siren of Riven: The Awoken kept me here so long. A better fate than my kin suffered. Ah! But paradise is a prison when you cannot leave. I would so love to repay the hospitality of those who used my words to carve this city into the screaming surface of reality.
After navigating the twisted realm, the Guardians reach the other side of the ravaged bridge and escape back into reality, encountering a dormant Morgeth.
- Siren of Riven: There is no end to the Taken. You have stolen more from them than they could have ever take from you. You are destined to fight forever.
Morgeth begins to collate strength.
- Morgeth is at 10% strength
- Morgeth is at 20% strength
- Morgeth is at 30% strength
- Morgeth is at 40% strength
- Morgeth is at 50% strength
- Morgeth is at 60% strength
- Morgeth is at 70% strength
- Morgeth is at 80% strength
- Morgeth is at 90% strength
If Morgeth reaches 100% strength, he releases his Grandeur of Morgeth attack.
- Morgeth is at full strength! He invokes your death…
The Guardians steal the Taken Strength before Morgeth can gather it.
- Morgeth's focus is broken and his strength lost!
If a Guardian holding Taken Strength dies:
- Taken Strength returns to the field!
The team defeat Morgeth, the Spirekeeper and are allowed ingress into the Keep.
- Siren of Riven: You don't hesitate to reach into the Deep. Your kind is so brave. Those with conviction pair best with my kind. Like you. Like the Awoken prince. Shall we be friends?
Entering the keep itself, the Guardians ascend its peak and land in the Hall of Two Souls.
- Siren of Riven: You're so close, friend. Find me. Kill me. My heart is yours.
The Guardians begin to decrypt the Vault Security Mechanism, while stopping Mights of Riven from shutting the Vault.
If a Might of Riven reaches the Vault mechanism:
- Knight overloaded security mechanism!
The Guardians bypass the Vault's security and enter the Queenswalk. Descending into Riven's chamber, the team faces off against the Taken Ahamkara.
- The chamber is sealed…
The fireteam slays the wish-dragon and stills her corrupt heart.
- You've slain Riven of a Thousand Voices
- Siren of Riven: Ahh, I've waited so long to fulfill one last wish...
- Kalli: Fetch the heart! Hurry!
- Bring Riven's Heart of Wishes to the Techeun before it destroys you
The team backtrack through Queenswalk with Riven's heart in tow, slaying Taken assailants and sheltering from the heart's Creeping Darkness.
- Riven's Heart chooses X
As the team is drawn into the heart one by one, they gather Taken Strength to slow Riven's Heart.
- Riven's Heart beats slower…
The Heart will begin to beat quicker threatening to envelop the holder. If all Guardians are drawn into the Heart they will be Trapped for Eternity.
- Riven's Heart beats quicker…
The remaining Guardian(s) descend back into the keep's main chamber.
- Kalli: I am glad you did not heed her words. We will finish this.
Depositing the heart before the freed Techeuns, the trapped Guardians are freed and the Heart glows.
- Kalli: Riven, of a Thousand Voices, architect of this city... Return to us – for the sake of plans to come.
The Techeuns purify the heart.
- Kalli: It is done. We shall meet you on the other side.
Loot chests spawn and the mission completes.
- Siren of Riven: I thought they'd never leave. You and I are not done. We're inseparable now. Through your actions, we've forged an age-old bond between my kind and yours. One wish granted deserves another. And I cannot wait to show you what SHE asked for. O murderer mine...
Mission ends
- Petra Venj: My Queen commanded me to slay a beast. We could not do it alone, so I turned to the Guardians. Six brave heroes came to destroy my people's greatest secret… Riven. The last known Ahamkara. A creature of immense power and cunning. The Guardians killed Riven and ripped out her heart. But Ahamkara transcend death. They can transform desire into reality… even when they are nothing but bone and dust. I should have known that Riven would grant one last wish… one last curse. Now, the Dreaming City has been Taken. I opened the gates. I ordered the attack. I… should have known.
Optional Dialogue[edit]
Upon entering the Tower of Opened Eyes, the Guardians can interact with a wish wall.
The First Wish is invoked
- You wish to feed an addiction.
The Second Wish is invoked
- You wish for material validation.
The Third Wish is invoked
- You wish to help a friend in need.
The Fourth, Fifth, Sixth or Seventh Wish is invoked
- You wish to stay here forever.
The Eighth Wish is invoked
- You wish to open your mind to new ideas.
Invoking the Ninth or Tenth wish will replace the Siren of Riven's dialogue with Failsafe and Drifter respectively.
The Ninth Wish is invoked
- You wish for the means to feed an addiction.
- Failsafe: Warning! Warning! Sensors are showing... showing...
- Failsafe: I... have a body?
- Failsafe: Captain! Did you wish for me to have a body?! Having a body has been my life's goal for the past 895 days! Stand by... processing new information... Captain. Is this... YOUR body?
- Failsafe: Gross.
The fireteam frees Kalli
- Failsafe: Shooting things is fun! Commence fixing more problems with bullets!
The fireteam summon Shuro Chi
- Failsafe: Another humanoid female! Is she friend or foe?
- Failsafe: Either way... I'm gonna shoot her.
Shuro Chi is freed
- Failsafe: I was aware that my captain's occupational duties included shooting "bad guys" and rescuing "good guys." I did not know that shooting and rescuing could be the same thing!
- Failsafe: That's... confusing.
The Ascendant portal is approached
- Failsafe: Already I am experiencing many new wonders! I spent the last [REDACTED] years staring at my own crumbling body! Now I am appreciating alien architecture!
- Failsafe: I... didn't know the world could be this... beautiful...
Morgeth is approached
- Failsafe: I also did not know the world could be this ugly!
- Failsafe: At least I get to shoot it.
Morgeth is defeated
- Failsafe: Warning... warning... I just defied 37 different laws of physics.
- Failsafe: Coo-oo-ool.
The team enters the Hall of Two Souls
- Failsafe: Is there a door in this chamber? I want to go through a door!
The Vault is opened
- Failsafe: I went through a door!
- Failsafe: Next up... I wanna get brain freeze.
Queenswalk is entered
- Failsafe: I'm detecting a very large organic creature!
- Failsafe: I don't think I wanna be a Guardian anymore...
Riven is defeated
- Failsafe: Calculating feelings! Please stand by! I feel... I feel...
- Failsafe: ...like a badass.
Mission complete
- Failsafe: I am so thankful to the captain for granting me a body! But... what I really want is a body of my own.
- Failsafe: Yours is gross/weird. So much sweat./Why does a robot need to eat?
- Failsafe: I wish my captain and I were returned to our own bodies!
- Failsafe: Goodbye, muscles...
The Tenth Wish is invoked
- You wish for love and support.
- Drifter: Hey, what the hell is this? Is that you, brother/sister? Oh. Heh. I see. You've made a friend. A friend you can wish to. Haven't you heard? Those things never give you what you ask for. You're crazy, my friend. Seems like I'm stuck in your head for a while. What're we doin' today? Huntin' your wish friend? I'm game! Woo!
Kalli is saved
- Drifter: Hey, you did great back there. Were those Tech Witches? Been a long time since I seen one o' them up close. You hang with strange company, my friend.
Shuro Chi is summoned
- Drifter: Dreaming City's easy on the eyes. That's what's messed up about it, if the stories of its construction are true.
Shuro Chi is freed
- Drifter: I don't ever wanna mess with you when you're in this mood!
The fireteam approach the Keep
- Drifter: And hey, that Tech Witch sure is a somber lady, huh? "Tear out its heart"? Whew. Terrifying. I like her style.
The Ascendant portal is approached
- Drifter: That... is one beautiful prison. The Reefborn Awoken, man. You had to have some stones to do what some of 'em did. And now she's free. You and this Ahamkara have a bond now, don't you? I can feel it. You be careful, brother/sister.
Morgeth is approached
- Drifter: Well, lookit that. Another Taken wants you dead. Shucks. They'll never forget what you did to their king. You show 'em how little that means to you, yeah?
Morgeth is defeated
- Drifter: Woo-oo! You really gave that Ogre a beating! And you used his own power to do it. Here I thought you City folk were soft. Come play Gambit some time. We'll have some fun.
The team enters the Hall of Two Souls
- Drifter: Is that a locked vault? I love locked vaults. What's inside? Come on, open it.
Queenswalk is entered
- Drifter: Six Lights in a dark place. Really brings me back.
Riven is defeated
- Drifter: Woo-hoo-hoo! All right, all right, all right! Let's see what kind of treasure this Riven's been sleepin' on.
Mission complete
- Drifter: Oh, man. You live a hard life, brother/sister. You think those Techeun knew I was here? If they did, I couldn't tell. Story o' my life. I started today wonderin' what you're like out here, away from Gambit. And now I know; you are insane. If I wake up in your head again tomorrow, I'm taking a bullet. And so is my Ghost. Naw, haha. I dig it.
The Eleventh Wish is invoked
- You wish for others to celebrate your success.
The Twelfth Wish is invoked
- You wish to look athletic and elegant.
The Thirteenth Wish is invoked
- You wish for a promising future.
The Fourteenth Wish is invoked
- You wish to move the hands of time.
Rewards[edit]
Weapons[edit]
- One Thousand Voices - Exotic
 Heavy Fusion Rifle.
 - Age-Old Bond - Legendary
 Auto Rifle. A curated version can drop from the Kalli encounter.
 - Transfiguration - Legendary
 Scout Rifle. A curated version can drop from the Shuro Chi encounter.
 - Nation of Beasts - Legendary
 Hand Cannon. A curated version can drop from the Morgeth encounter.
 - Tyranny of Heaven - Legendary Bow. A curated version can drop from the Vault encounter.
- Chattering Bone - Legendary Pulse Rifle. A curated version can drop from the Riven encounter.
- Apex Predator - Legendary Rocket Launcher.
- The Supremacy - Legendary Sniper Rifle.
- Techeun Force - Legendary Fusion Rifle.
Armor[edit]
Trivia[edit]
- According to a press release, the raid is described as being "like the Vault of Glass and King's Fall had a baby." It has the most bosses for a raid yet in Destiny 2. [1]
- Guardian activity during the raid will change the actual Dreaming City destination throughout the first few weeks.
- The raid is the third to take place in the Ascendant Realm, the first being Crota's End, and the second being King's Fall.
- A set of lore tabs in Forsaken offers an explanation as to why Last Wish, in particular, can be repeated an Infinitum in canon, claiming that Quria, Blade Transform, now attempting to defect from the Taken, trapped the entire area in a time loop to buy time to undo the corruption of the wish that Riven, the last Ahamkara, granted. However, as these texts belong to an arc involving unreliable narrators, the veracity of this claim cannot be verified, especially since the messenger of said lore series is claimed at different points to be Quria, Eris Morn, the Craftmind Medusa, and Dûl Incaru.[2]
- The raid is the first to ever feature an Ahamkara as a boss, and also the first to take place in the Reef.
- It is possible to use the Wall of Wishes to get raid loot without having to do any of the encounters. This exploit, as of yet, has not been patched.
- The world's first clear of the raid was performed by Clan Redeem in 18 hours and 48 minutes. Their achievement triggered a change to the Dreaming City, causing it to become corrupted by Riven's last wish.[3]
- Currently, Last Wish is the only raid that contains bosses that players do not actually kill. Those being Kalli and Shuro Chi.
- As of now, Last Wish is the only raid that doesn't end with a boss fight, with the players finishing the raid with the Queenswalk encounter.
- Riven of a Thousand Voices, when not cheesed, is considered the hardest Raid encounter in Destiny history, due to the coordination needed to shoot the correct eyes, dunk the correct Taken Essence, and stun the boss on 2 different sides of the arena at the same time.
- There are several glitches in the Riven fight, including:
- Taken Essence killing the holder when slammed on the correct symbol, and still activating the lift
- Riven's tentacles and mouth not taking damage, leading to wipes
- Tentacles bugging out if 2 players try to bait them at the same time
- Joining Allies spots in the entrance rooms
- Last Wish had the second longest and hardest World's First raid race, with only 2 teams clearing the raid in the first 24 hours
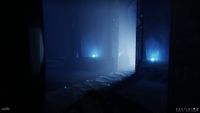
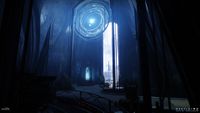
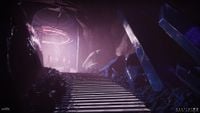
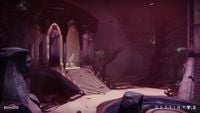
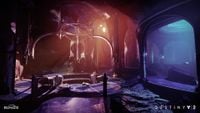
Gallery[edit]
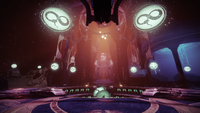
Kalli's arena

The staircase leading to the tower and the Vault encounter
The area between Shuro Chi and the Ascendant Realm before Morgeth
The end
Yet another view of Kalli's arena

An Awoken tree after Shuro Chi