The Shattered Throne
From Destinypedia, the Destiny wiki
|
Next: |
|
| The Shattered Throne | |
|---|---|
| |
|
Game: |
|
|
Player(s): |
1-3 |
|
Recommended Power Level: |
550 (Launch) |
|
Location: |
|
|
Enemy faction(s): |
|
|
Hostile race(s): |
|
|
Objective(s): |
|
|
Destinypedia has a walkthrough guide for this level; see The Shattered Throne/Walkthrough. | |
| “ | Strike back at the curse that plagues the Dreaming City. | ” |
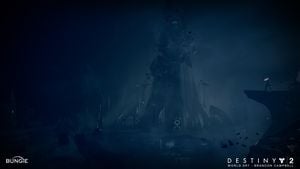
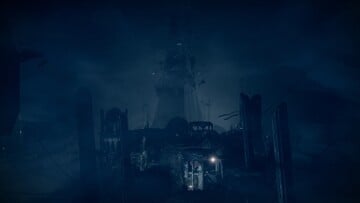
The Shattered Throne is a Dungeon, that was released on September 25, 2018 during Forsaken. It requires Guardians to enter Eleusinia, Queen Mara Sov's Throne World, where they fight their way past a horde of Taken, to uncover the source of the Dreaming City's Taken corruption following the Last Wish Raid. Before Shadowkeep was released, it was available every three weeks during the full curse week in the Dreaming City. Upon the release of Shadowkeep, it is now available at any time from an icon in the Director. It should be noted that the dungeon has checkpoints, so if you need to rest or go do something else, you can leave and return to your last checkpoint.
Objectives[edit]
- Search for safe passage
- "Show me your cunning…"
- Journey to the spire
- "There is no place better suited for you…"
- Press onward
- "Her plan will never come to pass…"
- Cross the chasm
- "Look down. Listen to the Deep call to you…"
- Overcome the Keeper of Petitions
- "Shape your schemes into reality…"
- Press onward
- "Come closer…"
- Ascend
- "Doomed are the hesitant…"
- Face Dûl Incaru
- "Enter the infinite…"
Walkthrough[edit]
Erebus[edit]
Prior to Shadowkeep, to reach the entrance to the Shattered Throne, you had to use one of the portals scattered around the Dreaming City to enter the Confluence. Following the path to the central room on a Strong Curse week, you would see a giant Taken gateway in a large room, with a Techeun standing in front of it. Approaching the gateway and following the prompt it gives would allow you to enter the Shattered Throne. It is still possible to reach this gateway, but it is purely cosmetic and isn't required to reach the Shattered Throne.
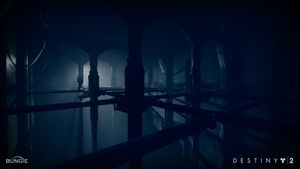
Upon entering Mara Sov's throne world, you will see a large door in front of you. Have your fireteam go through that door and enter the labyrinth. Continue to advance until you enter a restricted zone. It should be at one end of a broken bridge. On the other side of the chasm, you'll see a group of Taken Acolytes and a Taken Knight called a Labyrinth Architect. Kill them, but be wary of the Acolytes. They will constantly spawn numerous Acolyte's Eyes until they are defeated. Once you kill all the enemies (which doesn't have to include the acolyte eyes, but is recommended) and the miniboss, a symbol will pop up.
Travel to the location with the corresponding symbol. There you will find another Taken miniboss, along with a group of Acolytes. Kill them. Once all the enemies are dead, another symbol directing you to somewhere else on the map will appear. Go there. Repeat this process until you have to go back to where you came from. While on the way from destination to destination, various Taken enemies will spawn to block your path, such as Phalanxes, Captains, and hordes of Thrall. There will also be Taken Hobgoblins sniping you from above. It is not required to kill them, but it is highly recommended as it will make this entire section easier.
Once you have gone to every location, you will be directed to go back to the start, where you will face one final group of Acolytes and a Labyrinth Architect in the form of a Taken Captain. Kill them and jump down the hole that will open up. Keep following the path.
After you get far enough, you should trigger a checkpoint. Jump down, kill the enemies below, and at the end of the path, there will be a boss that you need to kill named Asterion, Set Apart. There will be snipers during this portion as well. Kill the enemies and move on to the next part.
You'll find yourself in a long hallway. On the sides are Taken Hobgoblins sniping you, along with Taken Phalanxes and Knights. Carefully take them out one by one, so that they don't trouble you as you make your way across the hall. Be especially wary of the Knights, as their fire attack can deal serious damage. When you reach the end, turn left. You'll enter a wide-open room with catwalks and a few pillars with platforms here and there. Your goal is to make it to the left side. Taken Ogres and obstacles will spawn on the platforms as you progress. Be careful and take out the Ogres as quickly as possible from a distance. Their eye blasts can easily knock you off the catwalks, which will kill you. Jötunn is excellent for this encounter, as it kills the Ogres in two shots each. Once you make it to the left side of the room, you will find yourself in front of a barrier.
When you reach the barrier, go through it, and you'll see that you are slower and you cannot double jump/glide/lift. There will also be a never-ending swarm of Shadow Thrall spawning around the room. Go through the maze and avoid the Shadow Thrall or dispatch as much as you can (there is an orb on a pedestal to the right of where you enter. If you jump, then melee, and do this to travel throughout the hall, you will be able to avoid a lot of damage from the Thrall). At the very end, drop down into the next area.
Follow the path. You will eventually be met with a choice: follow the outside of the rock face or go inside. Both paths take you to the same place. Either way, once you make it to the other side, you will find a large group of Taken Phalanxes. Kill them all to get to the next encounter.
Vorgeth, the Boundless Hunger[edit]
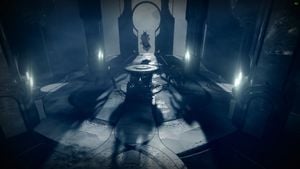
Here you arrive at the first boss, Vorgeth, the Boundless Hunger. This encounter has a special type of Taken Wizard known as the Keeper of Petitions. To do damage to Vorgeth, you will need to kill the Wizards and pick up the orbs they drop. You will receive a buff called "Petitioner's Mark" that stacks three times. There will also be a 45-second timer on the buff. If it reaches zero, the holder of the buff will die, and you'll have to kill however many Wizards you've defeated again. Once you collect the fourth orb, the buff will change to "Petitioner's Burden," which also has a 45-second timer. Deposit the buff at one of the 4 pillars in the center of the room to start the damage phase.
Once the damage phase is over, the Wizards and other enemies will respawn. Repeat this process as many times as it takes to kill Vorgeth. A recommended strategy for this encounter is to use a long-range primary weapon like a Scout Rifle or a Bow to kill all the ads in the room from the safe areas near the entrance. Once all of them are dead, bring all four Wizards to very low health without killing them. Then kill all four Wizards in rapid succession and deposit the buff to start damaging Vorgeth. While immune, Vorgeth will attack with powerful eye blasts that knock you back and deal severe damage. During the damage phases, he attacks with swarms of Axion Darts. Shooting the darts will destroy them and keep you safe from damage.
Once Vorgeth is dead, go through the door in the center. If this is your first time in the dungeon or you simply haven't done so before, interact with the statue. Next, jump down a series of platforms and ascend a gravitational lift. The path from there is fairly straightforward. If you get confused, just go to where the enemies are.
At some point, you'll be given a new objective - "Ascend." You have two options: either go up the stairs, go forward, and then jump to the ending right away (the harder path) or turn right and then go through a series of jumping puzzles. Stick to the wall and ascend the lifts to get to the last encounter.
Dûl Incaru, the Eternal Return[edit]
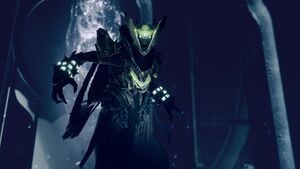
Dûl Incaru, the Eternal Return is the final boss of The Shattered Throne. Once you start the encounter, two fairly large groups of Taken Psions will spawn on either side of the room. Eliminate them as fast as possible, then kill the three Darkblades. Each one you kill will drop an orb. Pick them up. This is the start of the damage phase, and you only have 45 seconds until you have to cleanse yourself in the middle of the room (the purple orb on the pedestal) or fail the encounter and have to start over again. Dul Incaru will occasionally summon a crystal near where she spawns at the encounter beginning. This will make any living Knights immune. Destroying it will revive any dead Knights at full health. Once your buff runs out, you will have to break the crystal to revive the Knights and get your buff back. Repeat this process until Dul Incaru is dead. Reducing the health of the Darkblade Knights to a low level, then killing all three to claim their buffs at once, will make for an easy kill on Dul Incaru, as each stack of the buff provided will increase your damage. Gaining all three and using a Super like Thundercrash or Golden Gun with its complementary exotic (Cuirass of the Falling Star, Celestial Nighthawk) will allow Guardians to hit incredibly high numbers of damage, possibly even one-shotting Dul Incaru altogether.
Wish-Ender Guide / Hunter's Remembrance Quest[edit]
With the release of the Witch Queen on February 22 2022, some of the Forsaken DLC content supporting the original Wish-Ender quest was vaulted, and the quest for obtaining the exotic bow was revised, re-named, and partially simplified. Players who have partial progress on the original quest might not be able to complete it, depending on how far they went before the revision. A reliable option is to abandon the old one and begin again. With an experienced helper or sherpa, one can complete the steps for obtaining Wish-Ender in less than 40 minutes.
Players who are new and have attained Guardian Rank sufficient for access to the dungeon should clear a space in their Kinteic weapon reserves (if their alternates are all filled) on their character screen. You might find the quest waiting for you already in the Exotics section at the Terminal Quest Archive kiosk at the Tower, depending on what activities you've already completed in the Forsaken content. If you don't see them there, then go visit Petra Venj in the Dreaming City. Petra will offer the quest at the top left of the dialogue when you approach. The Awoken Memento that is given when you take the quest should be transported by the same character as you proceed through the Shattered Throne Dungeon, and it cannot be transferred to another character. This starts the new Wish-Ender questline, Hunter's Remembrance.
Players must then enter Eleusinia to kill 3 hidden bosses found in the Shattered Throne.
To find Querim, the Waking, the team must find a blue orb hidden atop the Tower of the Deep and bring it to the roof of the center building. There, a Siren of Riven will speak to the team. The orb must be placed in the empty hands of one of the statues. Once done, the fight begins. First, a Taken Minotaur named Theratos, Archersbane will spawn. Once you get Theratos's health low enough, Querim will spawn. To complete the fight, both the Minotaurs must be disposed of, regardless of time apart. From here, continue into the dungeon as normal until you reach the Ogre catwalks within the Descent.
Next is to find Eriviks, the Waking, whose arena must be unlocked with 2 orbs instead of 1. The first orb will be found in the Ogre catwalk area, where it is found behind the first pillar to the right of the beginning, and the orb is to be placed somewhere along the right side of the room (from the perspective of that first pillar, looking toward the Shadow Thrall room), where one of the statues will have no orb. The second orb is located in the "Thrallway" to the right of the entrance. The orb is to be placed at the end of this section, where the team jumps down over a railing, from the "Thrallway" into a chamber with a bunch of the statues along the sides. Just like before, you will find one statue that isn't holding an orb, and place it there. If both orbs are placed, a door on the other side of the chasm just ahead will open, revealing a hidden area where the 2nd Boss lurks. Once the team rendezvous in the room and any one of the players investigates the center area, the entry door will close and the second boss fight will begin; should a teammate be inadvertently locked out, they will still receive credit if the Captain encounter is successfully cleared. A bunch of Taken Psions will spawn to weaken and inconvenience the players, and then the boss will spawn in the aforementioned center. Once Eriviks is killed, the encounter will end, and the door will reopen. Again, continue through the dungeon as normal until you make it to the Vorgeth fight.
Lastly is Xavoth, the Waking, who is (inconveniently) located within the Vorgeth encounter. To advance the quest successfully, ensure that everyone on your team understands that Vorgeth must NOT be destroyed first. If Vorgeth is destroyed, any progress underway at that moment for the third Taken Boss in the quest will immediately terminate. To summon Xavoth, players must cleanse one of the sigils, getting rid of Vorgeth's shield. This happens when the Petitioner's Burden is Extinguished.
In the back of the room not far from the exit, a camouflaged Taken Minotaur called Fleeting Shade will spawn and make its way toward the platform in front of the tall exit door; killing it will drop an orb, which must be placed at one of the statues hidden along the side of the room, some distance away. Then, Xavoth will spawn; however, unlike Vorgeth, Xavoth is easier to kill, but can and will be a problem if not dealt with quickly enough. Once Xavoth is dead, resume the Vorgeth fight as normal.
Once all enemies are eliminated and the tokens are purified, the players can turn in those tokens to Sjur Eido's statue and claim the Wish-Ender bow. Remember that the Awoken Memento must be on your character to collect the Bow. It is permissible to have a teammate retain the checkpoint while you change characters at that moment, if necessary, and re-join them with the Memento on the other character.
Transcript[edit]
{Patrol}
The Confluence, The Dreaming City
- When the curse of the Dreaming City is at its zenith, the Guardian meets with Sedia in the Confluence.
- Sedia: For more than two weeks, I have watched a sickness consume my city. My people have been laid low by this infection — this ugly "wish." I am so hungry for vengeance! The Well has opened the gateway. May the Queen's will protect you.
If the Guardian is an Awoken:
- Sedia: And, cousin? If the walls begin whispering… Do not listen.
If the Guardian is not an Awoken:
- Sedia: And, Guardian? If the walls begin whispering… Do not listen.
If the Guardian is an Awoken:
- Sedia: Hold tight to reality as you walk the halls of that underworld, cousin.
Or
- Sedia: Unravel the curse at its source, cousin. Free us from this wretched cycle.
Or
- Sedia: Queen's blessing go with you, cousin.
Or
- Sedia: Safe journey, cousin. We will await your return.
Or
- Sedia: Let this be the last time you venture into this cursed place, cousin.
If the Guardian is not an Awoken:
- Sedia: Return triumphant, and we will name you the Cursebreaker.
Or
- Sedia: May the will of the Awoken protect you, Guardian.
Or
- Sedia: Take care in there, Guardian.
Or
- Sedia: I will stand vigil outside the gate while you journey beyond, Guardian.
Or
- Sedia: The Ascendant Plane has shattered Guardians wiser than you. Be cautious.
{Dungeon begins}
Erebus, The Dreaming City
- The Guardian enters the gateway into Eleusinia.
- Siren of Riven: Don't you feel foolish coming down here? I would, if I were you…
Or
- Siren of Riven: Relent, o murderer mine. There is no breaking this curse.
Or
- Siren of Riven: Reality is the finest flesh, o murderer mine. And are you not… hungry?
Or
- Siren of Riven: We have filled the world with teeth, you and I. See how they gleam…
Or
- Siren of Riven: You poor creature… You have hurt so much, haven't you? You have suffered so greatly. Shouldn't they be made to suffer the same way? Hush now, o murderer mine. We will erase your pain. We will strike it from your memory.
- The Guardian defeats Labyrinth Architects; revealing sigils to open the way downwards.
- Safe passage awaits…
The Descent, The Dreaming City
- The Guardian drops down to find a passage into the spire, fighting off Asterion, Set Apart and other Taken.
- Siren of Riven: You're fickle, you know that? That's why I like you.
Or
- Siren of Riven: I suppose this is your way of asking for a divorce. I refuse. You're stuck with me.
Or
- Siren of Riven: Come now. Listen to reason. You are throwing yourself at an impenetrable wall.
Or
- Siren of Riven: Here's a thought. Instead of fighting… let yourself be Taken. You wish for answers, don't you?
Or
- Siren of Riven: The mighty hero — fettered by small-minded ambitions. I think you have outgrown your purpose. I think you are destined for greater things. I think I am destined to guide you there.
Eleusinia, The Dreaming City
- Reaching inside the spire, Vorgeth, the Boundless Hunger and Keepers of Petitions arrive to block the way forward.
- The Guardian defeats a Keeper to gain a Petitioner's Mark, and with all four defeated, a Petitioner's Burden. With the Burden, the Guardian extinguishes a well to make Vorgeth vulnerable; then defeating them.
- Continuing on, the Guardian comes upon a statue of Sjur Eido.
- Sjur Eido: My name is Sjur Eido. I was the first to stand beside Mara Sov. You will be the last. But only if you prove yourself worthy…
If the Guardian has not yet collected Wish-Ender.
- Sjur Eido: You are unworthy.
Or
- Sjur Eido: I failed my Queen, but I will redeem myself.
Or
- Sjur Eido: Every moment free from fear amounts to immortality.
Or
- Sjur Eido: I know how death is vanquished.
Or
- Sjur Eido: I do not steal victory.
Or
- Sjur Eido: Prove yourself.
Or
- Sjur Eido: What we did expect never came to pass.
Or
- Sjur Eido: What we did not expect, greater powers brought to bear.
Or
- Sjur Eido: You cannot afford the leisure of inaction.
Or
- Sjur Eido: I swore an oath. I will not rest.
If the Guardian has collected Wish-Ender.
- Sjur Eido: You are worthy.
Or
- Sjur Eido: My strength is with you, hero.
Or
- Sjur Eido: Fear nothing. Bow to no one.
Or
- Sjur Eido: Do not ask how many stand against you — only where they are.
Or
- Sjur Eido: Fight like tomorrow will never arrive.
Or
- Sjur Eido: My oath still stands. I will rise again.
Or
- Sjur Eido: I will find my way back.
Or
- Sjur Eido: Fight like you are running out of time.
Or
- Sjur Eido: Let my hand guide you.
Or
- Sjur Eido: Respite, at last. I will seek a way home.
- The Guardian reaches a series of grav lifts and begins their journey to the spire's peak, fending off Yamaat, Ascendant Sentinel and other Taken.
- Siren of Riven: Don't tell me you believe the Queen's story…
Or
- Siren of Riven: There are better ways to furiously sleep green.
Or
- Siren of Riven: Seek out your manxome foe so long as you stand a while in thought.
Or
- Siren of Riven: This place was made to hide the Queen's death. Is she that different from Oryx?
Or
- Siren of Riven: O wanderer mine, where are you going? What are you doing? You are fighting the wind. You are swimming against the current. Why not let it wash over you? Why not just let go?
- At the peak, the Guardian confronts Dûl Incaru, the Eternal Return and her Fatesmiths: Alak-Tor, Ba-Kuur, and Gaurog. As the Guardian engages against the Fatesmiths, Dûl Incaru shields them.
- Dûl Incaru conjures…
- The Guardian shatters the crystal behind Dûl Incaru to break her conjuration. They then defeat the Fatesmiths, gaining Finite Thought; allowing them to defeat Dûl Incaru, the Eternal Return.
{Dungeon ends}
Unique Enemies[edit]
- Fleeting Shade
- Keeper of Petitions
Bosses[edit]
- The Labyrinth Architects
- Asterion, Set Apart
- Vorgeth, the Boundless Hunger
- Dûl Incaru, the Eternal Return
- Eriviks, the Waking (Wish-Ender Quest)
- Querim, the Waking (Wish-Ender Quest)
- Theratos, Archersbane (Wish-Ender Quest)
- Xavoth, the Waking (Wish-Ender Quest)
Rewards[edit]
Rewards that drop here will be the normal Dreaming City gear, such as the Reverie Dawn Suit and other Dreaming City-themed weapons. Drops from Shattered Throne are powerful and will increase a player's Power Level unless they are already at the soft cap for the current season. There will also be a chance for the rarer Dreaming City Ship, which is a required collection item for the Cursebreaker Seal.
Weapons[edit]
- Wish-Ender - Exotic
 Combat Bow (Challenge).
 - Abide the Return- Legendary
 Sword
Sword - Retold Tale - Legendary
 Shotgun
 - Sleepless - Legendary
 Rocket Launcher
 - Tigerspite - Legendary
 Auto Rifle
 - Twilight Oath - Legendary
 Sniper Rifle
 - Vouchsafe - Legendary
 Scout Rifle
 - Waking Vigil - Legendary
 Hand Cannon
Armor[edit]
Trivia[edit]
- The Shattered Throne is the first Dungeon in the Destiny series.
- The Shattered Throne is the only Dungeon that is able to be selected from within a destination, with the mission start located in The Confluence in the Dreaming City when the curse is at full power.
