Nightmare of the Fanatic: Difference between revisions
From Destinypedia, the Destiny wiki
Mrcroker 69 (talk | contribs) No edit summary |
Mrcroker 69 (talk | contribs) No edit summary |
||
| Line 13: | Line 13: | ||
|ability= Wrath of the Scorned <br> Shocking Effect <br> Summon Scorn <br> Summon Nightmares <br> High Durability <br> Rapid Movement <br> Teleportation <br> Nightmare Immunity <br> Ultra Smash | |ability= Wrath of the Scorned <br> Shocking Effect <br> Summon Scorn <br> Summon Nightmares <br> High Durability <br> Rapid Movement <br> Teleportation <br> Nightmare Immunity <br> Ultra Smash | ||
}} | }} | ||
{{Quote|The Light abandoned Cayde. Left him for dead. And kept him from being saved. Kept you from saving him. In Light, there is only failure.| | {{Quote|The Light abandoned Cayde. Left him for dead. And kept him from being saved. Kept you from saving him. In Light, there is only failure.|[[The Witness]] to the [[The Guardian|Guardian]], upon banishing the Nightmare of the Fanatic}} | ||
The '''Nightmare of the Fanatic''' is the [[Nightmare]] of the [[Archon]] and leader of the [[Scorn]]: [[Fikrul, the Fanatic]]. Serving as the Aspect of Insanity, it is the manifestation of [[The Guardian|Guardian's]] fears and trauma—created by the [[The Lunar Pyramid|Lunar]] [[Pyramid]]—and is used to taunt them by reminding them how the [[Light]] abandoned [[Cayde-6]] when he was most vulnerable. | The '''Nightmare of the Fanatic''' is the [[Nightmare]] of the [[Archon]] and leader of the [[Scorn]]: [[Fikrul, the Fanatic]]. Serving as the Aspect of Insanity, it is the manifestation of [[The Guardian|Guardian's]] fears and trauma—created by the [[The Lunar Pyramid|Lunar]] [[Pyramid]]—and is used to taunt them by reminding them how the [[Light]] abandoned [[Cayde-6]] when he was most vulnerable. Years later, it would reappear within the Underbelly of the [[Leviathan (ship)|Derelict Leviathan]], now serving the will of [[Emperor Calus]]. | ||
Years later, it | |||
==Gameplay== | ==Gameplay== | ||
| Line 25: | Line 23: | ||
After you have fought your way through the [[Hive]] fortress, you will reach the [[Shrine of Oryx]], where the Nightmare is waiting for you. The encounter will trigger when you approach the target on the other side of the Shrine, causing it to awaken and multiple, lesser Scorn Nightmares to appear alongside it. The boss shares most of its abilities with the real Fikrul. It can fire powerful blasts of [[Arc]] energy from it's [[Fanatic's Staff|staff]], and will raise it high in the air and slam it down on the ground if players get too close sending them flying backwards. Getting knocked back by this attack can kill you instantly if you hit a nearby wall, so it is important to remain weary of your surroundings, as well as how close you are to the boss. After taking enough damage, it will also gain the Fanatic's "Wrath of the Scorned" attack, where it will create a wide, circular area-of-effect around a random player. The boss will then begin to charge up with Arc energy before slamming its staff down, causing the circle to be bombarded with lightning. These can be avoided easily enough, however, by staying on the move at all times and quickly fleeing the effected areas whenever they appear. | After you have fought your way through the [[Hive]] fortress, you will reach the [[Shrine of Oryx]], where the Nightmare is waiting for you. The encounter will trigger when you approach the target on the other side of the Shrine, causing it to awaken and multiple, lesser Scorn Nightmares to appear alongside it. The boss shares most of its abilities with the real Fikrul. It can fire powerful blasts of [[Arc]] energy from it's [[Fanatic's Staff|staff]], and will raise it high in the air and slam it down on the ground if players get too close sending them flying backwards. Getting knocked back by this attack can kill you instantly if you hit a nearby wall, so it is important to remain weary of your surroundings, as well as how close you are to the boss. After taking enough damage, it will also gain the Fanatic's "Wrath of the Scorned" attack, where it will create a wide, circular area-of-effect around a random player. The boss will then begin to charge up with Arc energy before slamming its staff down, causing the circle to be bombarded with lightning. These can be avoided easily enough, however, by staying on the move at all times and quickly fleeing the effected areas whenever they appear. | ||
Like others of its kind, the boss is extremely durable and highly resistant against all attacks. However, picking up the Unstable Essence that drops from killing lesser enemies will greatly buff your damage against all Nightmares, allowing you to bring down the target much faster. After losing about a quarter of its health, the boss will summon more reinforcements and enter a state of immunity. Players must eliminate the all of the newly-spawned enemies in order to disable its defenses and continue the fight. This will have to performed a second time after the Nightmare of the Fanatic has lost another quarter of its health and once again enters its immunity phase. Once the Aspect of Insanity has been neutralized, the activity will be complete. Players will also be rewarded with the Essence of Insanity, which is required to unlock the [[Love and Death]] [[Grenade Launcher]]. | Like others of its kind, the boss is extremely durable and highly resistant against all attacks. However, picking up the Unstable Essence that drops from killing lesser enemies will greatly buff your damage against all Nightmares, allowing you to bring down the target much faster. After losing about a quarter of its health, the boss will summon more reinforcements and enter a state of immunity. Players must eliminate the all of the newly-spawned enemies in order to disable its defenses and continue the fight. This will have to performed a second time after the Nightmare of the Fanatic has lost another quarter of its health and once again enters its immunity phase. Once the Aspect of Insanity has been neutralized, the activity will be complete. Players will also be rewarded with the Essence of Insanity, which is required to unlock the [[Love and Death]] [[Grenade Launcher]].<ref>'''Bungie (2019/10/1)''', ''[[Destiny 2]]: [[Shadowkeep]], Playstation 4, [[Nightmare Hunt|Nightmare Hunt: Insanity]]''</ref> | ||
===Beyond=== | ===Beyond=== | ||
The Nightmare of the Fanatic serves as the second boss of the [[Beyond (mission)|Beyond]] mission. After you have defeated the [[Nightmare of Dominus Ghaul]] within the Lunar Pyramid, you will travel down a few more corridors before you reach the next objective. Upon approaching, the player will be teleported to a dark imitation of the entrance area of the [[The Watchtower|Watchtower]], where Fikrul was faced in the mission [[Nothing Left to Say]]. The Nightmare will then spawn with a third of its health gone. After you have dealt a small amount of damage, the boss will enter its immunity state and summon reinforcements to assist it. Just like the Nightmare Hunt, you must kill all of these enemies for Nightmare to become vulnerable once again. This will have to be repeated when two thirds of its health are gone and it regains its invincibility. When the boss is down to a quarter of its health, it will teleport behind the shield barrier blocking the entrance to the Watchtower, before you are transported back to the Pyramid, allowing you to progress on to the [[Nightmare of Crota, Son of Oryx|final boss]]. | The Nightmare of the Fanatic serves as the second boss of the [[Beyond (mission)|Beyond]] mission. After you have defeated the [[Nightmare of Dominus Ghaul]] within the Lunar Pyramid, you will travel down a few more corridors before you reach the next objective. Upon approaching, the player will be teleported to a dark imitation of the entrance area of the [[The Watchtower|Watchtower]], where Fikrul was faced in the mission [[Nothing Left to Say]]. The Nightmare will then spawn with a third of its health gone. After you have dealt a small amount of damage, the boss will enter its immunity state and summon reinforcements to assist it. Just like the Nightmare Hunt, you must kill all of these enemies for Nightmare to become vulnerable once again. This will have to be repeated when two thirds of its health are gone and it regains its invincibility. When the boss is down to a quarter of its health, it will teleport behind the shield barrier blocking the entrance to the Watchtower, before you are transported back to the Pyramid, allowing you to progress on to the [[Nightmare of Crota, Son of Oryx|final boss]].<ref>'''Bungie (2019/10/1)''', ''[[Destiny 2]]: [[Shadowkeep]], Playstation 4, [[Beyond (mission)|Beyond]]''</ref> | ||
===Sever - Shame/Reconciliation=== | ===Sever - Shame/Reconciliation=== | ||
The Nightmare of the Fanatic appears as the final boss of the first and second Sever missions: Shame and Reconciliation. The encounters in both of them function identically to each other. | The Nightmare of the Fanatic appears as the final boss of the first and second [[Sever]] missions: [[Sever - Shame|Shame]] and [[Sever - Reconciliation|Reconciliation]]. The encounters in both of them function identically to each other. | ||
After traversing the Underbelly of the Derelict Leviathan, the player will reach the Gauntlet, where Crow and the Nightmare of Uldren are waiting. You must then interact with the [[Nightmare Harvester]] to begin the Severance Ritual. Before beginning the encounter, the player may place a Rally Banner for them—and their [[Fireteam]] if they have one—to fully replenish their ammo and ability energy, if they need to do so. Once the ritual has begone, the Nightmare of Uldren will briefly torment Crow before the boss arrives the fight commences. It possesses the same abilities as it did in the previous battles. After you have dealt a small amount of damage to it, the Nightmare will teleport away, retreating into the Gauntlet's outer circle. A resonant | After traversing the Underbelly of the Derelict Leviathan, the player will reach the Gauntlet, where [[Crow]] and the [[Nightmare of Uldren]] are waiting. You must then interact with the [[Nightmare Harvester]] to begin the Severance Ritual. Before beginning the encounter, the player may place a Rally Banner for them—and their [[Fireteam]] if they have one—to fully replenish their ammo and ability energy, if they need to do so. Once the ritual has begone, the Nightmare of Uldren will briefly torment Crow before the boss arrives the fight commences. It possesses the same abilities as it did in the previous battles. After you have dealt a small amount of damage to it, the Nightmare will teleport away, retreating into the Gauntlet's outer circle. A resonant portal will then appear for you to chase after it. | ||
After the player has entered the obstacle course, the boss will begin to make use of its "Wrath of the Scorn" ability, whilst summoning Nightmares and Scorn reinforcements to slow the player down as it attempts to run away from them. It will stop to fight when it comes to a wall half way through, and you will have brief opportunity to attack it before it teleports around it and continues to flee. It is important to pick up Unstable Essence that drop from dead Nightmares in order to maximize your damage output. Once the boss has reached the end of the obstacle course, you will have another short chance to drain its health as much as you can before it becomes immune and you are teleported back to the inner arena of the Gauntlet. Upon returning, multiple Scorn will spawn to and begin charging you. A [[Scythe]] will manifest at the Nightmare Harvester after the first wave of enemies is defeated, allowing you to deal with the rest more easily. Once they have all been eliminate, the portal to the outer area will reappear, allowing the player to go back to chasing the boss. You will have to repeat this process as many times as it takes to kill the Nightmare, but it will most likely only take two or three runs. Once the boss has been neutralized, the mission will be complete and you watch the final interaction between Crow an his Nightmare. The player may also open the chest to gain powerful gear if they have Bound Presence in their inventory. | After the player has entered the obstacle course, the boss will begin to make use of its "Wrath of the Scorn" ability, whilst summoning Nightmares and Scorn reinforcements to slow the player down as it attempts to run away from them. It will stop to fight when it comes to a wall half way through, and you will have brief opportunity to attack it before it teleports around it and continues to flee. It is important to pick up Unstable Essence that drop from dead Nightmares in order to maximize your damage output. Once the boss has reached the end of the obstacle course, you will have another short chance to drain its health as much as you can before it becomes immune and you are teleported back to the inner arena of the Gauntlet. Upon returning, multiple Scorn will spawn to and begin charging you. A [[Scythe]] will manifest at the Nightmare Harvester after the first wave of enemies is defeated, allowing you to deal with the rest more easily. Once they have all been eliminate, the portal to the outer area will reappear, allowing the player to go back to chasing the boss. You will have to repeat this process as many times as it takes to kill the Nightmare, but it will most likely only take two or three runs. Once the boss has been neutralized, the mission will be complete and you watch the final interaction between Crow an his Nightmare. The player may also open the chest to gain powerful gear if they have Bound Presence in their inventory.<ref>'''Bungie (2022/5/24)''', ''[[Destiny 2]]: [[Season of the Haunted]] - [[Mission]]: [[Sever - Shame]]''</ref><ref>'''Bungie (2022/5/24)''', ''[[Destiny 2]]: [[Season of the Haunted]] - [[Mission]]: [[Sever - Reconciliation]]''</ref> | ||
===Catharsis=== | ===Catharsis=== | ||
Revision as of 14:34, July 7, 2022
 This article is a stub. You can help Destinypedia by expanding it.
| Nightmare of the Fanatic | |
|---|---|
| |
| Biographical information | |
|
Other names: |
Fading Nightmare of the Fanatic |
|
Species: |
|
|
Faction: |
|
|
Rank: |
|
|
Class: |
|
|
Gender: |
Male |
| Combat information | |
|
Mission: |
A Mysterious Disturbance (briefly) |
|
Weapon(s): |
|
|
Abilities: |
Wrath of the Scorned |
- "The Light abandoned Cayde. Left him for dead. And kept him from being saved. Kept you from saving him. In Light, there is only failure."
- — The Witness to the Guardian, upon banishing the Nightmare of the Fanatic
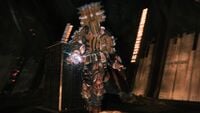
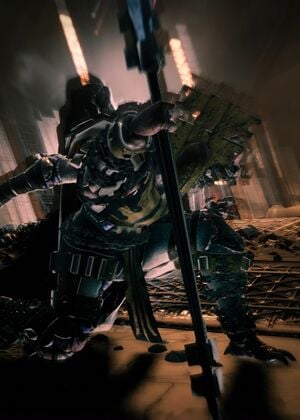
The Nightmare of the Fanatic is the Nightmare of the Archon and leader of the Scorn: Fikrul, the Fanatic. Serving as the Aspect of Insanity, it is the manifestation of Guardian's fears and trauma—created by the Lunar Pyramid—and is used to taunt them by reminding them how the Light abandoned Cayde-6 when he was most vulnerable. Years later, it would reappear within the Underbelly of the Derelict Leviathan, now serving the will of Emperor Calus.
Gameplay
Nightmare Hunt: Insanity
The Nightmare of the Fanatic can be found in the Nightmare Hunt: Insanity, which becomes available on the Moon every two to three weeks.
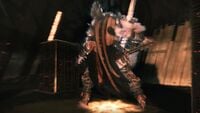
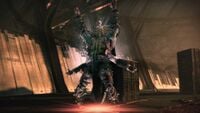
After you have fought your way through the Hive fortress, you will reach the Shrine of Oryx, where the Nightmare is waiting for you. The encounter will trigger when you approach the target on the other side of the Shrine, causing it to awaken and multiple, lesser Scorn Nightmares to appear alongside it. The boss shares most of its abilities with the real Fikrul. It can fire powerful blasts of Arc energy from it's staff, and will raise it high in the air and slam it down on the ground if players get too close sending them flying backwards. Getting knocked back by this attack can kill you instantly if you hit a nearby wall, so it is important to remain weary of your surroundings, as well as how close you are to the boss. After taking enough damage, it will also gain the Fanatic's "Wrath of the Scorned" attack, where it will create a wide, circular area-of-effect around a random player. The boss will then begin to charge up with Arc energy before slamming its staff down, causing the circle to be bombarded with lightning. These can be avoided easily enough, however, by staying on the move at all times and quickly fleeing the effected areas whenever they appear.
Like others of its kind, the boss is extremely durable and highly resistant against all attacks. However, picking up the Unstable Essence that drops from killing lesser enemies will greatly buff your damage against all Nightmares, allowing you to bring down the target much faster. After losing about a quarter of its health, the boss will summon more reinforcements and enter a state of immunity. Players must eliminate the all of the newly-spawned enemies in order to disable its defenses and continue the fight. This will have to performed a second time after the Nightmare of the Fanatic has lost another quarter of its health and once again enters its immunity phase. Once the Aspect of Insanity has been neutralized, the activity will be complete. Players will also be rewarded with the Essence of Insanity, which is required to unlock the Love and Death Grenade Launcher.[1]
Beyond
The Nightmare of the Fanatic serves as the second boss of the Beyond mission. After you have defeated the Nightmare of Dominus Ghaul within the Lunar Pyramid, you will travel down a few more corridors before you reach the next objective. Upon approaching, the player will be teleported to a dark imitation of the entrance area of the Watchtower, where Fikrul was faced in the mission Nothing Left to Say. The Nightmare will then spawn with a third of its health gone. After you have dealt a small amount of damage, the boss will enter its immunity state and summon reinforcements to assist it. Just like the Nightmare Hunt, you must kill all of these enemies for Nightmare to become vulnerable once again. This will have to be repeated when two thirds of its health are gone and it regains its invincibility. When the boss is down to a quarter of its health, it will teleport behind the shield barrier blocking the entrance to the Watchtower, before you are transported back to the Pyramid, allowing you to progress on to the final boss.[2]
Sever - Shame/Reconciliation
The Nightmare of the Fanatic appears as the final boss of the first and second Sever missions: Shame and Reconciliation. The encounters in both of them function identically to each other.
After traversing the Underbelly of the Derelict Leviathan, the player will reach the Gauntlet, where Crow and the Nightmare of Uldren are waiting. You must then interact with the Nightmare Harvester to begin the Severance Ritual. Before beginning the encounter, the player may place a Rally Banner for them—and their Fireteam if they have one—to fully replenish their ammo and ability energy, if they need to do so. Once the ritual has begone, the Nightmare of Uldren will briefly torment Crow before the boss arrives the fight commences. It possesses the same abilities as it did in the previous battles. After you have dealt a small amount of damage to it, the Nightmare will teleport away, retreating into the Gauntlet's outer circle. A resonant portal will then appear for you to chase after it.
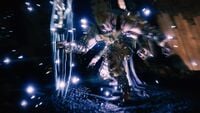
After the player has entered the obstacle course, the boss will begin to make use of its "Wrath of the Scorn" ability, whilst summoning Nightmares and Scorn reinforcements to slow the player down as it attempts to run away from them. It will stop to fight when it comes to a wall half way through, and you will have brief opportunity to attack it before it teleports around it and continues to flee. It is important to pick up Unstable Essence that drop from dead Nightmares in order to maximize your damage output. Once the boss has reached the end of the obstacle course, you will have another short chance to drain its health as much as you can before it becomes immune and you are teleported back to the inner arena of the Gauntlet. Upon returning, multiple Scorn will spawn to and begin charging you. A Scythe will manifest at the Nightmare Harvester after the first wave of enemies is defeated, allowing you to deal with the rest more easily. Once they have all been eliminate, the portal to the outer area will reappear, allowing the player to go back to chasing the boss. You will have to repeat this process as many times as it takes to kill the Nightmare, but it will most likely only take two or three runs. Once the boss has been neutralized, the mission will be complete and you watch the final interaction between Crow an his Nightmare. The player may also open the chest to gain powerful gear if they have Bound Presence in their inventory.[3][4]
Catharsis
Gallery
Trivia
- As a Scorn, the real Fikrul can be resurrected with Dark Ether, meaning that the Nightmare of the Fanatic is among those that could represent a living enemy, alongside the Nightmare of Taniks, the Scarred, whose template has a history of cheating death.
List of appearances
- Destiny 2
- Shadowkeep (First appearance)
References
- ^ Bungie (2019/10/1), Destiny 2: Shadowkeep, Playstation 4, Nightmare Hunt: Insanity
- ^ Bungie (2019/10/1), Destiny 2: Shadowkeep, Playstation 4, Beyond
- ^ Bungie (2022/5/24), Destiny 2: Season of the Haunted - Mission: Sever - Shame
- ^ Bungie (2022/5/24), Destiny 2: Season of the Haunted - Mission: Sever - Reconciliation
