Vow of the Disciple
From Destinypedia, the Destiny wiki
|
Prev: |
|
|
Next: |
Unknown |
| Vow of the Disciple | |
|---|---|

| |
|
Game: |
|
|
Player(s): |
1-6 |
|
Recommended Power Level: |
1530 |
|
Location: |
|
|
Destinypedia has a walkthrough guide for this level; see Vow of the Disciple/Walkthrough. | |
| “ | The disciple beckons... | ” |
 This article is a stub. You can help Destinypedia by expanding it.
Vow of the Disciple is a Raid in Destiny 2, released in the Witch Queen expansion on March 5, 2022.[1] Facing a sunken Pyramid lying in the swamps of Savathûn's Throne World, Guardians must venture inward and confront the ancient evil imprisoned within.
Walkthrough
Entrance
Guardians will spawn facing the entrance to the raid, with a projection of Savathun and numerous Hive defending it. Killing the projection will despawn all enemies and allow progression. It's just a short Sparrow section to reach the first area.
Disciple's Bog
Guardians must get within close proximity of the payload to begin this section. The payload will advance towards the Pyramid, stopping at 6 different points. Scorn waves will begin spawning, including Knowledge Bearer Abominations. Killing these Abominations will cause knowledge-granting Darkness shards to spawn in the area. Collect these (a maximum of 3 can be held) and bring them back to the payload to allow it to advance again. While Knowledge Bearers live, anyone not within close proximity to the payload will receive stacks of darkness. Once this reaches 10, the Guardian will die.
There are 3 different Darkness shard switches that can be shot during this segment to allow an optional chest to be opened. The first shard can be found nestled beneath the rocks and trees on the left hand side of the second stopping point for the payload. The second can be found at the end of the long path that is taken by the payload to reach the third stopping point. The final switch can be found beneath the bridge that the payload flies over, just after the fourth stopping point. This can be shot from the far side from the fourth stop.
The reward chest can be found to the right of the fifth stopping point, inside a building above the swamp level. The door will only open once all 3 switches have been shot.
Acquisition
In this section, Guardians must defend 3 obelisks from Scorn attackers (various minor units, and Unstoppable Abominations). 2 shield-bearing Abated Adherent Scorn units will home in on the obelisk, firing upon it, causing it to fill up with energy. Once any obelisk completely fills, a wipe will occur, killing all Guardians.
To complete this section and open the way to continue, 3 specific symbols on each obelisk must be shot within a short period of time of each other. Knowing which to shoot is revealed via a specific process. The fireteam should split into 3 teams, 2 at each obelisk, with one nominated as the runner, the other as the defender.
Directly across from each obelisk, there are columns of 3 panels that start out blank. When the encounter begins (by firing upon the Darkness switch found in the middle of the area), the top symbol will be revealed on one of these columns, showing either Traveler or Pyramid. This indicates the spawning point for a Disciple’s Compass Taken Knight. The large central structures of the area will indicate which side is Traveler and which side is Pyramid, via the symbols found on them. Killing the Disciple’s Compass will reveal the next symbol on the column that indicated its spawn point.
The middle symbol will then reveal which room must be entered, of which there are 9 spread around the area. Each runner will have 3 rooms they handle, closest to their obelisk. The runner must enter the specified room to begin revealing the next symbol on the current concern column. If the door of the room is not open, shoot the Darkness switch to swap which side of the room has open doors, Traveler or Pyramid.
Once inside, the runner will contend with a wave of Screebs, and two Glyphkeeper Chieftans, spawning on the "light" and "dark" side of the room. Depending upon the third symbol revealed on the column outside (light or dark), the runner should kill the corresponding Glyphkeeper, which will then reveal a symbol on its initial spawn point. This will be one of the symbols you have to shoot on an obelisk outside. Killing a Glyphkeeper will reset the level of energy in all obelisks around the room, providing more time to survive.
Repeat this process of hunting the Knight via the revealed symbol, sending a runner to the specified room, calling out whether to kill the light or dark side Glyphkeeper, until you have 3 symbols. Once you know all 3, check which obelisk has all 3 of these symbols, and shoot them within a short period of time of one another. This will then "accept" your offering, to complete the first stage. If you are too slow to shoot the right symbols, your offering will be rejected, shuffling the symbols and causing the obelisk to fill up with energy. Try shooting the right symbols again to progress.
Repeat this process until you have shot 3 symbols for each of the 3 obelisks, and you will succeed.
Collection
The next encounter is against The Caretaker. For this fight, a recommended setup is to split into 3 teams of 2. One team will be the Symbol Team, another team will be the Stun Team, and the third team will be the Kill Team. To begin, shoot either of the Darkness switches on either side of the door opposite the obelisk.
Symbol Team: The Symbol Team's job is to enter the dark room across from the obelisk one at a time. The reason for the one at a time rule is that the door to the room will close after a short period, leaving the Guardian inside trapped. Shooting a switch outside will open the door again. The other team member should be keeping the door open at all times, while assisting the Kill Team
Once inside, Pervading Darkness stacks will begin to accrue, of which 10 will kill the Guardian. Symbols can be found floating off the ground in the room, of which a Guardian can pick up a maximum of 3. The objective is for a Symbol Team member to race into the room, grab symbols, leave the room, and then shoot the corresponding symbols they picked up on the obelisk outside. Warning text in the bottom left corner will indicate when a player can begin shooting their symbols to provide an "offering". Picking up only 2 symbols is advised, as it is easiest to be able to shoot 2 within the small timeframe you have to have your offering "accepted". Picking up 3 risks having each symbol be on a different face of the triangular prism that makes up an obelisk. You have a tough timeframe to rotate and shoot the right symbol on all 3 sides, in this instance. With only two symbols, you may have them both on one side, or can stand facing the edge shared by the two sides and shoot the symbols you have with ease. Failing to shoot the correct symbols in the granted timeframe will cause your offering to be "rejected", meaning you lose any symbols you collected, returning them to the room.
Be careful of your Pervading Darkness stacks when entering the room. Higher stack counts will limit your visibility, hampering your chances of navigating the room and obtaining symbols, and 10 will kill you. You may need to wait a short time outside for these stacks to tick down before going back inside.
Collecting, shooting and clearing all symbols from the Obelisk will provide a warning message that the ritual is complete, indicating that the damage phase will soon begin.
Stun Team: The Stun Team's objective is to prevent The Caretaker from progressing to the obelisk, as once it reaches the obelisk, it will overflow the obelisk with energy, killing all raid fireteam members. One member should be nominated as the face side, the other member as the back side. The face side member should stick close to The Caretaker, which will force it to fixate on them. They should then shoot the face of The Caretaker when it glows, which will cause the small coffin-like object on its back to open, exposing a weak point. The back side member should then shoot this weak point, which will cause The Caretaker to become stunned, falling to one knee. The face side member should always try to rotate The Caretaker so that it is walking backwards to the obelisk, which will allow the back side member to stun it easily, and also provide the ability for other Guardians to assist with shooting this if the back side member is unable to for any reason. As the face side member, be wary of stomps from The Caretaker. A well-timed melee attack will prevent you from being knocked away.
Kill Team: The Kill Team objective is to kill any and all enemies that spawn in the room. Abated Adherent's will spawn again, aiming to shoot the obelisk to fill it with energy. These take priority over other enemies. Kill Team members should also help take care of the Darkness Scale drones that spawn from The Caretaker's back. Leaving these alive can heavily endanger the Stun Team, as they will turn into homing missiles when an unspecified mechanism is triggered.
Damage Phase: Once all 9 symbols on the obelisk have been shot and cleared, The Caretaker will no longer be stunnable, continuing its advance to the obelisk. 3 plates will surround the obelisk, which is where damage is performed. When The Caretaker reaches the obelisk, the plate from the side The Caretaker approached will glow, providing a Resonant Breakthrough buff to anyone standing on it. This allows damage to be done. After a set amount of time, the plate will de-power and the next one along will begin glowing. Move to this plate as a group and begin damage again. Once more, the plate will de-power and the final plate will glow. Move to this for your final chance to do damage for this floor.
Once the boss has been damaged enough, or all 3 plates have been exhausted, The Caretaker will gain immunity and teleport away. Stairs will lower on both sides of the floor, allowing the fireteam to advance to the next. Repeat this process on 3 different floors to advance to the final stand floor, where the 3 plates will be in a row towards The Caretaker. The same mechanic to damage exists here, no obelisk to worry about.
For skilled fireteams, it is possible to skip the third floor obelisk entirely. When damaging The Caretaker per floor, on the second plate, be careful not to push its health to the end of its current segment. The reason for this is that the third damage plate provides a longer opportunity to damage The Caretaker than the first and second. If the fireteam pushes as much of its damage on the third plate, it's possible to push damage into The Caretaker's next health segment. Save your high damage supers (Orpheus Rigs Moebius Quiver, Nova Bomb, Cuirass Thundercrash) for the third plate, in this instance.
Exhibition
The Exhibition encounter will start the fireteam off in a small room with a Darkness Shard to pick up. One Guardian must pick this up to start the encounter. When picked up, everyone will be given the Terminal Resonance debuff. It will have a countdown timer on it, which, when it reaches 0:00, will kill all Guardians. The aim of this encounter is to move as fast as possible to the next room to deposit relics to reset your timer, to allow progression.
Room 1: After picking up the Shard, 2 Glyphkeepers (A Scorn Chieftan on the left and a Taken Phalanx on the right) and a shielded Taken Knight called the Disciple's Hourglass will spawn in the room. Killing a Glyphkeeper will cause 3 symbols to appear in a column, in a fixed position on its side of the room. The Chieftan symbols can be read by anyone not holding a relic. The Phalanx symbols can be read by anyone who is currently holding a relic. Kill both Glyphkeepers to learn which symbol is in common between the two columns that spawn. Shooting this symbol out of the 6 surrounding the locked door will cause it to open, allowing the fireteam to advance.
To make it simple to identify which symbol is in common, one side should call out their symbols, and the other side should then determine which is in common and declare that to the fireteam.
For the Disciple's Hourglass, this Taken Knight allows the fireteam to reset the Terminal Resonance timer. The shield surrounding it can only be destroyed by firing the laser from the Shard at it. Once dead, it will reset the timer on Terminal Resonance to maximum.
Room 2: This next room will provide a deposit point for the Shard. Placing this will reset Terminal Resonance, and spawn the Aegis from the Vault of Glass raid on the other side of the room. 2 fireteam members must then pick up the Shard and the Aegis to continue. The player that deposits the Shard will gain a debuff called Curbed Resonance, which will prevent them from picking up any relic for 30 seconds.
The Aegis from Vault of Glass functions exactly the same as in that raid. Shielding with the Aegis, via the sword block button, will create a bubble around the holder. Standing inside this bubble will remove Pervading Darkness, which will now begin to accrue on players through the rest of Exhibition. The Aegis holder must be ready to cleanse Guardians with regularity to keep the fireteam alive.
Advancing into the next room, the fireteam should split into two teams of three on each side. Various Scorn and Taken units will appear to harass the fireteam. Killing them will advance spawns of more enemies, and eventually a Glyphkeeper on each side. Killing these Glyphkeepers will spawn symbols, and the same identification process as in Room 1 must occur. Once the Glyphkeepers are dead, Overload Hobgoblins will spawn. These can be killed or ignored, as moving toward the next objective will render them unable to attack you. Keep moving towards the far end of the room. The Shard holder should kill the Disciple's Glyphkeeper to reset Terminal Resonance. Keep killing enemies to spawn two more Glyphkeepers. Once dead, more symbols appear. Identify the shared symbol, and together with the symbol identified in the first set of Glyphkeepers for Room 2, shoot the two symbols at the door to open it and advance. Ensure you kill the next Disciple's Glyphkeeper before doing this, to give yourself some extra time.
Be careful when rushing into the next room, as Screebs will spawn in a large group near the deposit points. Kill these from afar before moving forward. Have the Aegis holder deposit as soon as they can, but have the Shard holder keep it in their grasp. The reason for this is that the Aegis holder has 30 seconds of Curbed Resonance when depositing, being unable to grab a relic, and you should have enough time left on Terminal Resonance to let Curbed Resonance expire for them. This provides another person who can grab a relic in case of emergency or if the group identifies them as proficient with that relic. This is important for Room 4, but first...
Room 3: Room 3 introduces another relic, this time, Taken Essence from Last Wish. It functions the exact same as Last Wish. The intended usage for the Taken Essence here is for the holder to cleanse Taken blights that will tether and protect enemies. Pushing the grenade button next to the blight will cleanse them. Two will spawn, one on left, one on right, for each set of Glyphkeepers. Cleansing both will be required to advance.
The exact same behavior as the last room will need to be followed initially. Three on left, three on right. However, once the first set of Glyphkeepers have been defeated, all players can rendezvous where the right set of symbols spawn to be cleansed, then advance up the right side as a team to defeat the large amount of enemies that will appear, and make it easier for the Aegis holder to provide periodic cleanses to all, and protect the Taken Essence holder when they go to cleanse blights.
For the Shard holder, the Disciple's Hourglass will spawn on a tiny platform in the middle of the abyss, in the middle of the room. This will be the same spot for the next Knight for the next set of Glyphkeepers, so take note of this spot.
Continue advancing as a crew, defeating Overload Hobgoblins, Glyphkeepers and Scorn to identify the correct symbols for the next door. Speed is essential due to the timer you are on. Once you know the right symbols and have killed the last Disciple's Hourglass, shoot the symbols and pile in to the next room, being careful of the Screeb wave. Deposit the Aegis and the Taken Essence, wait for Curbed Resonance to expire, then deposit the Shard.
Room 4: The final room, with no new mechanics or pick-ups required. The difficulty of this room is substantially increased due to the requirement for more platforming, as there is a large abyss to fall into that might doom your efforts. Enemies adore jumping between the platforms, so be extra careful not to get bodychecked by a Scorn in mid-air, sending you down to the depths. Dropping a relic into the abyss will return it to the start of this section, so dropping one might prove to be fatal to your clear efforts, as you need to rush back to grab it then come back to perform your job.
As before, split into two teams of three, advance to the small rooms on the left and right, cleansing blights, killing fodder and then Glyphkeepers. Once you identify the first symbol in common, gather up on a middle island to make it easier for the Aegis holder to perform a cleanse for everyone.
The Disciple's Hourglass spawn location for this room is on the highest island with the roof very close to it. This is generally a safe spot to be in, as the small walls can provide cover from the numerous enemies around. It can also be dangerous though, as fire belched by the Disciple's Hourglass and grenades from Scorn may prove inescapable by jumping due to the low ceiling.
Once you kill all Glyphkeepers and identify the common symbols, shoot them again, advance into the next room, staying aware of the Screebs, and deposit all relics to clear the encounter.
Rhulk, Disciple of the Witness
Bosses
Unique enemies
- Abated Adherent
- Disciple's Centurion
- Disciple's Compass
- Disciple's Hourglass
- Glyphkeeper
- Knowledge Bearer
- Resonant Glyphkeeper
Rewards
Weapons
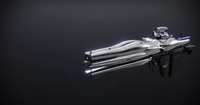
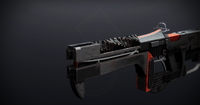
- Collective Obligation - Exotic Pulse Rifle[2]
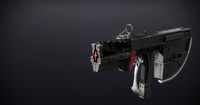
- Submission - Legendary Submachine Gun[2]
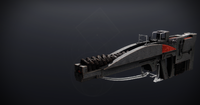
- Cataclysmic - Legendary Linear Fusion Rifle[2]
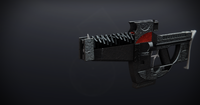
- Insidious - Legendary Pulse Rifle[2]
- Forbearance - Legendary Grenade Launcher[2]
- Deliverance - Legendary Fusion Rifle[2]
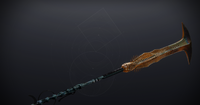
- Lubrae’s Ruin - Legendary Glaive[2]
Armor
Other rewards
Gallery
Weapons
Trivia
- This is the first raid to have Scorn as the main enemy faction.
- This is also the third raid with Taken as an enemy faction.
- This is the first raid to have a final boss from a race previously never seen nor mentioned in the Destiny franchise.
- This is the first raid to ever have two factions that are normally hostile towards each other, be allies.
