Vow of the Disciple: Difference between revisions
From Destinypedia, the Destiny wiki
RageReptile (talk | contribs) Tag: Mobile edit |
RageReptile (talk | contribs) Tag: Mobile edit |
||
| Line 63: | Line 63: | ||
It is recommended to use either power linear fusions or rocket launchers with at least 1 gally for boss dps. Well of radiance and ward of dawn should be avoided, as no adds spawn during dps and the boss only uses the darkness cockroaches for attacks. High damage supers like Golden Gun, Choas Reach, or Thundercrash are recommended. Mobeius Quiver is also recommended for extra tether damage. For kinetic and energy loadouts, it is ideal to have at least one medium to long range weapon and one ad clear weapon. Weapons like scout rifles, snipers and auto rifles will be effective at getting rid of the darkness cockroaches, while weapons like witherhoard, outbreak perfected, smgs and grenade launchers will be effective at getting rid of large amounts of ads. | It is recommended to use either power linear fusions or rocket launchers with at least 1 gally for boss dps. Well of radiance and ward of dawn should be avoided, as no adds spawn during dps and the boss only uses the darkness cockroaches for attacks. High damage supers like Golden Gun, Choas Reach, or Thundercrash are recommended. Mobeius Quiver is also recommended for extra tether damage. For kinetic and energy loadouts, it is ideal to have at least one medium to long range weapon and one ad clear weapon. Weapons like scout rifles, snipers and auto rifles will be effective at getting rid of the darkness cockroaches, while weapons like witherhoard, outbreak perfected, smgs and grenade launchers will be effective at getting rid of large amounts of ads. | ||
=== | ===Exhibition=== | ||
The Exhibition encounter will start the fireteam off in a small room with a relic to pick up. One player must pick this up to start the encounter. When a player picks it up, everyone will be given the "Terminal Resonance" debuff. It will have a countdown timer on it, which, when it reaches 0:00, the team will wipe. The aim of this encounter is to move as fast as possible to open doors before the timer runs out. After picking up the relic, 2 glyphkeepers and a special knight called the "Disciples Hourglass" will spawn in the room, which can only be killed the laser relic. The knight will have an immunity shield that can only be destroyed by the relic. The glyphkeepers must be killed first, as when one is killed, a set of 3 symbols will show up. The people who can see the symbols depends on the enemy the glyphkeeper. If it was a Scorn Chieftain, only people without a relic will be able to see it. If it was a Taken Centurion, only a relic holder can see it. | |||
How symbols work: | |||
When the glyphkeepers are killed, one player without a relic must go to the set they can see, and a relic holder must go to the other. One of the callers must say all of their symbols, and the other must find which one matches. That symbol will then be needed to open a door opposite the starting area. | |||
In the first room it will go: | |||
a) kill the glyphkeepers | |||
b) call out the symbols set and find the matching one | |||
c) kill the shielded knight with the laser relic to show the symbols on the door and increase the timer on terminal resonance | |||
d) shoot the right symbol on the door to open it and prepare for the next room | |||
e) deposit the relic so someone else can pick it up, as you will be given a debuff called "Curbed Resonance" which will lock you out of picking up any relics | |||
Room 2: | |||
a) the first relic must be picked up, then a second relic will spawn in. This relic will be the Aegis from the Vault of Glass. This second relic will be used to cleanse players of Pervading Darkness, otherwise they'll die. | |||
b) players will split up and go one of 2 ways to kill glyphkeepers for the symbols | |||
c) unlike the last room, another 2 glyphkeepers will spawn, amounting to 2 symbols required for the door | |||
d) a knight will spawn after the first glyphkeepers are killed in the room at the door to the next room. Kill it to increase the timer | |||
e) once both symbols are found repeat the process from the first room | |||
Room 3: | |||
a) this room will be similar to room 2, albeit with one more relic, taken essence from Last Wish. This will require the player to use the grenade ability to destroy blights giving immunity to enemies. | |||
Room 4: | |||
a) no difference at all. No new relics, no increased amount of glyphkeepers. | |||
Once all rooms are cleared, deposit all the relics in the last room to complete the encounter. | |||
===Rhulk, Disciple of the Witness=== | ===Rhulk, Disciple of the Witness=== | ||
Revision as of 02:39, April 21, 2022
|
Prev: |
|
|
Next: |
Unknown |
| Vow of the Disciple | |
|---|---|
| |
|
Game: |
|
|
Player(s): |
1-6 |
|
Recommended Power Level: |
1530 |
|
Location: |
|
|
Destinypedia has a walkthrough guide for this level; see Vow of the Disciple/Walkthrough. | |
| “ | The disciple beckons... | ” |
 This article is a stub. You can help Destinypedia by expanding it.
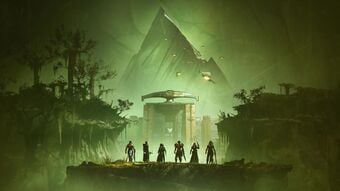
Vow of the Disciple is a Raid in Destiny 2, released in the Witch Queen expansion on March 5, 2022.[1] Facing a sunken Pyramid lying in the swamps of Savathûn's Throne World, Guardians must venture inward and confront the ancient evil imprisoned within.
Walkthrough
Payload
Kill Abominations, deposit Knowledge buffs they drop on cart. Repeat 6x.
Obelisk
Steps:
- Defend 3 obelisks from scorn. Each obelisk should have a “runner” and a “defender” - Each obelisk has a corresponding wall that will display 3 symbols that the defender must read:
- - Top: displays “Traveler” or “Pyramid,” a taken knight will spawn on the corresponding side. Killing this knight will show the next symbol.
- - Middle: displays one of nine symbols, these symbols will be found above doors around the arena. If a door is closed, defender should shoot the thing used to start the encounter to open the door. Runner entering this room will display the next symbol for the defender.
- - Bottom: displays light or dark, runner kills the chieftain (“Glyphkeeper”) on the corresponding side. This will show the runner another symbol and spawn three symbols on each obelisk. Runner needs to remember the symbol.
- Repeat this for all three obelisks.
- One of the three obelisks will have all three symbols remembered by the runners. Three people will find that obelisk and shoot all three symbols at once on that obelisk.
- -If done correctly, your team’s “offering” will be “accepted.” Repeat from the beginning two more times.
- -If done wrong or too slow, your team’s “offering” will be “rejected,” which will shuffle the symbols on the obelisks. Remember the same symbols and try again.
Wipe Mechanics:
- The obelisks will appear to fill up with a yellow glow. This is a timer. Once the timer fills up the team wipes. Completing obelisk walls resets the timer.
- Abated Adherents can damage the obelisks. Too much damage will wipe the team.
The Caretaker
starting off the encounter, the fireteam should split up into 3 teams of 2 (however you can change this). 1 team is focused on symbols for an obelisk, 1 on stunning the boss and the rest on clearing the room of enemies.
-symbols team: the team doing symbols must have one member go into the room behind the obelisk, which will start the encounter. When in this room, the "Pervading Darkness" debuff will be inflicted on the player, which will kill them should it reach 10 stacks. The aim is to run in and get three small cruxes of darkness, which grant a stack of knowledge. Each crux has a certain symbol above it. The person who went into the room must remember the symbols they collected and head to the entrance. Another fireteam member must open the door to let them out. The player then has to find the 3 corresponding symbols on the obelisk in the centre, and shoot all three as quickly as possible (doesn't have to be in the order that you picked them up). Shooting all three correct symbols within the time frame will bring up a prompt stating "the obelisk accepts your offering". Repeat 2 more times with a different member of symbols team going in to avoid death from pervading darkness. Failure to shoot the correct symbols will cause the obelisk to reject your offering and remove your stacks of knowledge, and returning the symbols to the room. Once all symbols on the obelisk are removed, the dps phase will begin.
-Boss stun team: 2 members of the fireteam must focus on going up to the boss and stunning him. One member must go in front of his face to get the 'Caretakers Gaze' debuff, which, similar to Golgoroths Gaze from Kingsfall, will make the Caretaker focus only on the player with the debuff. They must then wait until his face glows yellow. When it does, shoot his face. This will cause his back to open. The other member must then shoot his back as soon as possible to stun the boss in place. Flying "darkness cockroaches" will shoot out of his back, which must be shot immediately, as they do substantial damage to the player. This stun must be done as many times as possible to prevent the boss to making it to the obelisk, otherwise the team wipes. Once damage phase begins however, stunning him is not necessary.
DPS phase: Once symbols team has cleared the obelisk of symbols, the caretaker will no longer be stunnable. Whichever stair side the caretaker went up, a small well will show up on a plate corresponding to the side the caretaker is on. When inside this well, the player will have buff "Resonant Breakthrough" which allows players to damage the boss. Players must stay in this well to continue dealing damaging the boss, as stepping out will remove the buff(this also applies to DoT damage weapons like witherhoard). After a certain amount of time, a small text will say "the current well begins to fade". Players must then rotate to another plate in the middle to continue damaging the boss. This will repeat one more time, or will end if the bosses unique health threshold is dealt enough damage. Once enough damage is dealt, the boss will teleport to the floor above, which players must go to via stairs that will drop down. The same mechanics from the first floor must be repeated here and for the third floor, albeit with the symbols room being much larger in size each time. Once the boss has been damaged enough in the third room, he will enter his final stand. Players must climb a set of stairs in the middle of the room and go into the same wells for the buff. Wells will fade faster here, with a total of 4 wells instead of three. Well plates will be in a vertical line from the player. If insufficient damage is dealt to the boss in this last stand, the firteam will wipe. Dealing enough damage will kill the boss, completing the encounter.
Ideal loadouts: It is recommended to use either power linear fusions or rocket launchers with at least 1 gally for boss dps. Well of radiance and ward of dawn should be avoided, as no adds spawn during dps and the boss only uses the darkness cockroaches for attacks. High damage supers like Golden Gun, Choas Reach, or Thundercrash are recommended. Mobeius Quiver is also recommended for extra tether damage. For kinetic and energy loadouts, it is ideal to have at least one medium to long range weapon and one ad clear weapon. Weapons like scout rifles, snipers and auto rifles will be effective at getting rid of the darkness cockroaches, while weapons like witherhoard, outbreak perfected, smgs and grenade launchers will be effective at getting rid of large amounts of ads.
Exhibition
The Exhibition encounter will start the fireteam off in a small room with a relic to pick up. One player must pick this up to start the encounter. When a player picks it up, everyone will be given the "Terminal Resonance" debuff. It will have a countdown timer on it, which, when it reaches 0:00, the team will wipe. The aim of this encounter is to move as fast as possible to open doors before the timer runs out. After picking up the relic, 2 glyphkeepers and a special knight called the "Disciples Hourglass" will spawn in the room, which can only be killed the laser relic. The knight will have an immunity shield that can only be destroyed by the relic. The glyphkeepers must be killed first, as when one is killed, a set of 3 symbols will show up. The people who can see the symbols depends on the enemy the glyphkeeper. If it was a Scorn Chieftain, only people without a relic will be able to see it. If it was a Taken Centurion, only a relic holder can see it.
How symbols work: When the glyphkeepers are killed, one player without a relic must go to the set they can see, and a relic holder must go to the other. One of the callers must say all of their symbols, and the other must find which one matches. That symbol will then be needed to open a door opposite the starting area. In the first room it will go: a) kill the glyphkeepers b) call out the symbols set and find the matching one c) kill the shielded knight with the laser relic to show the symbols on the door and increase the timer on terminal resonance d) shoot the right symbol on the door to open it and prepare for the next room e) deposit the relic so someone else can pick it up, as you will be given a debuff called "Curbed Resonance" which will lock you out of picking up any relics
Room 2: a) the first relic must be picked up, then a second relic will spawn in. This relic will be the Aegis from the Vault of Glass. This second relic will be used to cleanse players of Pervading Darkness, otherwise they'll die. b) players will split up and go one of 2 ways to kill glyphkeepers for the symbols c) unlike the last room, another 2 glyphkeepers will spawn, amounting to 2 symbols required for the door d) a knight will spawn after the first glyphkeepers are killed in the room at the door to the next room. Kill it to increase the timer e) once both symbols are found repeat the process from the first room
Room 3: a) this room will be similar to room 2, albeit with one more relic, taken essence from Last Wish. This will require the player to use the grenade ability to destroy blights giving immunity to enemies.
Room 4: a) no difference at all. No new relics, no increased amount of glyphkeepers.
Once all rooms are cleared, deposit all the relics in the last room to complete the encounter.
Rhulk, Disciple of the Witness
Bosses
Unique enemies
- Abated Adherent
- Disciple's Centurion
- Disciple's Compass
- Disciple's Hourglass
- Glyphkeeper
- Knowledge Bearer
- Resonant Glyphkeeper
Rewards
Weapons
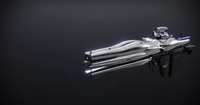
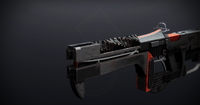
- Collective Obligation - Exotic Pulse Rifle[2]
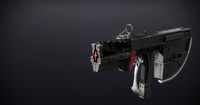
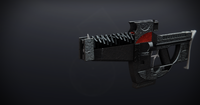
- Submission - Legendary Submachine Gun[2]
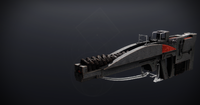
- Cataclysmic - Legendary Linear Fusion Rifle[2]
- Insidious - Legendary Pulse Rifle[2]
- Forbearance - Legendary Grenade Launcher[2]
- Deliverance - Legendary Fusion Rifle[2]
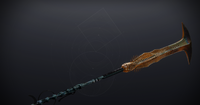
- Lubrae’s Ruin - Legendary Glaive[2]
Armor
Other rewards
Gallery
Weapons
Trivia
- This is the first raid to have Scorn as the main enemy faction.
- This is also the third raid with Taken as an enemy faction.
- This is the first raid to have a final boss from a race previously never seen nor mentioned in the Destiny franchise.
- This is the first raid to ever have two factions that are normally hostile towards each other, be allies.
