Kell's Grave: Difference between revisions
From Destinypedia, the Destiny wiki
m (Text replacement - "==References== " to "") |
(Clean-up) |
||
| Line 15: | Line 15: | ||
}} | }} | ||
'''Kell's Grave''' was a [[Gambit]] map that launched along with the gamemode with the release of [[Forsaken]] on September | '''Kell's Grave''' was a [[Gambit]] map that launched along with the gamemode with the release of [[Forsaken]] on September 4th, 2018. It was later removed from the game with the release of [[Beyond Light]] on November 10th, 2020, due to overall negative fan reception of the map. It was cumbersome to traverse the map due to the many pitfalls and layers that existed, and how easy it was to die to the kill zone in such pitfalls, as it was unusually high. | ||
==Layout== | ==Layout== | ||
The spawn location of the map was similar to most of the other Gambit maps, with cavernous terrain | The spawn location of the map was similar to most of the other Gambit maps, with cavernous terrain to provide safe haven upon resurrection. From there, there were four main locations. The Bank in the middle to deposit [[Mote of Dark|motes]], to the left was the Slums, straight ahead was the Pit, and to the right was the Canal. | ||
In between these areas was a large lake of acid that | In between these areas was a large lake of acid that served as a kill zone for anyone who fell into it. There were also two launch cannons at the Canal and Slums that would provide speedy transitions between sections of the map. | ||
===The Slums=== | ===The Slums=== | ||
[[File:Kell'sGraveSlums.png|300px|thumb|The Slums]] | [[File:Kell'sGraveSlums.png|300px|thumb|The Slums]] | ||
{{Quote|Enemies appearing in the Slums!|[[The Drifter (character)|The Drifter]]}} | {{Quote|Enemies appearing in the Slums!|[[The Drifter (character)|The Drifter]]}} | ||
The | The Slums were often the initial enemy spawn location at the start of the match. There existed numerous shelters that provided cover during invasions, and from the waves of enemies coming from various locations in the area. | ||
===The Pit=== | ===The Pit=== | ||
{{quote|Enemies at the Pit!|[[The Drifter (character)|The Drifter]]}} | {{quote|Enemies at the Pit!|[[The Drifter (character)|The Drifter]]}} | ||
The Pit was much lower to the ground compared to the other areas and | The Pit was much lower to the ground compared to the other areas and provided close-ranged combat opportunities. Enemies often gathered in large numbers here, making it easy to quickly clean up the wave with appropriate weaponry. | ||
===Canal=== | ===Canal=== | ||
[[File:Kell'sGraveCanal.jpg|300px|thumb|Canal]] | [[File:Kell'sGraveCanal.jpg|300px|thumb|Canal]] | ||
{{quote|Scorn in Canal!|[[The Drifter (character)|The Drifter]]}} | {{quote|Scorn in Canal!|[[The Drifter (character)|The Drifter]]}} | ||
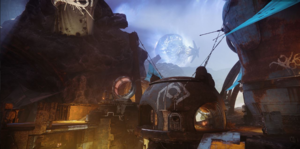
Canal was much more open compared to the other areas, with platforms to access it from spawn, two structures allowing players at the | Canal was much more open compared to the other areas, with platforms to access it from spawn, two structures allowing players at the Bank to jump to it, and a low to the ground edge to allow access from the Pit. | ||
==List of appearances== | ==List of appearances== | ||
Revision as of 21:20, October 3, 2022
 This article is a stub. You can help Destinypedia by expanding it.
| Kell's Grave | |
|---|---|

| |
| Map overview | |
|
Game: |
|
|
Location: |
The Tangled Shore |
|
Terrain: |
Rusted and acidic |
| Gameplay overview | |
|
Recommended number of players: |
8 |
|
Recommended gametype(s): |
Gambit (Formerly) |
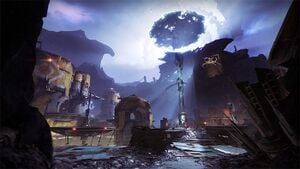
Kell's Grave was a Gambit map that launched along with the gamemode with the release of Forsaken on September 4th, 2018. It was later removed from the game with the release of Beyond Light on November 10th, 2020, due to overall negative fan reception of the map. It was cumbersome to traverse the map due to the many pitfalls and layers that existed, and how easy it was to die to the kill zone in such pitfalls, as it was unusually high.
Layout
The spawn location of the map was similar to most of the other Gambit maps, with cavernous terrain to provide safe haven upon resurrection. From there, there were four main locations. The Bank in the middle to deposit motes, to the left was the Slums, straight ahead was the Pit, and to the right was the Canal.
In between these areas was a large lake of acid that served as a kill zone for anyone who fell into it. There were also two launch cannons at the Canal and Slums that would provide speedy transitions between sections of the map.
The Slums
- "Enemies appearing in the Slums!"
- — The Drifter
The Slums were often the initial enemy spawn location at the start of the match. There existed numerous shelters that provided cover during invasions, and from the waves of enemies coming from various locations in the area.
The Pit
- "Enemies at the Pit!"
- — The Drifter
The Pit was much lower to the ground compared to the other areas and provided close-ranged combat opportunities. Enemies often gathered in large numbers here, making it easy to quickly clean up the wave with appropriate weaponry.
Canal
- "Scorn in Canal!"
- — The Drifter
Canal was much more open compared to the other areas, with platforms to access it from spawn, two structures allowing players at the Bank to jump to it, and a low to the ground edge to allow access from the Pit.

