Category:Images of Fusion Rifles
From Destinypedia, the Destiny wiki
Images featuring the various forms of Fusion Rifles in Destiny.
Subcategories
This category has the following 5 subcategories, out of 5 total.
I
- Images of Conduit F3 (5 F)
- Images of Merciless (6 F)
- Images of Telesto (7 F)
- Images of Vex Mythoclast (10 F)
Media in category "Images of Fusion Rifles"
The following 86 files are in this category, out of 86 total.
 Avant-Garde Mausoleum.jpg 1,920 × 991; 213 KB
 Burden of Guilt Adept.jpg 1,920 × 985; 212 KB
 Burden of Guilt.jpg 1,920 × 986; 204 KB
 Conduit f3 desktop.jpg 1,920 × 1,200; 487 KB
 Conduit fp fire.jpg 574 × 323; 33 KB
 Conduit fp.jpg 574 × 323; 31 KB
 Conduit model.jpg 574 × 322; 21 KB
 Coordinated Offensive.jpg 1,920 × 981; 155 KB
 Coriolis Force.jpg 1,920 × 993; 158 KB
 D2 Veist Fusion concept art.jpg 2,000 × 1,040; 165 KB
 Delicate Tomb.jpg 1,920 × 1,080; 161 KB
 Deliverance Adept.jpg 1,920 × 1,000; 154 KB
 Destiny Thesan FR4 reference.jpg 5,100 × 3,300; 6.24 MB
 Destiny-77Wizard-FusionRifle.jpg 1,920 × 1,080; 239 KB
 Destiny-ConduitF3FusionRifle-Side.png 1,180 × 580; 469 KB
 Destiny-FinalRest2-FusionRifle.jpg 1,280 × 720; 65 KB
 Destiny-LightBeware-FusionRifle.jpg 1,920 × 1,080; 258 KB
 Destiny-LightOfTheAbyss-FusionRifle.jpg 1,920 × 1,080; 294 KB
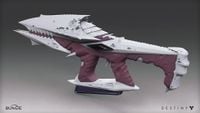 Destiny-MidhasReckoning-FusionRifle-Back.jpg 1,920 × 1,080; 199 KB
 Destiny-MidhasReckoning-FusionRifle-Front.jpg 1,920 × 1,080; 194 KB
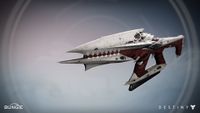 Destiny-MidhasReckoning-FusionRifle-Ingame.jpg 1,920 × 1,080; 167 KB
 Destiny-OmolonFusionRifle-Concept.jpg 1,540 × 840; 71 KB
 Destiny-OmolonThesanFR4-3D-Render-01.jpg 1,497 × 793; 401 KB
 Destiny-OmolonThesanFR4-3D-Render-02.jpg 1,497 × 793; 352 KB
 Destiny-OmolonThesanFR4-3D-Render-03.jpg 1,497 × 793; 388 KB
 Destiny-OmolonThesanFR4-3D-Render-04.jpg 1,497 × 793; 353 KB
 Destiny-PerunsFire-FusionRifle.jpg 1,280 × 720; 135 KB
 Destiny-PlanC-ExoticFusionRifle.jpg 1,920 × 1,080; 160 KB
 Destiny-PlugOne1-FusionRifle.jpg 1,920 × 1,080; 185 KB
 Destiny-PocketInfinity-ExoticFusionRifle.jpg 1,920 × 1,080; 144 KB
 Destiny-PraetorianFoil-FusionRifle.jpg 1,920 × 1,080; 615 KB
 Destiny-PurifierVII-FusionRifle.jpg 1,920 × 1,080; 113 KB
 Destiny-QueenbreakersBow-FusionRifle-Ingame.jpg 1,920 × 1,020; 190 KB
 Destiny-QueenbreakersBow-FusionRifle.jpg 1,920 × 1,080; 202 KB
 Destiny-SleeperSimulant-FusionRifle-Back.jpg 1,920 × 1,080; 282 KB
 Destiny-SleeperSimulant-FusionRifle-Concept.jpg 1,920 × 960; 213 KB
 Destiny-SleeperSimulant-FusionRifle-Front.jpg 1,920 × 1,080; 276 KB
 Destiny-SleeperSimulant-FusionRifle-Ingame.jpg 1,920 × 1,080; 203 KB
 Destiny-SleeperSimulant-FusionRifle-Side-Render.jpg 1,920 × 1,080; 264 KB
 Destiny-SleeperSimulant-PerksTree.jpg 1,920 × 1,080; 375 KB
 Destiny-SolasFR2-FusionRifle.jpg 480 × 240; 39 KB
 Destiny-Telesto-FusionRifle-Render-01.jpg 1,920 × 1,040; 187 KB
 Destiny-Telesto-FusionRifle-Render-02.jpg 1,920 × 1,040; 186 KB
 Destiny-Telesto-FusionRifle-Render-POV.jpg 1,920 × 1,040; 176 KB
 Destiny-TheCalming-FusionRifle.jpg 1,280 × 720; 157 KB
 Destiny-TheTrolleyProblem-FusionRifle.jpg 1,920 × 1,080; 190 KB
 Destiny-TTK-Telesto-FusionRifle-Concept.jpg 1,920 × 905; 303 KB
 Destiny-TTK-Telesto-FusionRifle.jpg 1,920 × 1,080; 214 KB
 Destiny-VexMythoclast-AltSideView.jpg 1,920 × 1,080; 187 KB
 Destiny-VexMythoclast-Render-01-extraction.png 1,800 × 640; 837 KB
 Destiny-VexMythoclast-Render-01.jpg 1,920 × 1,080; 216 KB
 Destiny-VexMythoclast-Render-02.jpg 1,920 × 1,080; 265 KB
 Destiny-VexMythoclast-Scope.jpg 1,920 × 1,080; 261 KB
 Destiny-VexMythoclast-Side-Render-Extraction.png 1,800 × 600; 643 KB
 Destiny-VexMythoclast-Side-Render.jpg 1,920 × 1,080; 212 KB
 Destiny-VexMythoclast.jpg 1,280 × 720; 158 KB
 Destiny2-Merciless-ExoticFusionRifle-Concept.jpg 1,800 × 840; 156 KB
 Destiny2-MercilessExoticFusionRifle-BreakTheDawn-Ornament.jpg 1,920 × 1,080; 161 KB
 Destiny2-MercilessExoticFusionRifle-FPV-Render.jpg 1,920 × 1,069; 286 KB


