Pit of Heresy
From Destinypedia, the Destiny wiki
| “ | Deep beneath Sorrow's Harbor, the Hive keep their darkest secrets. | ” |
|
Prev: |
|
|
Next: |
|
| Pit of Heresy | |
|---|---|

| |
|
Game: |
|
|
Player(s): |
1-3 |
|
Recommended Power Level: |
940 |
|
Location: |
|
|
Objective(s): |
Destroy the Hive champion Zulmak, Instrument of Torment. |
|
Destinypedia doesn't currently have a walkthrough for this level; could you write one? | |
The Pit of Heresy is a Dungeon that was introduced in Shadowkeep, and released on the 29th of October 2019. It requires Guardians to enter the bottom of The Scarlet Keep, where they fight their way past a horde of Hidden Swarm, in order to slay the Hive champion, Zulmak, Instrument of Torment along with many wicked rituals that the remaining daughters of Crota have wrought. Like The Shattered Throne before it, it is now available every week. It should be noted that the dungeon has checkpoints, so if you need to rest or go do something else, you are able to leave and return to your last checkpoint.
Walkthrough
To access the Pit of Heresy, you must first complete a quest from Eris Morn that involves completion of at least tier 3 of the Altars of Sorrow, in addition to defeating 20 Nightmares during the event. After returning to Eris, the Pit of Heresy will be visible from the Director.
Necropolis

The first encounter is all about matching the correct runes and utilizing a relic to defeat enemies with unique interactions. There are several towers built in to the face of the mountain in the first area. Each tower has a Hive rune on top that's used to navigate this stage.
To find out which runes you should be looking for you need to drop off the cliff and into the first tower. Here you need to kill a set of enemies and gain access to a room with a Knight therein. Defeating it rewards you with a relic and a view of three runes.
Take note of them and retrace your steps. Then find the matching tower and dispatch its inhabitants. You'll need to use the sword depending on the enemy. If the room has a Knight, use the relic's melee function. If it’s a Wizard, unleash a damage-dealing projectile. Then, if it’s a Shrieker, deflect its shots back at it to destroy it.
When you’ve finished all three towers based on the runes you’ve noted, an exit will open and a chest will appear.
Collect your loot and continue until you see a wall of doors. Ignore the vast array of doors and look for a hole in the wall to head just off to the right of the broken bridge on which you're standing.
Tunnels of Despair

Follow this path until you drop in to a dimly lit room. Here there are some hidden tunnels with small Hive membranes protecting them, which can be destroyed with a few shots. There are also two unkillable ogres rampaging around the wider tunnels, so be vigilant.
Escape this by navigating these tunnels and killing the Hive Knights you come across. Killing a Knight triggers a void orb dropping. Dunk this orb in a vessel outside of three doors the ogres are protecting. After you kill three and deposit their orbs in each of these doors the next stage commences.
Chamber of Suffering

The third encounter in the Destiny 2 Pit of Heresy is largely a wave defense activity with a debuff mechanic. There’s a large wall protected by six Hive runes in the centre of the room. Your goal is to destroy them.
Similar to the previous encounter, you need to destroy Hive knights and deposit their void orbs in the container next to the blocked door. It sounds simple, but this time, you're hit with debuffs. If the team accrues enough of them, it's game over. Counter this by depositing void orbs, thereby reducing the debuff.
My team worked on rotation: we stationed one of us outside the door to kill adds that spawn above the area and fire devastating shots. Then we switched each time one of us deposited an orb. When you've deposited all six, the encounter ends and you can blast your way through the door.
Harrow

Now you're met with a jumping puzzle and another set of runes protecting another door. This time you need to carefully jump around the ledges and platforms within the area while looking for more towers with runes that match those on the new door.
When you locate one of these towers you will need to kill a Hive Wizard inside and the enemies surrounding it. When you clear the area, the rune disappears. Your biggest obstacle is the platforming here, so equip mobility-friendly gear or change your jump for this section.
Cradle of Damnation

The fifth and final phase of the Pit of Heresy is a big ol’ boss phase that recalls some of the previous encounters. You need to kill Knights for relics and dunk more void orbs, all while the dungeon boss rains down projectiles.
To progress to a damage phase, kill the Hive Knights that surround the arena, take their relics to one of the three nearby towers, kill the relevant enemy (Knight, Shrieker, or Witch) as you did in the first encounter, take the dropped void orb the enemy drops, and deposit them in one of the three receptacles.
As you deposit the third orb the boss enters a damage phase and the floor beneath you glows green. Stay in this spot to continue dishing out damage. After a period of time the boss bends down on one knee and starts to charge an attack. This attack will kill you instantly, so take cover outside the damage zone to avoid it. After Zulmak is defeated, you will receive a fully masterworked piece of dreambane gear.
Bosses
Unique Enemies
- Accursed Swordbearer
- Apocalyptic Blade
- Harrowing Pariah
- Heretical Knight
- Malevolent Ritualist
- Might of the Broken Blade
- Omen of the Broken Blade
- Oracle of the Broken Blade
- Pit Keeper
Rewards
Weapons
- A Fine Memorial: Machine gun
- Apostate: Sniper rifle (Hymn of Desecration reward only)
- Arc Logic: Auto Rifle
- Blasphemer: Shotgun (Hymn of Desecration reward only)
- Dream Breaker: Fusion rifle
- Every Waking Moment: Submachine gun
- Heretic: Rocket launcher (Hymn of Desecration reward only)
- Loud Lullaby: Hand Cannon
- Love and Death: Grenade launcher
- Night Terror: Sword
- One Small Step: Shotgun
- Premonition: Pulse Rifle
- Tranquility: Sniper rifle
- Xenophage: Machine gun (Exotic Quest)
Armor
- Dreambane Armor
Trivia
- The Pit of Heresy is the first dungeon to center on the Hive.
- Some of the locations encountered in the dungeon are also where the events of Inquisition of the Damned unfold - the Pit, where ambitious Hive fight for the vacant Osmium Throne, and Necropolis, from where the Daughters of Crota watch the battles below.
Gallery
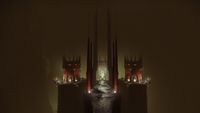
The Pit of Hersey
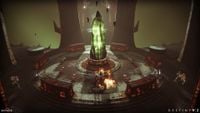
The Chamber of Suffering Ritual
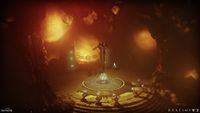
A Ritual on an Ascendant Crystal

Zulmak, Instrument of Torment.
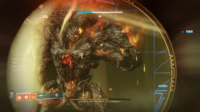
Zulmak battling a fireteam of three Guardians.


List of appearances
- Destiny 2: Shadowkeep (First appearance)


