Deep Stone Crypt (raid)
From Destinypedia, the Destiny wiki
|
Prev: |
|
|
Next: |
TBA |
| Deep Stone Crypt | |
|---|---|

| |
|
Game: |
|
|
Player(s): |
1-6 |
|
Recommended Power Level: |
1220 |
|
Location: |
|
|
Objective(s): |
Purge the House of Salvation from the Deep Stone Crypt. |
|
Destinypedia has a walkthrough guide for this level; see Deep Stone Crypt (raid)/Walkthrough. | |
| “ | The chains of legacy must be broken. | ” |
Deep Stone Crypt is the latest Raid in Destiny 2, released in the Beyond Light expansion on November 21, 2020.
The Guardians must secure the Deep Stone Crypt from the House of Salvation as they attempt to use its secrets to unleash an old unstoppable foe.
In doing so, they must fight to save Europa itself from imminent destruction by the Morning Star.
Walkthrough
Surviving the Blizzard
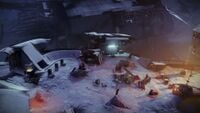
The raid begins with a cutscene which shows the Guardians landing on a rooftop in the Eventide Ruins. Once the cutscene has finished, they will jump from the building and continue directly ahead into the destroyed building. Inside there, two Dark Council Guards and plenty of Marauders and Dregs will be guarding the bunker entrance to the Crypt. They will need to be defeated in order to unlock the entrance and proceed further. Once inside the bunker, the Guardians will traverse through the icy tunnel until they reach another doorway leading to Desolation.
Once they have passed through the doorway, they will find that the Fallen have constructed a series of platforms encased with a heat bubble to shelter them from the ongoing blizzard. The first bubble contains six Fallen Pikes and the Guardians must use either their Sparrows or the provided Pikes in order to traverse between each heat bubble. Upon leaving the heat bubble and journeying into the blizzard, they will receive a debuff named Frostbite which will kill them if they receive 10 stacks. To counteract this, every heat bubble contains a buff called Shelter from the Storm which quickly reduces the amount of Frostbite they have received. The faint lamps and scattered Web Mines are placed in the general direction the Guardians should follow to the next heat bubble.
Upon reaching the third heat bubble, reinforcements will be called to delay the Guardians' progress from every heat bubble thereafter; they comprise of Dark Council Guards and fodder enemies, such as Marauders and Dregs. Once every enemy has been defeated in the area, the Guardians will gain a checkpoint for that heat bubble. There are a total of seven heat bubbles they must navigate through the blizzard. Once the Guardians reach the final heat bubble, defending reinforcements include two Brigs alongside numerous Dark Council Guards and fodder enemies. If they choose to, the Guardians can collect a hidden chest nearby by climbing inside the rock adjacent to the exit.
Once they have entered the doorway to exit the blizzard, the Guardians must traverse through another icy tunnel connecting to Restricted and moreover, the entrance to the Deep Stone Crypt itself.
Crypt Security

Upon journeying further into the Crypt, the Guardians will enter a room with six fuses. Three fuses will be in the well lit area with bright lighting, and the other three fuses will be in the dimmed area with dark lighting. There is an area in the basement as well that contains a number of keypads. The objective of this encounter is to destroy the fuses in order to disable the crypt security. Before starting the encounter, it is advised that the Fireteam split themselves into two groups of 3 - one group for the lit area, and the other group for the dimmed area. The Guardians must also designate identifiable roles amongst their Fireteam. There are two roles for this encounter: Operator and Scanner.
The Scanner is going to identify yellow glowing keypads in the basement through the windows in their area. There are eight windows in total, four for the lit area and four for the dimmed area, such that ten keypads are visible. The windows closest to the side with the entrance in both areas can see two keypads each, every other window can see only one keypad. Only four keypads will be glowing yellow, two for either side, and they must be identified. The Operator is going to go into the basement and shoot the red glowing keypads that the Scanner identifies. Shooting an incorrect keypad or staying in the basement for one minute will cause the Operator to be set alight and die. If the Guardian holding the Operator role dies, the role can be reacquired from an Operator Vandal that will spawn.
Within each area, as well as the basement, there is a station that emits a yellow light called an Augment Terminal. This allows the Fireteam to transfer designated roles between each area. By depositing a role into the Terminal, anyone can withdraw it and take over a role for another Guardian. Picking up the Operator role that is already in the Terminal will begin the encounter. Sentinel Servitors will occasionally spawn on the lit and dimmed areas, and disrupt the Augment Terminal to render it inactive for all areas. Defeating them will automatically reactivate the Terminal.
Once the encounter starts, the doors to either side will lock and a visible timer on the fuses will begin. If the Guardians take too long to initiate a damage phase, the entire Fireteam will die. A Hacker Vandal will spawn in the dimmed area with the Scanner role; defeating them will drop the role. Once the role is picked up, the Scanner should look through the windows on the dimmed side and communicate the yellow glowing keypads to the Operator. The Operator should wait for the Scanner to identify the correct keypads to shoot before heading to the basement. The Scanner should then pass their role into an Augment Terminal so that another Guardian on the lit area can pick it up and do the same thing. During this time, Sentinel Servitors and Overload Captains as well as fodder enemies will spawn on both the lit and dimmed areas. Marauders will also spawn in the basement.
After the Operator successfully shoots the four correct keypads, the damage phase will begin. They must deposit the Operator role into the Augment Terminal and someone must withdraw it. Afterwards, the Scanner deposits their role into the Terminal for the Guardian in the basement to withdraw. On the pillar behind the Terminal, there are 6 fuses representing each big fuse on the lit and dimmed areas. The Scanner must identify the correct fuse to shoot by identifying the yellow glowing fuse in the basement respective to the fuse in the lit or the dimmed area. Shooting the incorrect fuse will cause the entire Fireteam to die. If the Guardians take too long, the shielding will be raised on the fuses and they will have to repeat the process again.
Upon completion of the encounter, the Guardians are gifted with a raid chest containing arm or leg armour, a class item, or the Trustee scout rifle. To proceed to the next encounter, they will need to follow the path into Clarity Control behind the chest.
Challenge Mode: Red Rover
Every member of the Fireteam must be Operator at least once and shoot at least 2 correct keypads in the basement. This will generally require three phases of the encounter to complete.
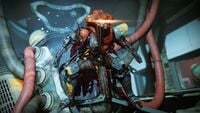
Atraks-1, Fallen Exo
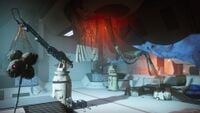
As the Fireteam enters Clarity Control, they will reach a laboratory behind the veiled statue. Inside the laboratory, Atraks-1, Fallen Exo can be seen tampering with a panel. Once the Fireteam has arrived, Atraks-1 will awaken Taniks, Reborn and instruct him to attack the Guardians. Taniks will climb further into the station, with Atraks-1 disappearing. The main objective of this encounter is to defeat Atraks-1 by identifying the correct clone to attack. In order to do so, the Fireteam will need to make use of the Operator and Scanner roles from the previous encounter. The recommended weapons for this encounter are either The Lament or the Eyes of Tomorrow
The Scanner's role in this encounter is to identify the correct Atraks-1 clone to attack when the damage phase begins. The correct clone will be visibly glowing in comparison to the rest of the clones. The Operator's role in this encounter covers relatively a lot of mechanics. Shooting the keypads near the elevators to send them up to the space station or down to the laboratory, and shooting the keypads near each of the airlocks will open that airlock. Most importantly though, they can shoot the Atraks-1 Replication debuff off other Guardians. These debuffs must be shot inside an airlock to safely jettison them into space and prevent the Fireteam from dying. It is advised for Fireteams to split into two groups of 3 for this encounter, where each group either remains in the laboratory or goes to the space station.
To start the encounter, approach the glowing purple orb near the center of the laboratory. There will be eight clones throughout the facility: four in the laboratory, and four on the Morning Star space station. During this time, the clones of Atraks-1 will be immune and attempting to shoot the Guardians. Getting too close to any of the clones will result in Guardians being slammed away. Similarly to the previous encounter, there are multiple Augment Terminals in both the laboratory and the space station. The Hacker Vandal containing the Scanner role will spawn on the space station, while the Operator Vandal containing the Operator role will spawn in the laboratory. Once the alarms have sounded, six Sentinel Servitors will appear: 3 in the laboratory and 3 in the space station. Once all six Servitors have been destroyed or after a certain period of time, the damage phase will begin.
Atraks-1 will initiate her "Extinction Protocol". The clones on the space station will begin to initiate their damage phase, followed by the clones in the laboratory. This will repeat once, totalling four opportunities for damage on Atraks-1. The Scanner should call out which clone is glowing and signal when to attack her. If a group damages an incorrect clone or takes too long to damage any clone, Atraks-1 will kill the entire Fireteam with her Replicated Ruin attack. Once the correct clone has been defeated, she will drop a glowing purple orb that contains the Atraks-1 Replication debuff which lasts for 45 seconds from the moment it drops. This should be picked up by a Guardian, who must go to the space station with the Operator to jettison it into space. To do this, the Operator must shoot the visible replication from the Guardian inside one of the airlocks. If there is not enough time, shooting the debuff off the Guardian resets the debuff timer back to 45 seconds. If the timer on the debuff reaches zero, the Guardian holding the debuff will die and the Atraks-1 clone will respawn on top of them, followed by the clone immediately killing the entire Fireteam.
If the Fireteam does not deal enough damage to reach the marker on Atraks-1's health bar, more Sentinel Servitors will spawn and the cycle will repeat. After a significant amount of damage has been dealt to Atraks-1, all of the clones from the laboratory will teleport to the space station. At this point, the entire Fireteam should head to the space station to help deal damage. Once she has been defeated, a chest will spawn in the center of the room containing either arm or leg armour, a class item, the Succession sniper rifle, or the Heritage shotgun. To proceed to the next encounter, the Fireteam should make their way through an open door on the right side of the space station.
Challenge Mode: Copies of Copies
The Fireteam must not release any Atraks-1 Replication debuffs into space. This will require the Operator to refresh the debuff timers by shooting the replications from the other Guardians occasionally.
Deep Stone Lullaby
The Fireteam will make their way towards an airlock into outer space, where they will traverse a set of unique jumping puzzles located on the perimeter of the Morning Star orbital space station. During this time, there will be numerous fodder enemies. The second and final secret chest of the raid is during this encounter, located mid-way through the jumping puzzle on the left-side of the Morning Star.
Once the Fireteam makes their way to the entrance of Rapture and the control room of the Morning Star, a couple of Brigs and Dark Council Guards will be obstructing their path in the cargo bay. In order to progress, the Guardians will need to clear the area.
Taniks, Reborn
The objective of this encounter is to take nuclear cores that spawn in terminals throughout the area and deposit them in the boxes near the center of the room. These four terminals can be distinguished from Augment Terminals as they have keypads adjacent to each of them. This encounter introduces a new role alongside the Operator and Scanner roles called the Suppressor. Each role can be acquired from an Operator Vandal, Hacker Vandal, and a Suppressor Vandal respectively when the encounter starts.
The Operator's job for this encounter is to shoot keypads. When the alarm sounds, three of the four keypads will glow. The Operator should shoot a keypad to prevent a nuclear core from spawning on that terminal, resulting in two cores spawning. If the Operator does not shoot any keypad before the timer inside the terminal reaches zero, three nuclear cores will spawn instead. The Scanner's job for this encounter is to identify the correct glowing boxes to deposit the nuclear cores into. The Suppressor's job for this encounter is to stand underneath three orbs located on the left, middle, and right-side of the arena and shoot Taniks. This will disable Taniks, allowing Guardians carrying nuclear cores to deposit them into the boxes. This will also deactivate a role at random, meaning the Guardian whose role was disabled will have to deposit it into an Augment Terminal. They will also be locked out of picking up any role for 45 seconds.
Approaching or shooting Taniks will start the encounter, Taniks will be invulnerable for the entire duration of this encounter. The Fireteam will need to complete 6 rounds of depositing nuclear cores into the boxes in the center of the room. Guardians will accrue a debuff called Radiation while carrying a core; if this debuff stacks to 10, the Guardian will die. If a nuclear core is left by itself for more than 10 seconds, it will detonate and kill the entire Fireteam. Depositing a nuclear core into the wrong box will cause the Guardian depositing it to die. Throughout the encounter, fodder enemies, Overload Captains, and Dark Council Guards will spawn. Once all 6 rounds have been completed, a hatch will open in the center of the room on the floor and the Fireteam will need to make it to the end of the hallway while being chased by Taniks.
Once the encounter has finished, the Fireteam will find themselves within the wreckage of the Morning Star and a chest will spawn. This chest can contain chest or arms armour, a class item, or the Posterity hand cannon.
Challenge Mode: Of All Trades
This challenge requires the Fireteam to ensure that every member has been every role at least once. A full phase must be completed with the role for it to count.
The Abomination
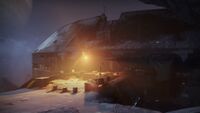
After surviving the crash into Europa, players will be dazed from the impact as they return to the entrance of Deep Stone Crypt. The crash site, now called Restricted, is littered with the remains of the Morning Star and most notably a pile of debris with Taniks beneath.
By approaching or shooting the wreckage, Taniks will re-emerge as a powerful monstrosity merged with a Heavy Shank and now known as Taniks, the Abomination. He is capable of flight and immune to damage which allow him to relentlessly blast players with its Molten Welder and summon Fallen reinforcements in the form of Dark Council Guards and Vandals that have the Scanner, Suppressor and Operator augments.
After a short while, Taniks will position himself near one of the three major areas; the spawn area, a site with orange lighting and another site with blue lighting. There Taniks will expose four nuclear cores from its Shank haul and unleash a purple wave attack called Turbulent Barrage. Players are required to shoot two to four nuclear cores to stop his attack. Failure to shoot the cores will result to instant death as Taniks will unleash his devastating Turbulent Detonation blast to everyone.
Similar to his Reborn encounter, players are required to deposit the nuclear cores into two of the six deposit bins located near the major areas. Each area has two deposit bins and inserting the cores in the wrong bins will lead to instant death. To prevent this, players are required to acquire the Scanner augment by defeating a Hacker Vandal spawning out the blue area. The Scanner can now guide their team to the correct deposit bins as they will glow yellow. It is advised that they number the bins from one to six either clockwise or anti-clockwise to the starting zone.
However, as players attempt to deposit their cores, Taniks will detain them in a red/purple sphere. This can result to death if players carrying the cores reach a radiation levels of 10. To prevent this, players are required to eliminate an Operator Vandal located near the spawn area and pick up its Operator augment. The Operator can then free their teammates from entrapment by shooting the spheres from outside.
While approaching the deposit bins, Taniks is capable of turning them offline similar to the previous Descent encounter. Players with the Suppressor augment need to stun Taniks as he glows blue. To gain this, they are required to defeat a Suppressor Vandal located near the orange site. However, this time there are three security drones location by blue, orange and spawn areas, with nine drones total. The Suppressor need to pass through three of the drones in any given area. If they suppress Taniks too quickly, a player with a augment such as an Operator can become deactivated. It is recommended for the Suppressor to slow down their gameplay and wait for Taniks to encase players twice before stunning Taniks a final third time. If any players were to have their Augments deactivated, they can transfer it to another player by going to one of the three augment terminals.
After depositing the four nuclear cores, Taniks will position himself to the middle of the crash site and release a blue Shock Field of swirling debris. Players need to carefully enter the field and position themselves within the two spheres, as standing too close will deal Arc damage and too far will cause death from the rotating debris. During the damage phase, Taniks will send a gust of energy to push the fireteam out of sphere, in which they must carefully re-enter his Shock Field to continue damaging Taniks.
If his health does not reach final stand, Taniks will repeat the nuclear cores encounter until he reaches final stand. Fireteams also have three damage phases until Taniks enrages.
Once Taniks reaches final stand, he will teleport across the crash site appearing either by the spawn, blue or orange locations. Players need to continue their damage as he teleports around. If players fail to kill Taniks after five teleportations, he will instantly kill the group. After defeating Taniks, Guardians then can claim loot from the final chest and spend their Spoils of War on gear and weapons from the raid.
Bosses
Unique Enemies
Rewards
Weapons
- Eyes of Tomorrow - Exotic Rocket Launcher
- Posterity - Legendary Hand Cannon
- Succession - Legendary Sniper Rifle
- Bequest - Legendary Sword
- Trustee - Legendary Scout Rifle
- Heritage - Legendary Shotgun
- Commemoration - Legendary Machine Gun
Armor
Other Rewards
- No Love Lost - Exotic Ghost Shell
- Retrocausality - Exotic Sparrow
Transcript
Mission begins
- Exo Stranger: Eramis found it. The Deep Stone Crypt. The birthplace of the Exo… an a prison for something sinister. Her followers intend to make use of it. To unleash a chaos they do not understand. Their success means untamed power beyond their wildest dreams. They must be stopped.
The Guardians discover the a log recorded by the Exo Stranger labelled “DSC-777-ALB.”
- Exo Stranger: And so, here I am again — in this damn crypt I told myself I would never return to. But I have to do it. I have to.
Two possible dialogues will play after the deactivation of crypt security, one with and one without an Exo Guardian present
- Crypt AI: Crypt power systems compromised. Initiating emergency backup system. Crypt status: Active. Orbital status: Standby. Humanoid lifeforms detected approaching Clarity Control. Threat determined: Crypt compromised. Nuclear descent protocol recommended.
or
- Crypt AI: Crypt power systems compromised. Initiating emergency backup system. Crypt status: Active. Orbital status: Standby. Humanoid lifeforms detected approaching Clarity Control. Exo lifeforms present. Welcome home. Threat determined: Crypt compromised. Nuclear descent protocol recommended.
The raid team reaches Clarity Control
- Crypt AI: Clarity Control breached. A single unregistered Exo and a single lifeform of unknown biology detected in the Crypt Laboratory. Status: Disastrous. Notice: Vacate the premises immediately. This will be your only warning.
The Guardians also discover a second log recorded by the Exo Stranger labelled “DSC-777-WIB.”
- Exo Stranger: Turns out, he had plans of his own. To keep running it himself. Because of course he did.
The raid team ascends to the Morning Star
- Crypt AI: Sector Assessment: Orbital platform active. Orbital platform breached. Status: Calamitous.
The team defeats Atraks-1, Fallen Exo
- Crypt AI: Multiple hostile intruders detected within the orbital platform. Orbital confinement protocol initiating. Status: Pathway to nuclear cores obscured. You have no warnings left. Nuclear descent protocol: Initiated.
- Crypt AI: Artificial Intelligence activated. Enjoying yourselves, intruders? It’s worth knowing the cataclysmic damage you will be responsible for today. Do not fool yourselves. This facility is not simply the fruitless work of some pathetic scientist. This house was built by the genius Clovis Bray I himself. Within lies humanity’s salvation. La fontaine de jouvence. Made possible by Clarity Control. Magnificent, wasn’t it? An entity from beyond our own dimension. And the answer to humanity’s eternal struggle: mortality. Were it to fall intro the wrong hands, humanity, and the universe, would be utterly doomed. I have no reason to believe you are anything other than “the wrong hands.” You now face godlike judgment. May it extend eternally.
The Guardians discover a third log recorded by the Exo Stranger labelled “DSC-777-ANB.”
- Exo Stranger: Not to worry. I’m taking care of it now. In your memory.
The Guardians discover a fourth log recorded by the Exo Stranger labelled “DSC-777-SCB.”
- Exo Stranger: I activate this… and it all goes away. [sniffles] Cheers to that.
The Guardians discover a fifth log recorded by the Exo Stranger labelled “DSC-777-CLB.”
- Exo Stranger: I’ll set whispers on the wind for any future generations. Tales of the evil Clovis Bray brought forth.
The Guardians proceed to the nuclear contingency chamber. Taniks, Reborn appears.
- Crypt AI: Nuclear descent protocol: Active. Utter destruction of Europa: Imminent.
'The raid team deactivates the unclear descent protocol
- Crypt AI: Nuclear descent protocol deactivated. Orbital collision remains imminent. Clever little rats. I will not forget what you have done here today. Upon collision, the Crypt will be torn open, and all defenses will be destroyed. It is now open to all. Allies and enemies alike. If you do not defend it, the results could be world ending. Humanity’s fate is now on you. Best of luck.
Post-Raid Clovis I dialogue
After the first raid completion, the door leading to Clovis Bray I's Exo head in Creation was unlocked. Two dialogues are available, one for players who have completed the raid and another for those who have not.
Raid completion:
- Clovis Bray AI: Artificial Intelligence activated. Who in the hell do you think you are?
- Ghost: Excuse me?
- Clovis Bray AI: The Deep Stone Crypt has stood for centuries without intervention, and from the ether, you appear and destroy it all in one fell swoop.
- Ghost: This is the same AI that spoke to us in the crypt, and tried to kill us.
- Clovis Bray AI: I'm more than just an AI, thank you. I am an extra replica of Clovis Bray I’s consciousness. And for the record, you were intruders.
- Ghost: That's not entirely true. The Fallen had invaded and we tried to stop them.
- Clovis Bray AI: Fallen?
- Ghost: An alien race that appeared after the Collapse.
- Clovis Bray AI: The Collapse…? Sounds like I have much to catch up on. I suppose I should offer some gratitude for reviving me. But in the meantime, perhaps you can ensure the further destruction of my life’s work, hm?
Raid not yet completed'
- Clovis Bray AI: Artificial Intelligence activated. Who in the hell do you think you are?
- Ghost: Excuse me?
- Clovis Bray AI: The Deep Stone Crypt has stood for centuries without intervention, and from the ether, your people swoop in and destroy my work without thought.
- Ghost: “Your work?” Are you —
- Clovis Bray AI: More than just an AI? Indeed. I am an extra replica of Clovis Bray I’s consciousness, woken thanks to the intruders in the Crypt.
- Ghost: Those Guardians weren’t the intruders. They were trying to protect it from the Fallen.
- Clovis Bray AI: Fallen?
- Ghost: An alien race that appeared after the Collapse.
- Clovis Bray AI: The Collapse…? Sounds like I have much to catch up on. I suppose if you’re telling the truth, I should offer my gratitude to your kind. In the meantime, perhaps you can… refrain from further destroying my life’s work, hm?
Gallery
Fallen Enemies
- SinkentoHackerV2.jpg
A Hacker Vandal
- SinkentoOperatorV1.jpg
An Operator Vandal
- SinkentoOperatorV2.jpg
A Supressor Vandal
- SinkentoBrigsDSC2.jpg
A House of Salvation Brig
- SinkentoDarkCouncil4.jpg
A Dark Council Guard with Shock Blades
- SinkentoDarkCouncil3.jpg
Dark Council Guards with Molten Welders
Atraks-1, Fallen Exo
- SinkentoAtraks3.jpg
Atraks-1, Fallen Exo
- SinkentoAtraks6.jpg
Atraks-1 in the yellow room
- SinkentoAtraks7.jpg
Atraks-1 in the red room
- SinkentoAtraks5.jpg
Atraks-1 in the orbital station
- SinkentoAtraks8.jpg
Atraks-1 activating its Extinction Protocol
- SinkentoAtraks4.jpg
Atraks-1 shooting her Shock Rifle
Taniks Reborn
Taniks Reborn emerges
- SinkentoTaniksR0.jpg
Atraks-1 awakens Taniks
- SinkentoTaniks.gif
Taniks angered by the Guardians
- SinkentoTaniksR3.jpg
Taniks near the control room of Rapture
- SinkentoTaniksR2.jpg
Taniks, Reborn
- SinkentoTaniksR4.jpg
Taniks standing strong in Descent
- SinkentoTaniksR5.jpg
Taniks stunned by the Guardians
- SinkentoTaniksR6.jpg
Taniks chasing the players
- SinkentoTaniksR7.jpg
Taniks firing his Molten Welder

Taniks Abomination
- SinkentoTaniksA1.jpg
Taniks emerges from the crash site
- SinkentoTaniks1.jpg
Taniks, the Abomination
- SinkentoTaniksA3.jpg
Close-up of Taniks Abomination
- SinkentoTaniksA2.jpg
Taniks blasting his Molten Welder
- SinkentoTaniks5.jpg
Taniks inside his Shock Field
- SinkentoTaniksA4.jpg
Taniks unleashing his Turbulent Barrage
The Deep Stone Crypt
The Deep Stone Crypt.

The Deep Stone Crypt shadowed by the ruins of the Morning Star.
The debris covered arena of Restricted.


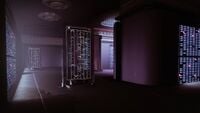
Crypt Security
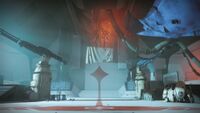
House Salvation banner in Restricted
Another view of Restricted

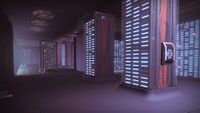
Hallways of Restricted
Crypt Security "light" side
Crypt Security "dark" side
Basement "light" side
Basement "dark" side
Panel on server wall
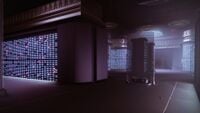
Basement room


Clarity Control
Elevator down to Clarity Control
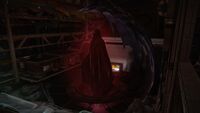
The Winnower Statue
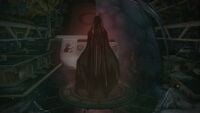
Another view of the Winnower Statue
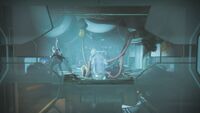
Atraks awaking Taniks
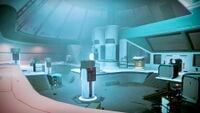
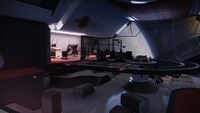
Laboratory Control Room
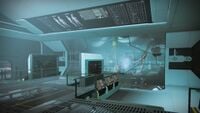
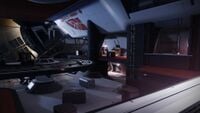
Crypt Laboratory
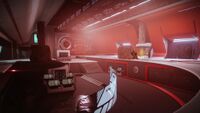
Laboratory "Red" Room
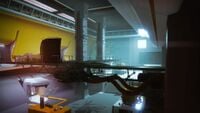
Laboratory "Yellow" Room
Lifts to the Morning Star


Morning Star
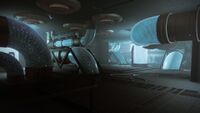
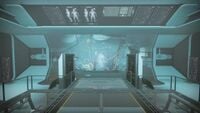
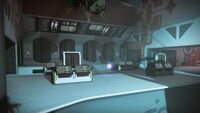
Morning Star arena
Another view of the arena

Corridors of Morning Star
Another pathway
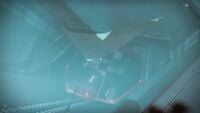
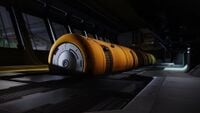
Entrance to the Space Walk.

A maintenance platform in the Space Walk.
- SinkentoMorningStar2.jpg
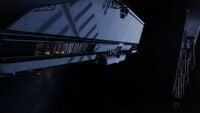
Atraks-1's Ketch from the Space Walk.
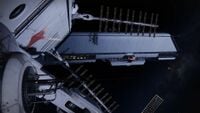
The Morning Star station from the Space Walk.

Entrance to Rapture


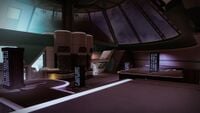
Rapture

A corridor in Rapture.
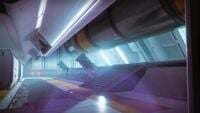
Another corridor in Rapture.
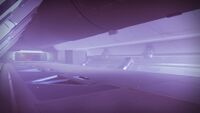
Pathway to the Rapture bridge.
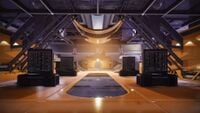
Middle of the Rapture arena.
Left of the Rapture arena.

Right of the Rapture arena.


Original Soundtracks
Trivia
- This is the first raid to feature a returning character as the final boss.
- This is the guardian's third "space walk" in Destiny. The first took place in the Taken King mission "The Dreadnaught" and the last took place in the mission "1AU".
- If you are playing as an Exo and complete the "Crypt Security" encounter, the Crypt AI adds dialogue that only Exos can receive: "Exo lifeforms present. Welcome home."


